Nerve Impingement

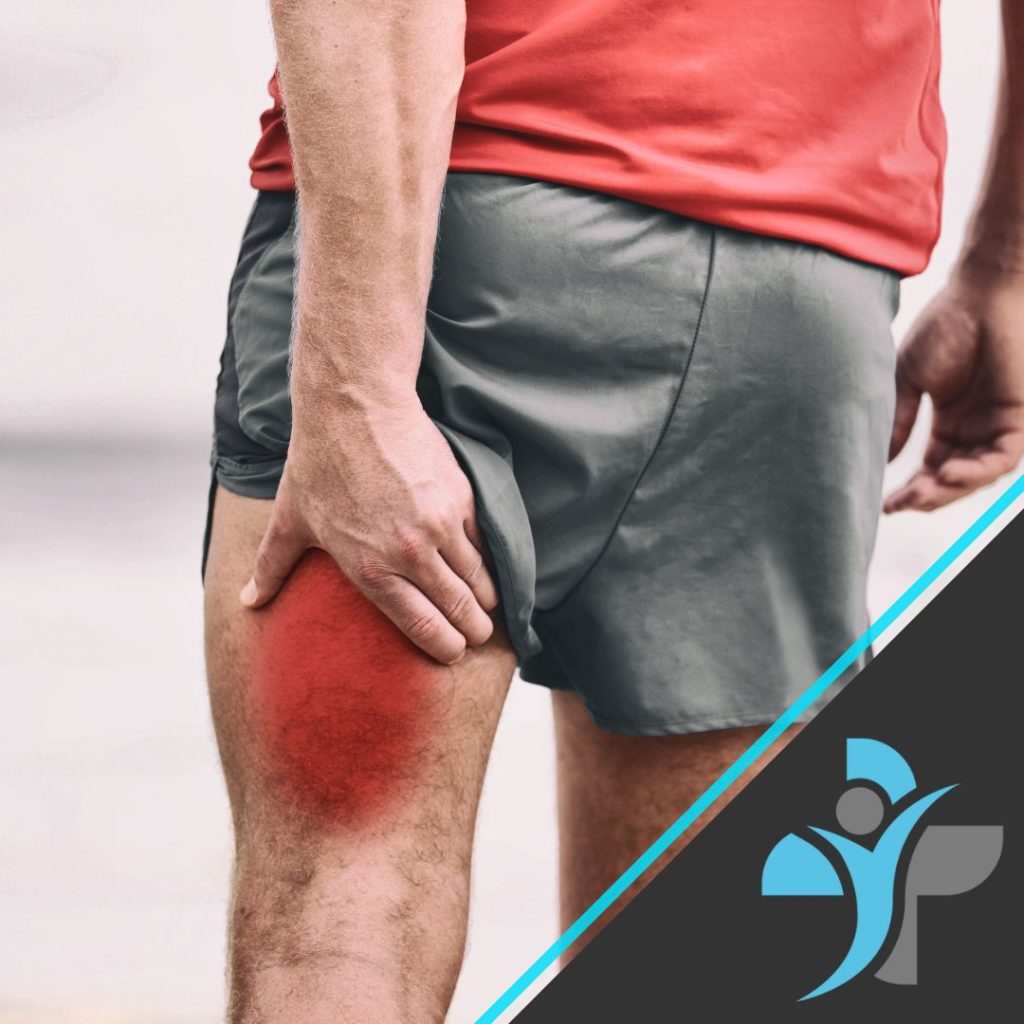
Nerve impingement, also known as nerve compression or pinched nerve, is a condition in which a nerve is compressed or constricted, leading to pain, weakness, numbness, or tingling sensations in the affected area. This can occur in various parts of the body, including the neck, back, arms, and legs.
The pathology of nerve impingement involves pressure or constriction on the nerve, which can be caused by a variety of factors, such as injury, repetitive motions, poor posture, or degenerative conditions like arthritis. This pressure can lead to irritation and inflammation of the nerve, which can cause pain and other symptoms.
The occurrence of nerve impingement is quite common, especially as people age and degenerative changes occur in the spine. It can also be seen in people who perform repetitive motions or maintain poor posture for extended periods of time. Additionally, nerve impingement can result from injuries, such as whiplash or a herniated disc, or from conditions such as carpal tunnel syndrome or sciatica.

Anatomy

The human nervous system is comprised of a complex network of nerves that run throughout the body, transmitting signals between the brain and various tissues and organs. Nerves are made up of axons, which carry electrical signals, and are surrounded by a layer of protective tissue called myelin. Nerves can be affected by a variety of factors, including compression, entrapment, inflammation, and injury.

Symptoms

The symptoms of nerve impingement can vary depending on the location and severity of the impingement. Common symptoms may include pain, numbness, tingling, burning, or a feeling of pins and needles. In severe cases, nerve impingement can lead to muscle weakness, loss of sensation, and difficulty with movement.

Causes

Nerve impingement can be caused by a variety of factors, including physical trauma, repetitive motions, poor posture, and underlying medical conditions such as arthritis, diabetes, and nerve disorders. Other common causes of nerve impingement include spinal stenosis, herniated discs, and degenerative conditions such as spinal cord injuries.

People who are at a higher risk of developing nerve impingement include:

  • Individuals with certain medical conditions such as diabetes, arthritis, or other conditions that can cause nerve damage or inflammation.
  • Athletes and physically active individuals who engage in repetitive motions, such as running, cycling, or weightlifting, which can put stress on the nerves.
  • People who have a sedentary lifestyle and spend long hours sitting or working in positions that can put pressure on the nerves, such as office workers or truck drivers.
  • Individuals with a family history of nerve impingement, as this may suggest a genetic predisposition to the condition.
  • People who have suffered a previous injury, such as a fracture or dislocation, that may have damaged the nerves.

Diagnosis

The diagnosis of nerve impingement is typically based on a review of medical history, a physical examination, and diagnostic imaging tests such as MRI or CT scans. Nerve conduction studies and electromyography (EMG) tests can also be used to help diagnose nerve impingement and determine the severity of the injury.

It is important to note that while anyone can develop nerve impingement, early detection and proper treatment can greatly reduce the risk of developing long-term complications and help ensure a full recovery.

Treatment

Here are some of the treatment options for nerve impingement:

Rest: Resting the affected area can help reduce inflammation and give the nerve time to heal. You may need to avoid activities that aggravate your symptoms, such as heavy lifting, repetitive motions, or prolonged sitting or standing.

Physical therapy: Physical therapy can help improve your strength, flexibility, and posture, which can relieve pressure on the affected nerve. Your physical therapist may recommend exercises, stretches, or other techniques to help alleviate your symptoms.

Medications: Non-steroidal anti-inflammatory drugs (NSAIDs) like ibuprofen or naproxen can help reduce inflammation and relieve pain associated with nerve impingement. In some cases, corticosteroids may be prescribed to reduce inflammation and alleviate symptoms.

Injections: In some cases, injections of corticosteroids or other medications may be given directly into the affected area to reduce inflammation and alleviate symptoms.

Surgery: If conservative treatments are not effective, or if nerve impingement is causing significant weakness or loss of function, surgery may be recommended. The type of surgery will depend on the location and severity of the compression and may involve removing bone or tissue to relieve pressure on the affected nerve.

Lifestyle changes: Making lifestyle changes can help prevent or alleviate nerve impingement. This may include maintaining good posture, staying active, avoiding repetitive motions, and avoiding activities that put excessive strain on your nerves.

Exercises

Exercises to help relieve nerve impingement and prevent further damage may include:

  • Stretching: Gentle stretching exercises can help relieve pressure on the nerves and improve flexibility in the affected area.
  • Strengthening exercises: Targeting the muscles surrounding the affected nerve can help relieve pressure and prevent further damage.
  • Posture correction: Paying attention to posture and correcting any imbalances can help reduce stress on the nerves.
  • Aerobic exercises: Engaging in low-impact aerobic activities, such as swimming or walking, can help improve blood flow to the affected area and promote healing.
  • Yoga or Pilates: Gentle yoga or Pilates can help improve flexibility and strengthen the muscles surrounding the affected nerve.

It is important to consult with a doctor or physical therapist before beginning any exercise program, as they can help determine which exercises are best for your individual needs and ensure proper form and technique.

Prevention

Maintain Correct Posture:

Be mindful of your posture, especially when sitting or standing for long periods. Maintain a neutral spine position to reduce unnecessary stress on the spine and nerves.

Ergonomics:

Ensure that your workspace, whether at a desk or using electronic devices, is ergonomically designed to support good posture. Use supportive chairs, maintain eye-level screens, and take regular breaks to avoid prolonged periods of the same position.

Regular Exercise:

Engage in regular physical activity to strengthen the muscles that support the spine. Focus on exercises that promote core strength and flexibility, as a strong and flexible spine is less prone to nerve compression.

Correct Lifting Techniques:

When lifting objects, use proper lifting techniques to avoid putting excessive strain on the spine. Bend at the knees, keep the back straight, and lift with the legs rather than the back.

Weight Management:

Maintain a healthy weight to reduce the load on the spine. Excess body weight can contribute to conditions like herniated discs and spinal stenosis, increasing the risk of nerve impingement.

Stay Hydrated:

Hydration is essential for maintaining the elasticity of spinal discs. Dehydration can contribute to disc degeneration, which may increase the risk of nerve compression.

Avoid Repetitive Stress:

Be mindful of repetitive movements or activities that can strain specific nerves. If your work or hobbies involve repetitive motions, take breaks and incorporate stretching exercises to reduce the risk of overuse injuries.

Regular Stretching:

Include regular stretching exercises in your routine to maintain flexibility and prevent muscle imbalances. Focus on stretches that target the muscles around the spine, including the neck, back, and hips.

Quit Smoking:

Smoking has been associated with increased disc degeneration and reduced blood flow to spinal structures. Quitting smoking can contribute to overall spine health.

Proper Nutrition:

Maintain a balanced diet rich in essential nutrients, as proper nutrition supports the health of spinal structures. Calcium and vitamin D are particularly important for bone health.

Regular Check-ups:

Schedule regular check-ups with your healthcare provider to monitor your spine health. Early detection and management of spinal conditions can help prevent the progression to nerve impingement.

Patellofemoral Syndrome (PFS)

Patellofemoral Syndrome (PFS), also known as anterior knee pain, is a condition characterized by irritation or damage to the posterior surface of the patella, the kneecap. This syndrome encompasses a spectrum of severity, ranging from mild dysfunction to more serious and chronic issues. The pain originates from the patellofemoral joint or nearby soft tissues. While previously referred to as anterior knee pain, discomfort associated with PFS can be experienced throughout various regions of the knee.

Anatomically, PFS involves the patellofemoral joint, one of the two major joints in the knee. The patella sits within the femoral groove, and if it is displaced, its sharp undersurface may compress against one side of the femoral groove. The patella is connected to the quadriceps muscle tendon and the patellar ligament, playing a crucial role in knee function.

Anatomy

Patellofemoral Syndrome (PFS) involves the patellofemoral joint, which is a crucial component of the knee anatomy. Here’s a more detailed exploration of the relevant anatomical features associated with PFS:

Patellofemoral Joint: The patellofemoral joint is the articulation between the patella (kneecap) and the femur (thigh bone). This joint allows for smooth movement of the patella as the knee flexes and extends.

Patella (Kneecap): The patella is a sesamoid bone embedded in the tendon of the quadriceps muscle. It plays a vital role in the biomechanics of the knee by providing leverage for the quadriceps and protecting the underlying joint surfaces.

Quadriceps Tendon: The quadriceps tendon attaches the quadriceps muscles (rectus femoris, vastus lateralis, vastus medialis, and vastus intermedius) to the patella. This tendon is essential for the extension of the knee.

Patellar Ligament: The patellar ligament continues from the patella and attaches to the tibial tuberosity on the tibia. This ligament is a continuation of the quadriceps tendon and is involved in knee extension.

Femur: The femur is the long bone of the thigh and forms the upper part of the knee joint. The patella glides in the femoral groove during knee movement.

Femoral Groove: The femoral groove is a groove or channel on the femur where the patella moves as the knee flexes and extends. Any deviation in the alignment of the patella within this groove can contribute to PFS.

Quadriceps Vastus Medialis Obliquus (VMO): The VMO is a specific part of the quadriceps muscle located on the inner side of the thigh. It plays a crucial role in stabilizing the patella and preventing lateral displacement.

Meniscus: The menisci (medial and lateral) are crescent-shaped cartilaginous structures located between the femur and tibia. They contribute to shock absorption and load distribution within the knee joint.

Ligaments:

Ligaments around the knee contribute to stability:

Medial Collateral Ligament (MCL): Stabilizes the inner side of the knee.
Lateral Collateral Ligament (LCL): Stabilizes the outer side of the knee.
Anterior Cruciate Ligament (ACL) and Posterior Cruciate Ligament (PCL):

Cruciate ligaments within the joint that control anterior and posterior movement.

Understanding the specific anatomy involved in PFS is crucial for recognizing factors that may contribute to the development of this syndrome. Issues such as malalignment, muscle imbalances, or abnormal patellar tracking can disrupt the normal function of the patellofemoral joint, leading to pain and dysfunction. Proper diagnosis and treatment often involve addressing these anatomical aspects through targeted interventions such as physical therapy, strengthening exercises, and biomechanical assessments.

Symptoms

Patellofemoral syndrome, also known as patellofemoral pain syndrome (PFPS), is a condition characterized by pain in the front of the knee, around the patella (kneecap) and the surrounding area. It is a common cause of knee pain, especially among athletes and individuals engaged in activities that involve repetitive knee motion. The symptoms may include:

• Pain around the kneecap: The primary symptom is usually a dull, aching pain in the front of the knee, especially around or behind the patella. The pain may be aggravated by activities such as climbing stairs, sitting for long periods with the knee bent, or engaging in activities that stress the knee joint.

• Pain during or after activities: Pain may increase during activities that involve bending the knee, such as running, jumping, squatting, or sitting with the knee bent for an extended period.

• Crepitus or grinding sensation: Some individuals with patellofemoral syndrome may experience a grating or grinding sensation (crepitus) when moving the knee.

• Swelling and inflammation: The knee may exhibit signs of swelling or puffiness around the patella.

• Instability or weakness in the knee: Weakness or a feeling of instability in the knee can be present, making it challenging to perform certain activities.

• Pain when sitting for prolonged periods: Individuals with patellofemoral syndrome may experience discomfort when sitting for extended periods, especially with the knee bent, such as during long car rides or at a desk.

It’s important to note that the symptoms of patellofemoral syndrome can vary from person to person, and the severity of symptoms may fluctuate over time. If you suspect you have patellofemoral syndrome or are experiencing persistent knee pain, it is advisable to consult with a healthcare professional, such as a doctor or physical therapist, for an accurate diagnosis and appropriate management plan. Treatment often involves addressing contributing factors, such as muscle imbalances, and implementing exercises and strategies to improve knee function and reduce pain.

Causes

The exact cause of patellofemoral syndrome (PFPS) can be multifactorial, and it often results from a combination of various factors. Some common causes and contributing factors to the development of PFPS include:

• Overuse or Excessive Training: Activities that involve repetitive knee motion, such as running, jumping, or squatting, can lead to overuse of the patellofemoral joint, contributing to the development of PFPS.

• Muscle Imbalances: Weakness or imbalance in the muscles around the knee, particularly the quadriceps (front thigh muscles) and the muscles that make up the hip, can affect the alignment of the patella within its groove. This imbalance may lead to increased stress on the patellofemoral joint.

• Poor Biomechanics: Abnormalities in the way the lower limb moves, such as issues with foot pronation (rolling inward) or supination (rolling outward), can affect the alignment of the patella and contribute to PFPS.

• Flat Feet or Overpronation: Individuals with flat feet or excessive pronation may have altered biomechanics that can lead to increased stress on the patellofemoral joint.

• Malalignment of the Patella: Anatomical factors, such as a misalignment of the patella within its groove, may contribute to PFPS. This can be influenced by factors like the shape and structure of the knee joint.

• Trauma or Injury: Direct trauma to the kneecap or the surrounding structures can contribute to the development of PFPS.

• Tightness or Weakness in the Hamstrings: Imbalances between the quadriceps and hamstring muscles can affect knee joint mechanics, potentially contributing to PFPS.

• Improper Footwear: Wearing shoes that do not provide proper support or that exacerbate biomechanical issues can contribute to PFPS.

• Joint Laxity: Some individuals may have increased joint laxity, which can affect the stability of the patellofemoral joint.

• Changes in Physical Activity: Sudden increases in intensity, duration, or frequency of physical activity can contribute to the development of PFPS.

It’s important to note that these factors alone are not necessarily the only cause, and often, a combination of them may contribute to the development of patellofemoral syndrome. Additionally, individual variations in anatomy and biomechanics can play a role.

Diagnosis

Diagnosing patellofemoral syndrome (PFPS) typically involves a comprehensive evaluation by a healthcare professional. This may include a thorough medical history, a physical examination, and in some cases, imaging studies. Here is an overview of the diagnostic process for PFPS:

• Your doctor or physical therapist will start by asking about your symptoms, including the nature and location of the knee pain, factors that aggravate or alleviate the pain, and any relevant medical history or previous injuries.

• A physical examination will be conducted to assess various aspects of your knee function. This may involve how you walk, assessing the alignment of your lower limbs, and checking for signs of muscle imbalances or weakness. The healthcare provider may also perform specific manoeuvres to reproduce or exacerbate your symptoms.

• Your healthcare provider may palpate (feel) around various structures around the knee, including the patella, to identify areas of tenderness or swelling.

• The range of motion of the knee joint will be assessed, and strength testing of the muscles around the knee, especially the quadriceps and hamstrings, may be conducted.

• Functional tests, such as evaluating your ability to perform specific movements like squatting or climbing stairs, may be used to assess how your knee functions during activities that can aggravate PFPS.

• While the diagnosis of PFPS is often based on clinical evaluation, imaging such as X-rays or MRIs (Magnetic Resonance Imaging) may be ordered to rule out other structural issues and to assess the alignment of the patella and the condition of the surrounding structures.

It’s important to note that the diagnosis of PFPS is often one of exclusion, meaning other knee pain causing factors will be ruled out first.

Treatment

The treatment of patellofemoral syndrome (PFPS) usually involves a combination of conservative measures aimed at reducing pain, improving knee function, and addressing underlying contributing factors. Here are common treatment approaches:

Rest from activities that exacerbate symptoms can help reduce inflammation and pain.

Modifying or temporarily avoiding activities that involve repetitive knee motion, such as running or jumping, may be beneficial.

A physical therapist can design a specific exercise program to strengthen the muscles around the knee, particularly the quadriceps and hip muscles. These can be physiotherapists, sports therapists or personal trainers.

Stretching exercises to improve flexibility in the muscles and tissues around the knee.

Sports Massage or Deep Tissue Massage performed by a qualified therapist who has level 4 or above.

Patellar taping or bracing may be used to help stabilize the patella.

Orthotics and Footwear:

Custom orthotics or supportive footwear may be recommended to address issues related to foot pronation or other biomechanical factors.

Over-the-counter pain medications, such as acetaminophen or nonsteroidal anti-inflammatory drugs (NSAIDs), may be recommended for pain relief.

Ice application can help reduce inflammation. Applying an ice pack to the affected area for about 15-20 minutes at a time can be effective.

Guidance on modifying activities or exercises to reduce stress on the patellofemoral joint.

Evaluation of gait and lower limb biomechanics to identify and address any issues contributing to PFPS.

Maintaining a healthy body weight can help reduce stress on the knee joints.

In some cases, a healthcare provider may recommend corticosteroid injections to reduce inflammation and pain. However, these are typically used judiciously due to potential side effects.

Surgery is rarely the first-line treatment for PFPS. However, in cases where conservative measures are not effective, surgical options such as arthroscopy may be considered. This might involve procedures to address structural issues or correct biomechanical problems.

It’s important to note that the effectiveness of treatment can vary from person to person, and a tailored approach is often necessary. It’s recommended to consult with a healthcare professional, such as an orthopaedic specialist or physical therapist, to determine the most appropriate treatment plan based on individual circumstances. Additionally, early intervention and adherence to recommended exercises and modifications are crucial for successful management of PFPS.

Exercises

Exercise is a key component of the treatment plan for patellofemoral syndrome (PFPS). The goal of exercises is to strengthen the muscles around the knee, improve flexibility, and address any muscle imbalances or weaknesses that may be contributing to the pain. Here are some exercises that are commonly recommended for individuals with PFPS. However, it’s crucial to consult with a healthcare professional or a physical therapist before starting any new exercise program, as the specific exercises should be tailored to individual needs and capabilities.

Quad Sets:

Sit or lie down with your leg extended.

Tighten the muscles on the top of your thigh and push the back of your knee into the surface you’re sitting or lying on.

Hold for a few seconds, then relax.

Repeat for several sets.

Straight Leg Raises:

Lie on your back with one leg straight and the other bent.

Lift the straight leg a few inches off the ground and hold for a few seconds.

Slowly lower the leg back down.

Repeat for several sets on each leg.

Wall Sits:

Stand with your back against a wall and slide down into a sitting position, as if you were sitting in an imaginary chair.

Hold the position for 20-30 seconds.

Stand back up and repeat for several sets.

Step-Ups:

Use a sturdy step or platform.

Step up onto the platform with one foot, then bring the other foot up.

Step back down, leading with the same foot.

Repeat for several sets, alternating legs.

Clamshell Exercise:

Lie on your side with your hips and knees bent at a 90-degree angle.

Keeping your feet together, lift the top knee while keeping the feet together.

Lower the knee back down.

Repeat for several sets on each side.

Lateral Leg Raises:

Lie on your side with the bottom leg bent slightly for support.

Lift the top leg to the side, keeping it straight.

Lower the leg back down.

Repeat for several sets on each side.

Hamstring Stretch:

Sit on the floor with one leg extended and the other bent so that the sole of your foot is against the inner thigh of the extended leg.

Reach toward the toes of the extended leg while keeping your back straight.

Hold the stretch for 20-30 seconds and then switch legs.

Calf Stretch:

Stand facing a wall with your hands on the wall at shoulder height.

Step one foot back and press the heel into the floor.

Hold the stretch for 20-30 seconds and then switch legs.

Remember to start slowly and gradually increase the intensity and duration of exercises. If you experience increased pain or discomfort during any exercise, it’s important to stop and consult with your healthcare provider or physical therapist. Additionally, consistency is key, and performing these exercises regularly as part of a comprehensive rehabilitation program can contribute to improved outcomes for individuals with PFPS.

Prevention

While not all cases of patellofemoral syndrome (PFPS) can be entirely prevented, there are several strategies and lifestyle modifications that can help reduce the risk of developing or exacerbating the condition. Here are some preventive measures:

Strengthening:

Regularly incorporate exercises that focus on strengthening the muscles around the knee, especially the quadriceps, hamstrings, and hip muscles. Strong muscles provide better support to the knee joint.

Flexibility:

Include stretching exercises to maintain flexibility in the muscles and tissues around the knee. This can help prevent muscle imbalances and improve joint function.

Warm-up and Cool Down:

Always warm up before engaging in physical activities or sports. A proper warm-up prepares the muscles and joints for the stresses of exercise. Similarly, cool down with stretching exercises to help prevent stiffness.

Gradual Progression:

Avoid sudden increases in the intensity, duration, or frequency of physical activities. Gradual progression allows your body to adapt to new demands, reducing the risk of overuse injuries like PFPS.

Well Fitted Footwear:

Wear supportive footwear that is appropriate for your activity. Shoes with good arch support and shock absorption can help maintain proper biomechanics and reduce stress on the knee joint.

Maintaining a Healthy Weight:

Excess body weight can contribute to increased stress on the knee joints. Maintaining a healthy weight through a balanced diet and regular exercise can reduce the risk of PFPS.

Biomechanical Assessment:

If you have concerns about your gait or lower limb biomechanics, consider consulting with a healthcare professional or a physical therapist for a biomechanical assessment. Addressing any abnormalities early on can help prevent future issues.

Cross-Training:

Engage in a variety of physical activities to avoid overuse of specific muscle groups or joints. Cross-training can help distribute the workload and reduce the risk of repetitive strain injuries.

Good Technique:

Ensure proper technique when participating in sports or exercises. Improper form can contribute to increased stress on the knee joint and may lead to overuse injuries.

Listen to Your Body:

Pay attention to any signs of pain or discomfort during physical activities. If you experience persistent knee pain, consult with a healthcare professional for evaluation and appropriate management.

It’s important to note that individual factors, such as anatomy and genetics, can also influence the risk of developing PFPS. While these preventive measures can help reduce the risk, there is no one-size-fits-all approach. If you have concerns about your knee health or are experiencing persistent pain, it is advisable to consult with a healthcare professional for personalized guidance and recommendations.

Hamstring Tear – Grade 1 and 2

Hamstring tear is an injury to a muscle at the back of the thigh, that is caused by a rapid extensive contraction or a violent stretch of the hamstring muscle group, causing high mechanical stress. They account for up to 29% of lower limb injuries in sport, due to the involvement of high speeds such as sprinting and football, however older age can increase the risk due to a loss of flexibility.

Some experiences of hamstring tears involve pain and tenderness, with limited range of motion, where others experience additional symptoms, such as swelling or a ‘popping’ or tearing sensation.

Grade 1 and 2 hamstring tears can heal within 3 to 8 weeks, however can take months to heal depending on the severity of symptoms.

Anatomy

The hamstrings are a group of three muscles: semitendinosus, semimembranosus, and bicep femoris (long head), that predominantly acts to flex and extend the knee.

Most hamstring tears occur in the central part of the muscle, or where the muscle fibres and tendon fibres intersect (MTJ). Tendons can tear away from a small bone fragment (ischial tuberosity), that typically occur at the proximal origin (top) of the hamstring, however, can occur from the distal origin (bottom), although less common.

Symptoms

  • Sudden and sharp pain
  • Tenderness
  • A “popping sensation” at the time of injury
  • Swelling and bruising (or discolouration) in the first few hours and days
  • Weakness and a loss of strength in the leg

Causes

Overload of the hamstrings typically the cause of hamstring tears, that occurs when the muscle is stretches beyond its limit or challenged with sudden load, typically during an eccentric contraction. Previous hamstring injuries can increase the risk of developing a tear, particularly if the body is compensating for another limb injury, or if there is muscle weakness and a lack of flexibility.

Diagnosis

Physical examinations are often performed, such as palpation to pinpoint the area of the hamstring tear, however precise location may be difficult to determine without medical imaging.

Other physical examinations involve performing various movement to evaluate strength and range of motion, to determine the severity or the classification (grade 1 to 3) according to the pain and physical limitations.

Neurological examination may be performed to assess the sciatic nerve, to check any entrapment or irritation in healing scar tissue. Imaging such X-rays and MRI may be advised in severe cases, to detect the location of the tear and the extent of the injury, however for grade 1 and 2 tears, only physical examination if typically required.

Treatment

There are 3 phases of treatment to aid recovery and function of the hamstring injury (grade 1 and 2):

Phase 1 (inflammation phase) -Exercises and excessive stretching should be avoided, to control pain and help scar tissue develop. At the phase, crutches may be required to reduce weight bearing and facilitate recovery.

Phase 2 (reparative phase) – Exercises are introduced to try and regain full range of motion. Progressions of more challenging exercises are included in this stage, however, should be performed tolerably and pain-free. Such exercises could include hamstring curls, hip extension (with added resistance band for progression), hamstring wall stretch, and single leg balance.

Phase 3 (remodelling phase) – specific to patients playing sport to allow return to sport, and their level of function. This phase is specific to the patient, where sport or activity-specific drills such as agility are advised to promote tissue remodelling, or drills involving quick movements such as plyometric exercises.

Exercises

  • Hamstring stretch: Sit on the floor with your legs straight out in front of you. Lean forward, reaching your hands towards your toes until you feel a stretch in your hamstrings. Hold for 30 seconds and repeat 3 times.
  • Hamstring curl: Stand facing a wall or chair, with your feet shoulder-width apart. Lift one foot towards your buttocks, keeping your knee bent. Lower your foot and repeat for 10-15 repetitions on each leg.
  • Deadlift: Stand with your feet shoulder-width apart, holding a barbell or dumbbells in front of your thighs. Hinge forward from your hips, keeping your back straight, and lower the weights towards the floor. Return to the starting position and repeat for 10-15 repetitions.
  • Romanian deadlift: Stand with your feet shoulder-width apart, holding a barbell or dumbbells in front of your thighs. Hinge forward from your hips, keeping your back straight, and lower the weights towards the floor. Keep your knees slightly bent and your hips back as you lower the weight. Return to the starting position and repeat for 10-15 repetitions.
  • Glute bridge: Lie on your back with your knees bent and your feet flat on the floor. Lift your hips towards the ceiling, squeezing your glutes at the top. Lower your hips and repeat for 10-15 repetitions. This exercise strengthens the glutes and hamstrings.


Prevention

  • Warm-up properly: Warming up properly before any physical activity is essential to prevent hamstring tears. It increases blood flow to the muscles, making them more pliable and less prone to injury.
  • Stretch regularly: Regular stretching, especially before and after exercise, can help prevent hamstring tears. Incorporate stretching exercises such as hamstring stretches, quadriceps stretches, and hip flexor stretches into your routine.
  • Build strength gradually: Gradually increasing the intensity and duration of your exercise routine can help prevent overloading the hamstrings. Focus on building strength in the hamstrings and surrounding muscles to improve overall stability and reduce your risk of injury.
  • Use proper technique: Using proper technique when performing exercises that involve the hamstrings, such as running and weightlifting, can help prevent hamstring tears. Avoid over-striding, sudden changes of direction, and landing heavily on your heels.
  • Wear appropriate footwear: Wearing appropriate footwear that provides adequate support can help prevent hamstring tears. Choose shoes that fit well and have good shock absorption.

Calf Tear

Calf tears are a relatively common injury that occurs in people of all ages and activity levels. It is estimated that up to 18% of all sports injuries involve the calf muscles, making it one of the most injured areas in the lower leg.

Calf tears are more common in people who engage in sports or activities that involve repetitive or explosive movements of the lower legs, such as running, jumping, or dancing. These activities can put a significant amount of stress on the calf muscles, making them more susceptible to injury.

Calf tears are classified into three grades based on the severity of the injury. Grade 1 tears involve minor damage to the muscle fibers, while grade 2 tears involve a partial tear of the muscle. Grade 3 tears are the most severe and involve a complete tear of the muscle.

While calf tears can be painful and limit mobility, they generally heal well with proper treatment and rehabilitation. It is important to seek medical attention if you suspect a calf tear or if you experience persistent pain or swelling in the calf muscle. With proper care, most people are able to return to their normal activities within a few weeks to a few months.

Anatomy

The calf muscle is made up of two muscles: the gastrocnemius and the soleus. The gastrocnemius is the larger of the two muscles and is responsible for flexing the ankle and knee. The soleus is located underneath the gastrocnemius and is responsible for plantar flexion of the ankle.


Symptoms

The symptoms of a calf tear can vary depending on the severity of the injury. The following are some common symptoms of calf tears grade 1 and 2:

  • Mild to moderate pain in the calf muscle
  • Swelling and tenderness in the affected area
  • Difficulty in walking or standing on the affected leg
  • Stiffness and limited range of motion in the ankle and foot
  • A popping or snapping sensation at the time of injury

Causes

Calf tears can be caused by a sudden or forceful movement, such as pushing off or jumping, which puts excessive strain on the calf muscle. The following are some common causes of calf tears:

  • Overuse or repetitive strain on the calf muscle
  • Sudden movements or changes in direction
  • Inadequate warm-up before exercise or sports activities
  • Poor flexibility or strength in the calf muscles
  • Foot and ankle problems, such as flat feet or ankle instability

Diagnosis

A calf tear can be diagnosed through a physical examination by a healthcare professional. Imaging tests, such as an ultrasound or MRI, may be ordered to confirm the diagnosis and to determine the extent of the injury.

Treatment

The treatment for a calf tear grade 1 or 2 generally includes the following:

  • Rest: The affected leg should be rested to allow the muscle to heal.
  • Ice: Applying ice to the affected area can help reduce pain and swelling.
  • Compression: Compression with a bandage or brace can help reduce swelling and provide support to the affected area.
  • Elevation: Elevating the affected leg can help reduce swelling and promote healing.
  • Pain medication: Over-the-counter pain medications may be used to help manage pain.

Exercises

After the initial healing period, the following exercises may be prescribed to help improve range of motion and strength in the calf muscle:

  • Calf stretches: Stretching the calf muscle can help improve flexibility and reduce the risk of future injury. Stand facing a wall with your hands on the wall and your feet shoulder-width apart. Step back with your affected leg, keeping your heel on the ground. Lean forward into the wall until you feel a stretch in your calf. Hold for 30 seconds and repeat on the other leg.
  • Calf raises: This exercise helps strengthen the calf muscle. Stand with your feet shoulder-width apart and rise up on your toes, lifting your heels off the ground. Hold for a few seconds and then lower your heels back down. Repeat for 10-15 repetitions.
  • Single leg balance: This exercise helps improve balance and stability in the affected leg. Stand on your affected leg and lift your other leg off the ground. Hold for 30 seconds and repeat on the other leg.


Prevention

To prevent calf tears, it is important to take the following measures:

  • Warm-up: Always warm up before engaging in exercise or sports activities. A proper warm-up can help prepare your muscles for activity and reduce the risk of injury.
  • Stretching: Regular stretching of the calf muscles can help improve flexibility and reduce the risk of tears. Incorporate calf stretches into your warm-up routine and stretch after exercise.
  • Proper footwear: Choose appropriate footwear that provides adequate support and cushioning for your feet and ankles. Replace worn-out shoes regularly.
  • Gradual progression: If you are new to a sport or activity, start slowly and gradually increase the intensity and duration of your workouts. This can help prevent overuse injuries.
  • Strengthening exercises: Regularly performing exercises that strengthen the calf muscles can help prevent tears. Examples include calf raises and resistance band exercises.

By following these preventive measures, you can significantly reduce your risk of calf tears and other lower leg injuries. If you do experience pain or discomfort in your calf muscles, it is important to seek medical attention before continuing with exercise or sports activities.

Rotator Cuff Injury

In the rotator cuff region there are four muscles, tendons and ligaments, surrounding the shoulder which provide added stability to the shoulder joint. This structure helps to keep the bone securely placed into the socket. Injury to the rotator cuffs can cause an ache like pain in the shoulder. This may lead to a feeling of muscle weakness and inability to lift the shoulder above the head.

Rotator cuff injuries are most commonly presented in people regularly exposed to overhead movements, such as painters, carpenters and builders. Individuals who suffer from this injury can usually manage their symptoms, through sports massage and specific exercises focusing on the rotator cuff muscle region. However, if not treated correctly, further injury to the area may occur such as a complete tear, which may result in surgery.

Anatomy

The rotator cuffs are made up by four muscles, these are the supraspinatus, infraspinatus, teres minor and subscapularis. These muscles aid in keeping the upper arm and shoulder into the socket with stability. They also each allow specific movements at the shoulder joint. The group of four muscles all originate within the shoulder blade, but all insert into different portions of the upper arm bone.

Supraspinatus: This muscle originates at the supraspinous fossa; the muscle belly passes laterally over the acromion process and inserts into the greater tubercle of the humerus bone. This muscle allows the first 15 degree’s movement of abduction, after this the deltoid and trapezius muscles will then allow further motion.

Infraspinatus: The origin of the infraspinatus is the infraspinatus fossa, and the insertion is also the greater tubercle of the humerus. The motion created by this muscle is lateral rotation of the shoulder, moving the arm away from the centreline of the body.

Teres Minor: A small narrow muscle on the back of the shoulder blade which sits underneath the infraspinatus. The origin is the lateral boarder of the scapula. This muscle contributes to external rotation of the arm of the body.

Subscapularis: This rotator cuff is the strongest and largest out of the three listed above. This muscle originates at the subscapularis fossa and inserts into the lesser tubercle of the humerus. The subscapularis allows greater motion at the shoulder and mainly aids in allowing medial rotation of the arm.

Symptoms

Common symptoms of possible rotator cuff injury:

  • Dull ache
  • Difficulty lifting arm over head
  • Weakness around the shoulder
  • Disturbed sleep
  • The constant need to use self-myofascial techniques

Causes

There are a few common risk factors of why rotator injury may occur:

  1. Family History: There may be family history of rotator cuff injuries which may make certain family members more prone to having the injury than others.
  2. The type of job you do: Individuals who work in construction or manual labour who have repetitive overhead movement of the shoulder could damage the rotator cuff overtime.
  3. Age: As you get older joints and muscles become weaker, meaning you may be more prone to injury overtime.

Diagnosis

To diagnose a rotator cuff injury a physical examination will be carried out by a doctor or a physiotherapist. Firstly, they may ask about your day-to-day activities which may determine the seriousness of the injury. The doctor will test the range of movement at the shoulder by getting you to perform movements such as flexion, extension, abduction, adduction and medial and lateral rotation. This will allow the doctor to determine if it is actually rotator cuff injury or whether it may be other conditions such as impingement or tendinitis.

Imaging scans such as X-Ray’s may also be used to see if there is any abnormal bone growth within the joint, which may be causing the pain.

Treatment

Treatments for rotator cuff injuries can be non-surgical or surgical. Tendinitis may occur over time from the repetitive strain placed around the joint, so it is important to treat the affected area.

  • Apply a cold compress/ ice to the effected area to reduce swelling
  • Heat packs can be used to reduce swelling
  • Resting the affected area
  • Inflammatory medication such as ibuprofen and naproxen
  • Reduce the amount of repetitive movement to the joint
  • Don’t lift the arm overhead

Exercises

  • Doorway Stretch: Stand facing an open doorway with your hands placed on the door frame at shoulder height. Step one foot forward and gently lean forward, feeling a stretch in your chest and shoulders. Hold the stretch for 20-30 seconds before releasing. Repeat the stretch with the other foot forward.
  • External rotation with weight: Hold a dumbbell or weight plate in one hand and stand with your elbow bent at 90 degrees and your upper arm against your side. Rotate your arm outwards, away from your body, while keeping your elbow tucked in. Slowly return to the starting position and repeat for 8-12 repetitions before switching arms.
  • High to low rows with resistance band: Attach a resistance band to a sturdy anchor point at chest height. Stand facing the anchor point with the band in both hands. Pull the band towards your chest, keeping your elbows tucked in and your shoulders down. Slowly release the band back to the starting position and repeat for 8-12 repetitions.
  • Reverse fly’s: Hold a dumbbell or weight plate in each hand and bend forward at the waist, keeping your back straight. Extend your arms out to the sides, keeping them parallel to the floor. Squeeze your shoulder blades together as you bring the weights up towards your body, then slowly release back to the starting position. Repeat for 8-12 repetitions.
  • Lawn mower pull with resistance band: Attach a resistance band to a low anchor point and stand with your side to the anchor point. Hold the band in one hand with your arm extended towards the anchor point. Pull the band towards your chest, keeping your elbow bent and your shoulder blade squeezed down and back. Slowly release back to the starting position and repeat for 8-12 repetitions before switching sides.
  • Isometric internal rotation: Stand with your elbow bent at 90 degrees and your upper arm against your side. Place a rolled up towel or small ball between your elbow and your side. Squeeze your elbow into your side, holding the contraction for 10-15 seconds before releasing. Repeat for 2-3 sets of 10-15 repetitions.
  • Isometric external rotation: Stand with your elbow bent at 90 degrees and your upper arm against your side. Hold a resistance band in both hands, with one end of the band anchored to a sturdy object. Rotate your arm outwards, away from your body, while keeping your elbow tucked in. Hold the contraction for 10-15 seconds before releasing. Repeat for 2-3 sets of 10-15 repetitions before switching arms.

Prevention

  1. Strengthen the rotator cuff muscles: Exercises that target the rotator cuff muscles can help to build strength and stability in the shoulder joint. Examples of such exercises include external rotation with a resistance band, internal rotation with a light weight, and scapular stabilization exercises.
  2. Warm up properly: Before engaging in any activities that involve overhead arm movements, it is important to warm up the shoulder joint with dynamic stretches and exercises. This can help to increase blood flow to the muscles and reduce the risk of injury.
  3. Practice good technique: When engaging in activities that involve overhead arm movements, it is important to use proper technique and form. This can help to reduce stress on the rotator cuff muscles and tendons and minimize the risk of injury.
  4. Use proper equipment: Using equipment that is properly fitted and designed for the activity can help to reduce the risk of rotator cuff injuries. For example, using a tennis racket with a larger grip or wearing properly fitting swim goggles can reduce the stress on the shoulder joint.
  5. Rest and recover: Resting and allowing the shoulder joint to recover after activity is important for preventing overuse injuries. Avoiding overuse and engaging in activities that strengthen and stretch the shoulder muscles can help to prevent rotator cuff injuries.

How We Can Help

We understand that dealing with a rotator cuff injury can be a challenging and painful experience. As healthcare professionals, we are dedicated to helping you manage your symptoms and regain full function of your shoulder joint.

We are pleased to offer you our services in massage therapy and sports therapy, both of which can be highly effective in treating rotator cuff injuries. Our trained and experienced therapists can work with you to reduce pain and inflammation, improve range of motion, correct muscle imbalances, and provide advice on injury prevention.

Our services are tailored to meet your individual needs and goals, and we will work with you to develop a treatment plan that is effective and manageable for you. We believe in a collaborative approach to healthcare, and we may work in conjunction with other healthcare professionals, such as physiotherapists or orthopedic specialists, to ensure that you receive the best possible care.

We take pride in providing our patients with high-quality, compassionate care, and we are committed to helping you achieve optimal health and well-being. If you are interested in learning more about our massage therapy and sports therapy services, or if you would like to schedule an appointment, please do not hesitate to contact us.

How effective is Kinesio taping?

How effective is kinesio taping ?

Tips for knees, shoulder, ankles, wrists.

Overview

Kinesio taping is a method of taping the skin to provide support and stability to muscles and joints, while also allowing for full range of motion. The tape is made of flexible, breathable material that stretches and moves with the skin. It is applied in specific patterns depending on the area of the body being treated.

Kinesio taping is often used to help alleviate pain, reduce inflammation, improve muscle function, and promote healing. It is also used as a preventative measure to improve muscle activation and stability, as well as to support joints during movements. It’s often used to help with conditions such as back pain, knee pain, sprains, strains and sports injuries.

Kinesio therapy is a non-invasive, drug-free method of treatment, and it is generally considered safe for most people. However, it is best to consult with a physical therapist or doctor before using Kinesio taping, as it may not be appropriate for everyone, especially for those with certain skin conditions or allergies.

How effective is Kinesio taping?

Kinesio taping is relatively new method of treatment and research on its effectiveness is still ongoing. Some studies have shown that Kinesio taping can be effective in reducing pain and inflammation, improving muscle function, and promoting healing.

For example, a study published in The Journal of Athletic Training found that Kinesio taping was effective in reducing pain and improving function and reduced pain in people with the patellofemoral pain syndrome.

However, it is important to note that the effectiveness of Kinesio taping can vary depending on the condition being treated and the individual. Some studies have found that Kinesio taping is no more effective than other treatments such as physical therapy or exercise. It is important to note that more research is needed to fully understand the effectiveness of Kinesio taping and to determine the best ways to use it.

Knee Kinesio taping

Injuries in which the Kinesio taping might be helpful:

Patellofemoral pain syndrome:
This condition is characterized by pain in the front of the knee and around the kneecap, often caused by overuse or improper alignment of the kneecap. Kinesio taping can help to stabilize the kneecap and reduce pain.

Anterior cruciate ligament injuries (ACL):
The ACL is a ligament that helps to stabilize the knee. Injuries to the ACL can cause pain, instability, and difficult walking. Kinesio taping can help to provide support and stability to the knee joint following and ACL injury.

Meniscus injuries:
The meniscus is a piece of cartilage that helps the cushion the knee joint. Injuries to the meniscus can cause pain, swelling, and difficulty walking. Kinesio taping can help to support and stabilize the knee joint following a meniscus injury.

Osteoarthritis:
This degenerative condition that causes pain and stiffness in the knee joint. Kinesio taping can help to reduce pain and improve function in individuals with knee osteoarthritis.

Patellar tendonitis:
This overuse injury that causes pain and inflammation in the tendon that connects the kneecap to the shin bone. Kinesio taping can help to reduce pain and improve function in individuals with patellar tendonitis.

Ankle Kinesio Taping

Sprains:
Kinesio taping can be used to support the ankle during the healing process and reduce swelling and pain.

Tendinitis:
Taping can be used to support the tendons and reduce stress on the area.

Plantar fasciitis:
Taping can be used to provide support for the foot and help reduce pain and inflammation in the heel.

Ankle instability:
Taping can be used to provide support and help stabilize the ankle joint, which can reduce the risk of reinjury.

Overuse injuries:
Taping can be used to support the muscles and tendons of the ankle and reduce the risk of overuse injuries such as stress fractures.

Shoulder Kinesio Taping

Rotator cuff strains and tears:
Kinesio taping can provide support and stability to the rotator cuff muscles, helping to reduce pain and inflammation while promoting healing.

Shoulder Impingement:
Kinesio taping can help to correct muscle imbalances and improve posture, which can help to reduce the risk of shoulder impingements.

Frozen shoulder (Adhesive capsulitis):
Kinesio taping can improve range of motion and reduce pain during the frozen stage of the condition.

Dislocated shoulder:
Kinesio taping can provide support and stability to the shoulder joint, helping to reduce the risk of further dislocations.

Tendinitis:
Kinesio taping can help to reduce pain and inflammation and promote healing of the tendons.

Wrist Kinesio Taping

Carpal Tunnel syndrome:
Taping can be used to provide support for the median nerve and help reduce pain and inflammation in the wrist.

Wrist instability:
Taping can be used to provide support and help stabilize the wrist joint, which can reduce the risk of reinjury.

If you believe that you could benefit from some Kinesio Taping then please contact a member of our team or book an appointment online with one of our kinesio taping experts!

tel: 0330 043 2501 or via email on: info@livewellhealth.co.uk

Plantar Fasciitis

In the bottom of the foot there is a thick fibrous tissue known as the plantar fascia. The plantar fascia provides stability for the foot and also works as a shock absorber. Injury to the plantar fascia can lead to an aching sensation on the bottom of the foot when walking, especially after long periods of rest. The term plantar fasciitis refers to inflammation on the sole of the foot.

Plantar fascia injuries are most common in individuals who do lots of exercise such as running, jumping and dancing, involving lots of impact on the bottom of the feet. Treatment methods such as massage and rest can help alleviate the painful symptoms. Painful symptoms may ease on their own but if they still remain after 2 weeks, consult a professional.

Anatomy

The plantar fascia is a long, thick fibrous tissue connecting to the calcaneus (heel bone of the ankle) it runs along the bottom of the foot and divides into five digital bands, along the heads of the metatarsals (toes). It covers the sole of the foot.

The function of plantar fascia is to provide support to the foot when standing and shock absorption when running.

Inflammation or degeneration of the tendon where the fascia originates can cause heel pain.

Symptoms

The symptoms of plantar fasciitis will be aggravated by continuing activity on the sole of the foot such as walking/running and will get worse over time. Some of the symptoms of plantar fasciitis include:

  • Pain on the bottom of the foot, around the heel and the arch (main symptom)
  • May be tenderness/pain under sole of foot and under heel when pressing in
  • Eases pain when exercising, but painful once rest
  • Difficult to raise toes off floor
  • Pain occurred gradually
  • Pain worse first thing in morning/when walking after long periods of rest
  • Pain eases off only to return later
  • Pain directly under the heel
  • Flat or overpronated feet
  • Tight calves

Causes

Plantar fasciitis is directly caused by damage to the plantar fascia running along the sole of the foot.

Some examples of causes/links consist of:

    • Overuse
    • Recently started exercising on hard surfaces
    • Exercising with a tight calf or heel
    • Overstretch the sole of your foot during exercise
    • Recently started doing a lot more running, walking or standing up
    • More common in sports involving running, dancing or jumping
    • Foot biomechanics
    • Overpronation (foot rolling in/flattening too much when running or walking which stretches plantar fascia more than normal)
    • High arch – unable to absorb as much shock so increased strain on plantar fascia
    • Footwear – very flat and unsupportive shoes increase likelihood of developing plantar fasciitis
    • Bodyweight – overweight individuals or those that do lots of heavy lifting causes increased load on feet increasing chances of developing heel pain

Flexibility – if have tightness in the calves or plantar fascia this can alter the biomechanics in the foot causing strain on the fascia

Diagnosis

During your visit to your local GP or Sports Therapist / Physiotherapist, they will assess..

      • History- how long the pain has been occurring for and when its most painful
      • Physical examination- check for tenderness in foot, pain during palpation
      • Gait analysis- analysing feet and how they function when walking and running- if overpronate or feet flatten

Treatment

Aims to decrease pain and inflammation, identify and correct possible causes, improve flexibility, gradually increase strength and return to full fitness levels.

  • Rest- rest from activities causing the pain reduces initial pain and inflammation
  • Massage – can help stretch and relax the plantar fascia. Massage also helps to stimulate blood flow and loosen tight tissues underneath the foot which cause pain
  • Stretches – for calf muscles and plantar fascia
  • Night splint – compliments plantar fasciitis exercises by preventing the tissues from tightening up overnight. Wearing a night splint is more effective than stretching exercises alone.
  • Taping- supports the arch of the foot and reduces strain on the plantar fascia
  • Shock Wave Therapy – method of therapeutic treatment for soft tissue injuries- works by passing shock waves into the tissues
  • Ultrasound – transmits high frequency sound waves into the tissues- has a micro massage effect and can reduce pain and inflammation
  • Footwear – wear comfortable trainers with good cushioning- avoid hard, flat soles
  • Cold therapy – ice massage or application of an ice pack for 10 minutes every hour for the first day- reduce to 3-5 times a day as symptoms ease
  • Medication – doctor may prescribe NSAID’s (Nonsteroidal anti-inflammatory drugs) e.g. ibuprofen in the early stages – always check with a doctor before taking any medication
  • Orthotics (shoe insoles) – for overpronated feet if feet roll in or overpronate it can cause strain on the foot should be worn at all times, not just when training
  • Surgery – rarely needed but is used when all other treatments haven’t helped. 

Exercises

The best way to treat plantar fasciitis is firstly to rest. If pain allows, some stretching exercises can help improve symptom’s and alleviate some pain.

  • Foot rolling – rolling the foot over a round object such as a ball, weights bar, rolling pin or can of soup can stretch the plantar fascia. Roll the foot repeatedly over the object, applying increasing downward pressure. You can also apply an object that can be cooled in the freezer (bottle or metal can) to apply cold therapy at the same time – 10 minutes per day until walking in the mornings is pain-free.
  • Calf stretches
  • Soleus stretch
  • Stretching on a step – stand with toes on step and heels off the back, lower heels down below the level of the step until a stretch is felt- hold for 15-20 seconds- further stretches calves and Achilles
  • Towel Scrunch – While sitting, place a towel on the floor with your foot on top of it. Try scrunching up a towel with your toes like you are trying to pick it up off the floor

No running!

Try to maintain fitness by swimming or cycling & you can begin to start walking again when there has been no pain for at least a week, slowly increase the distance and speed.

Prevention

  • Stretching – make sure to keep up the stretching of the lower body to prevent strain on the fascia
  • Footwear and Insoles – try to wear shoes that are supportive for the sole of the foot and absorb shock with cushioning
  • Ease into more intense exercise gradually – start by walking and gradually increase the amount as time goes on, then eventually ease back into running when pain is eliminated
  • Keep a healthy lifestyle and your weight under control as excess weight can increase the amount of stress on the foot

Hip Labrum Impingement

Hip labrum impingement may occur when the ball and socket joint is unable to move smoothly within the joint. It is more frequently known as Femoral acetabular impingement (FAI). The ball and socket joint are lined with a layer of cartilage that assists in cushioning the femur bone into the socket, which allows free movement no grinding or rubbing within the joint, resulting in no pain. It is also lined with a ridge of cartilage called the labrum, this will keep the femoral head in its place inside the hip socket enabling extra stability.

Anatomy

The hip is a synovial joint more so known as a ball and socket joint. The ball of the joint is the femoral head (the upper part of the femur) more commonly known as the thigh bone. Within the socket is the acetabulum which is surrounded by the pelvis, this makes up the joint.

The surface of the ball and socket is protected by articular cartilage. This enables the bones in and around the joint to glide easily when performing everyday movements such as walking. The cartilage also helps prevent any friction around the surface of the joint avoiding any sort of impingement. Another feature around the joint is the hip labrum. This fibrocartilage labrum is found within the acetabulum, this enables stability to the joint as the hip has a large range of motion in movements such as flexion, extension, abduction, adduction and rotation.

Causes

Common causes of hip impingement are triggered by the femoral head being covered too much by the hip socket. Repetitive grinding at this joint leads to cartilage and labral damage, causing the feeling of impingement.

Other factors that may affect an individual to suffer with labrum impingement could be that individual may have been born with a structurally abnormal ball and socket joint. Also, movements that involve repetition of the leg moving into excessive range of motion may aid in the injury of hip labrum impingement.

Symptoms

Some common Hip Labrum impingement symptoms are as follows:

  • Stiffness in the hip or groin region
  • Reduced flexibility
  • Pain when performing exercise such as running, jumping movements and walking
  • Groin area pain, especially after the hip is placed into flexion
  • Pain in surrounding areas such as lower back and the groin
  • Pain in the hip even when resting

Causes

When you go to visit your doctor/ health care professional about hip complications they may talk about two main types of hip impingement:

  • Cam impingement
  • Pincer impingement

Cam impingement “occurs because the ball-shaped end of the femur (femoral head) is not perfectly rounded. This interferes with the femoral head’s ability to move smoothly within the hip socket”. 

Pincer impingement “involves excessive coverage of the femoral head by the acetabulum. With hip flexion motion, the neck of the femur bone “bumps” or impinges on the rim of the deep socket. This results in cartilage and labral damage”.

Unfortunately, both these two types can happen at the same time, more so known as combined impingement. Which may cause an individual to experience a lot of pain and discomfort.

Diagnosis

The diagnosis of hip impingement will be given by a doctor based on how you describe your symptoms and after performing a physical examination of the hip.

A passive motion special test that is commonly used for hip impingement is called the FADIR (flexion, adduction and internal rotation). This is where the patient will lie in supine position (on their back) with the legs relaxed, then the doctor will carry out the test:

  1. The affected leg will be raised so that the knee and hip are at a 90-degree angle
  2. The doctor will support the knee and ankle and gently push the entire leg across the midline portion of the patient’s body moving into adduction 
  3. Then whilst keeping the knee in position, the doctor would move the foot and lower calf away from the body into abduction 

People who are suffering with hip impingement would feel pain during stage 3 of the test, however it may be hard to differentiate between each injury as someone not suffering with impingement may still feel pain, so it is always important to test the unfaceted side for a comparison.

Some imagining tests may also be performed such as: 

  • X-Ray – The X-Ray screening may show an irregular shape of the femur bone at the top of the thigh or too much bone around the rim of the hip socket, thus causing the impingement
  • MRI Scans – This may pick up wear and tear of the cartilage which runs along the hip labrum 
  • CT scans may also be performed

Treatment

Non-Surgical Management

Activity Modification

Advise the patient to avoid activities that exacerbate symptoms, such as deep squats, prolonged sitting, or high-impact sports.

Physical Therapy:

  • Stretching Exercises: Focus on stretching the hip flexors, hamstrings, and quadriceps to improve flexibility.
  • Strengthening Exercises: Emphasise strengthening the gluteal muscles, core, and hip stabilisers to support joint function and reduce stress on the hip.
  • Manual Therapy: Incorporate techniques such as joint mobilizations and soft tissue massage to reduce pain and improve range of motion. A deep tissue massage or sports massage may be a good option.

Medications:

  • NSAIDs: Prescribe non-steroidal anti-inflammatory drugs (NSAIDs) to reduce inflammation and alleviate pain.
  • Pain Relievers: Recommend acetaminophen for additional pain management if needed.

Injections:

  • Corticosteroid Injections: Administer corticosteroid injections into the hip joint to reduce inflammation and provide temporary pain relief.

Surgical Interventions

  • Indications for Surgery:Consider surgery if the patient experiences persistent pain and functional limitations despite exhaustive non-surgical treatments.
  • Arthroscopic Surgery:
    • Debridement: Remove bone spurs, damaged cartilage, or any other impinging structures to alleviate pain and improve hip function.
    • Labral Repair: Repair any torn labrum to restore joint stability and function.
  • Post-Surgical Rehabilitation:
    • Early Mobilisation: Initiate gentle range-of-motion exercises soon after surgery to prevent stiffness.
    • Progressive Strengthening: Gradually introduce strengthening exercises as healing progresses, focusing on restoring hip strength and stability.
    • Functional Training: Incorporate functional and sport-specific training to facilitate a return to normal activities and athletic pursuits.

Exercises

    • Hip flexor stretches 
    • Piriformis stretches 
    • Isometric hip raises in abduction 
    • Glute bridge
    • Single leg bridge
    • Straight leg raises (can also use resistance band)

Prevention

      • When exercising avoid placing full body weight onto your hip when the legs are positioned in excessive range of motion
      • Do daily stretches morning and night
      • Always rest when needed
      • Perform rehabilitation exercises given by a physiotherapist

If you feel you may have this condition / injury and would like it assessed by a professional our team of sports therapists and physiotherapists can help. Alternatively you can speak to your doctor. Either way please contact us for further information alternatively please make a booking directly online.

Winging Scapula

Scapula winging is a condition that affects the shoulder blades, the shoulder blade bones should usually lay flat against the back of the body. Scapula winging occurs when a person suffers with shoulder problems, causing the shoulder blades to stick out abnormally. The condition of scapula winging is quite rare but some individuals may suffer really bad from the condition and need effective treatment.

The main muscle involved in the cause of scapula winging is the serratus anterior. This muscle originates from the ribs 1-8 and attaches to the anterior surface of the scapula, which pulls the muscle against the ribcage. The long thoracic nerve is stimulated by the serratus anterior, when or if this nerve becomes injured the scapula will be affected as it jolts back adding more force onto the arm. Injuries to the shoulder may affect this nerve causing inflammation and added pressure onto the nerve, consequently triggering the onset of scapula winging.

Anatomy

The scapula more commonly known as the shoulder blade articulates with the humerus at the glenohumeral joint. The scapula has three surfaces: the costal, lateral and posterior.

Costal Surface

The anterior surface of the scapula faces the ribcage. This is where the subscapularis originates (one of the rotator cuff muscles). The coracoid process also originates here which lies underneath the clavicle allowing the pectoralis minor, coracobrachialis and bicep brachii to attach at this region.

Lateral Surface

The lateral surface faces the humerus bone. This is where the glenohumeral joint is situated, the main bones around this area are the glenoid fossa, supraglenoid tubercle and infraglenoid tubercle.

Posterior Surface

The posterior surface of the scapula is the site of the majority of the rotator cuff muscles. These include the Infraspinous fossa and the Supraspinous fossa.

All 3 surfaces of the scapula are important to know to locate the site of pain/ discomfort and understand what is causing the winging.

Symptoms

Scapula winging symptoms may differ as it depends where the location of the muscle or nerve damage is situated. Scapula winging is commonly presented by the shoulder blade sticking out from the back uncharacteristically. This may affect a person from even doing everyday things such as sitting down on a chair that has a hard back or even carrying bags that have straps.

Common symptoms of scapula winging are shown as:

  • Shoulder blades sticking out
  • Pain into the neck, shoulders and arms
  • Weakened muscles surrounding the shoulder blade
  • Tiredness and exhaustion when performing simple tasks
  • Pain and discomfort around the area
  • Inability to lift arms over the head
  • Sagging of the scapula

Causes

Scapula winging Is triggered by an individual sustaining a severe injury to any muscles that control the scapula. The serratus anterior is one of the main muscles that enables a person to lift the arm above shoulder level, therefore when this is injured it can cause many problems within the shoulder region.

The main causes of scapula winging are:

    • Nerve damage to the long thoracic nerve
    • Serratus anterior weakness
    • Weakness in the rotator cuff muscles (supraspinatus, infraspinatus, teres minor and subscapularis)
    • Compression on the dorsal scapula nerve (controls the Rhomboid muscles)
    • Weakness in the trapezius

Diagnosis

Firstly, for the diagnosis of scapula winging your doctor will look at the shoulder blades for any clear obvious signs of winging. Some patient’s scapula bone may be more visible than others and have distinct scapula winging. The doctor may also ask you to perform arm/ shoulder movements to examine the range of movement and stability at the joint.

One of the main tests that are used to aid in the diagnosis of scapula winging is the serratus anterior test. This is where the patient is asked to face a wall, standing about two feet from the wall and then push against the wall with flat palms at waist level. This test is carried out to identify if any damage is done to the thoracic nerve causing the scapula to wing.

Treatment

Treatment for winging scapula is dependent on which muscles or nerve is causing the issue. There are two types of treatment surgical and non-surgical.

Non-surgical treatment (Scapula Winging)

Surgical treatment (Scapula Winging)

One surgical treatment for scapula winging is nerve and muscle transfers. This is a process which involves moving a part of the nerve and muscle to a different portion of the body, this mainly focuses on the neck, shoulder, back and chest areas.

Static stabilization is another form of treatment used to prevent scapula winging, however there is a risk with this treatment that it may return. This procedure uses a sling to attach the scapula to the ribs to add extra stability to the shoulder blade.

Exercises

When performing these exercises aim to do 3 rounds of 15 sets for each exercise. Make sure they are slow and controlled so that it is solely focusing on strengthening the weakened muscles:

  • Scapula retraction
  • External Rotation
  • Horizontal Row
  • Standard press ups
  • Press up on knees (easier version)
  • Angel wings exercise

Prevention

Prevention for scapula winging may not always be possible, however there are procedures you can complete to reduce the risk:

  • Perform exercises to help with posture
  • Try and maintain correct posture positioning
  • Don’t carry anything to heavy on the shoulders and back
  • Do not lift heavy weights at the gym that could cause more damage to the shoulder
  • Strengthen the muscles in the neck and shoulders
  • Perform rehabilitation exercises given by a physiotherapist or doctor
  • Avoid constant repetitive shoulder/ arm movements
  • Rest when needed

If you want to discuss this concern with our specialists then please contact us or make a booking.

Lateral Ankle Sprain

A lateral ligament sprain within the ankle complex is one of the most frequently injured area within the body, being encountered at 83% in sports such as football and many athletic events.

The main mechanism of this occurring is when an individual will be placed in excessive inversion and internal rotation of the foot whilst the leg is forced into external rotation. The anterior talo-fibula ligament is thought to be the most susceptible within this Injury.

As soon as athlete or personnel have sustained a lateral ankle injury, mechanical limitations and neuromuscular control of the joint becomes effected, for example; ligamentous tear, reduced strength and loss of balance. Due to these influences effecting the ankle joint, it leads to a 73% chance of recurrent damage and injury within one year, especially if correct and safe rehabilitation is not carried out.

Anatomy

The ankle complex consists of three key joints; these are the talocrural, subtalar and distal tibiofibular. The talocrural joint is known as a hinge joint, movements such as plantarflexion, dorsiflexion, inversion and eversion can be experienced. However due to the fibula being protracted superiorly towards the lateral malleolus compared to the tibia with medial malleolus, eversion movements become restricted. Therefore, implying why inversion injuries may be more frequent in the lateral ankle complex.

Symptoms

A few symptoms of a lateral ankle sprain are as follows:

  • Tenderness and swelling
  • Bruising around the ankle joint
  • Tenderness on palpation around the joint
  • Unable to place full body weight onto the joint
  • Restricted range of movement
  • General pain and discomfort

Causes

A lateral ankle sprain may occur when the ankle joint is forced out of its natural position, causing an overstretch within the ligaments around the joint, therefore resulting in a possible partial tear or complete tear. Some causes may consist of wrongly falling on the ankle causing it to twist. Awkwardly landing from a jump or pivoting. Walking or running on an uneven surface resulting in loss of balance, or another person unintentionally landing onto the ankle during a sporting event.

Diagnosis

An injury to the ankle complex is classified by grades I to III to distinguish the severity of ligamentous damage and indisposition of the sprain. Lateral ankle injuries consist of two types of dysfunction, one being mechanical instability and the other being functional instability.

Both of these elements influence the acute injury, implying that once an individual has sustained a lateral ankle injury, a development of chronic ankle instability may transpire in the near future. The incidence of CAI may be present due to mechanical instability from where ligaments have not healed properly in the ankle region and joint laxity becomes effected.

Specific Tests can also be used to help with the diagnosis of a lateral ankle sprain:

  • The Anterior Draw test: Tests the ATFL
  • Talar tilt test: Tests the CFL
  • Posterior Draw test: Tests the PTFL

Treatment

Treatment for a lateral ankle sprain can vary as it will be dependant on the severity of the injury.

  • The first step that should be taken 24-72 hours after the injury is sustained would be to reduce the amount of swelling around the joint. An individual should follow the RICE model. Rest, Ice Compress and Elevate. This would include using a cold compress on the ankle and making sure no weight is placed onto the joint.
  • Soft tissue massage therapy may also be used to assist with the removal of oedema and aid in mild stretching. However, this technique should only be performed once swelling and bruising has reduced around the joint.
  • Once the ankle can handle some weight being placed onto it, rehabilitation exercises given by a Physiotherapist or doctor should be performed. This will help decrease stiffness around the joint, increase ankle strength and prevent any further complications such as long-term chronic ankle instability issues. These exercises may consist of proprioceptive, strengthening and early motion specific training exercises.

Exercises

Here is a list of exercises specifically for lateral ankle sprain injuries:

  • Single leg squat (use chair to hold onto if needed)
  • Single leg squat (use chair to hold onto if needed)
  • Single leg hip abduction
  • Wobble board balance on one leg
  • Standing single leg balance
  • Star excursion balance test

Prevention

To assist in the prevention of a lateral ankle sprain from reoccurring you should:

  • Ensure a full warm up and cool down is performed before and after taking part in Sporting events or exercise activities.
  • Wear the correct footwear that is made for your activity e.g., suitable running trainers when going for a run.
  • If suffered with an ankle sprain before then use protective equipment such as a brace or tape to add extra support to the ankle.
  • Perform some form of stability training and balance exercises regularly.
  • Use strengthening exercises for the ankle joint.
  • Make sure any rehabilitation strategies are executed and performed daily.

If you believe you have a lateral ankle sprain or at least want to find out, please contact a member of our physiotherapy or sports therapy team or make a booking online for an appointment.