The Power of Sports Massage: Performance and Recovery

The Power of Sports Massage: Enhancing Athletic Performance and Recovery

Whether you’re a professional athlete, a weekend warrior, or just someone who enjoys staying active, sports massage can be a game-changer in your fitness journey. This specialized form of massage therapy offers a wide range of benefits that go far beyond relaxation. In this article, we’ll explore the numerous advantages of sports massage and why it’s a crucial component of many athletes’ training and recovery routines.

1. Enhanced Athletic Performance

One of the most significant benefits of sports massage is its ability to boost athletic performance. By targeting specific muscle groups and alleviating tension, sports massage helps improve flexibility and range of motion. This increased flexibility allows athletes to move more freely and efficiently, which is especially vital in sports that require agility and quick movements. As a result, athletes can perform at their best and reduce the risk of injury.

2. Faster Recovery

The demands of intense physical activity can lead to muscle soreness and fatigue. Sports massage helps in the speedy recovery of fatigued muscles by increasing blood circulation and lymphatic flow. This enhanced circulation assists in the removal of waste products and reduces muscle soreness, allowing athletes to bounce back faster and maintain their training consistency.

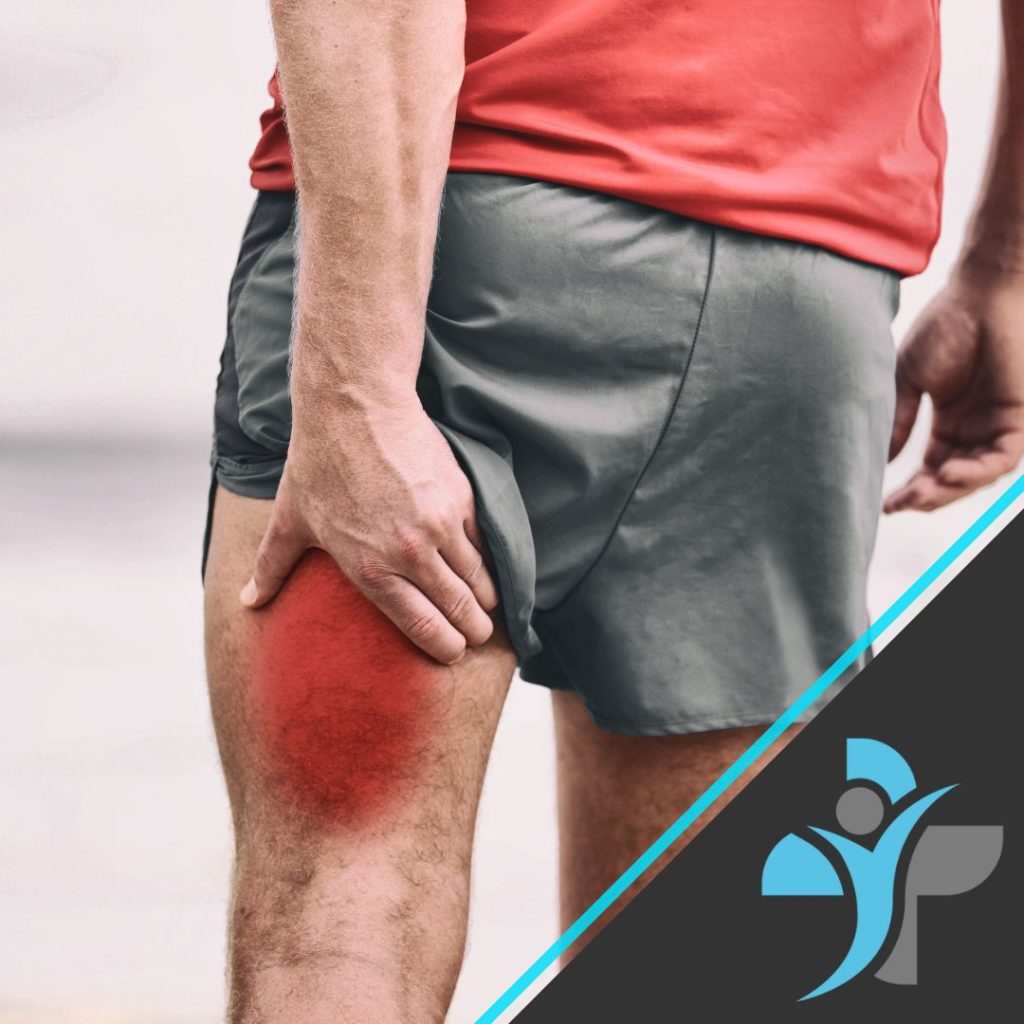
3. Injury Prevention

Preventing injuries is a top priority for athletes of all levels. Sports massage is an invaluable tool in injury prevention. By identifying and addressing muscle imbalances and areas of tension, massage therapists can reduce the risk of overuse injuries. They can also spot potential issues before they become more severe, helping athletes make necessary adjustments to their training routines.

4. Stress Reduction

Training and competition can be physically and mentally taxing. Sports massage offers a dual benefit by reducing both physical and mental stress. The soothing touch of massage can have a calming effect, helping athletes manage anxiety and stay focused on their goals.

5. Improved Posture and Body Awareness

A well-trained sports massage therapist can identify and address postural issues and imbalances that may be negatively impacting an athlete’s performance. By focusing on these areas, athletes can improve their posture and overall body awareness, which can lead to better movement and reduced strain on the body.

6. Targeted Rehabilitation

In cases where injuries have already occurred, sports massage can be an integral part of the rehabilitation process. Therapists can work alongside healthcare professionals to design a customized massage plan that aids in the healing and recovery of injured muscles and tissues.

7. Enhanced Immune System Function

Regular sports massage can also strengthen the immune system. The reduction of stress and the improvement in circulation and lymphatic flow can help the body better defend against illnesses, keeping athletes in peak condition.

8. Mental Clarity and Focus

Physical well-being and mental health are intricately connected. Sports massage contributes to mental clarity and focus, helping athletes stay motivated and determined to achieve their goals.

In conclusion, sports massage is not just a luxury; it’s a powerful tool that can significantly impact an athlete’s performance, recovery, and overall well-being. Whether you’re a professional athlete or someone who enjoys an active lifestyle, incorporating sports massage into your routine can help you achieve your fitness objectives and enjoy a more balanced, injury-free life. Consult with a qualified sports massage therapist to discover how this specialized therapy can benefit your athletic journey.

Hamstring Tear – Grade 1 and 2

Hamstring tear is an injury to a muscle at the back of the thigh, that is caused by a rapid extensive contraction or a violent stretch of the hamstring muscle group, causing high mechanical stress. They account for up to 29% of lower limb injuries in sport, due to the involvement of high speeds such as sprinting and football, however older age can increase the risk due to a loss of flexibility.

Some experiences of hamstring tears involve pain and tenderness, with limited range of motion, where others experience additional symptoms, such as swelling or a ‘popping’ or tearing sensation.

Grade 1 and 2 hamstring tears can heal within 3 to 8 weeks, however can take months to heal depending on the severity of symptoms.

Anatomy

The hamstrings are a group of three muscles: semitendinosus, semimembranosus, and bicep femoris (long head), that predominantly acts to flex and extend the knee.

Most hamstring tears occur in the central part of the muscle, or where the muscle fibres and tendon fibres intersect (MTJ). Tendons can tear away from a small bone fragment (ischial tuberosity), that typically occur at the proximal origin (top) of the hamstring, however, can occur from the distal origin (bottom), although less common.

Symptoms

  • Sudden and sharp pain
  • Tenderness
  • A “popping sensation” at the time of injury
  • Swelling and bruising (or discolouration) in the first few hours and days
  • Weakness and a loss of strength in the leg

Causes

Overload of the hamstrings typically the cause of hamstring tears, that occurs when the muscle is stretches beyond its limit or challenged with sudden load, typically during an eccentric contraction. Previous hamstring injuries can increase the risk of developing a tear, particularly if the body is compensating for another limb injury, or if there is muscle weakness and a lack of flexibility.

Diagnosis

Physical examinations are often performed, such as palpation to pinpoint the area of the hamstring tear, however precise location may be difficult to determine without medical imaging.

Other physical examinations involve performing various movement to evaluate strength and range of motion, to determine the severity or the classification (grade 1 to 3) according to the pain and physical limitations.

Neurological examination may be performed to assess the sciatic nerve, to check any entrapment or irritation in healing scar tissue. Imaging such X-rays and MRI may be advised in severe cases, to detect the location of the tear and the extent of the injury, however for grade 1 and 2 tears, only physical examination if typically required.

Treatment

There are 3 phases of treatment to aid recovery and function of the hamstring injury (grade 1 and 2):

Phase 1 (inflammation phase) -Exercises and excessive stretching should be avoided, to control pain and help scar tissue develop. At the phase, crutches may be required to reduce weight bearing and facilitate recovery.

Phase 2 (reparative phase) – Exercises are introduced to try and regain full range of motion. Progressions of more challenging exercises are included in this stage, however, should be performed tolerably and pain-free. Such exercises could include hamstring curls, hip extension (with added resistance band for progression), hamstring wall stretch, and single leg balance.

Phase 3 (remodelling phase) – specific to patients playing sport to allow return to sport, and their level of function. This phase is specific to the patient, where sport or activity-specific drills such as agility are advised to promote tissue remodelling, or drills involving quick movements such as plyometric exercises.

Exercises

  • Hamstring stretch: Sit on the floor with your legs straight out in front of you. Lean forward, reaching your hands towards your toes until you feel a stretch in your hamstrings. Hold for 30 seconds and repeat 3 times.
  • Hamstring curl: Stand facing a wall or chair, with your feet shoulder-width apart. Lift one foot towards your buttocks, keeping your knee bent. Lower your foot and repeat for 10-15 repetitions on each leg.
  • Deadlift: Stand with your feet shoulder-width apart, holding a barbell or dumbbells in front of your thighs. Hinge forward from your hips, keeping your back straight, and lower the weights towards the floor. Return to the starting position and repeat for 10-15 repetitions.
  • Romanian deadlift: Stand with your feet shoulder-width apart, holding a barbell or dumbbells in front of your thighs. Hinge forward from your hips, keeping your back straight, and lower the weights towards the floor. Keep your knees slightly bent and your hips back as you lower the weight. Return to the starting position and repeat for 10-15 repetitions.
  • Glute bridge: Lie on your back with your knees bent and your feet flat on the floor. Lift your hips towards the ceiling, squeezing your glutes at the top. Lower your hips and repeat for 10-15 repetitions. This exercise strengthens the glutes and hamstrings.


Prevention

  • Warm-up properly: Warming up properly before any physical activity is essential to prevent hamstring tears. It increases blood flow to the muscles, making them more pliable and less prone to injury.
  • Stretch regularly: Regular stretching, especially before and after exercise, can help prevent hamstring tears. Incorporate stretching exercises such as hamstring stretches, quadriceps stretches, and hip flexor stretches into your routine.
  • Build strength gradually: Gradually increasing the intensity and duration of your exercise routine can help prevent overloading the hamstrings. Focus on building strength in the hamstrings and surrounding muscles to improve overall stability and reduce your risk of injury.
  • Use proper technique: Using proper technique when performing exercises that involve the hamstrings, such as running and weightlifting, can help prevent hamstring tears. Avoid over-striding, sudden changes of direction, and landing heavily on your heels.
  • Wear appropriate footwear: Wearing appropriate footwear that provides adequate support can help prevent hamstring tears. Choose shoes that fit well and have good shock absorption.

Winging Scapula

Scapula winging is a condition that affects the shoulder blades, the shoulder blade bones should usually lay flat against the back of the body. Scapula winging occurs when a person suffers with shoulder problems, causing the shoulder blades to stick out abnormally. The condition of scapula winging is quite rare but some individuals may suffer really bad from the condition and need effective treatment.

The main muscle involved in the cause of scapula winging is the serratus anterior. This muscle originates from the ribs 1-8 and attaches to the anterior surface of the scapula, which pulls the muscle against the ribcage. The long thoracic nerve is stimulated by the serratus anterior, when or if this nerve becomes injured the scapula will be affected as it jolts back adding more force onto the arm. Injuries to the shoulder may affect this nerve causing inflammation and added pressure onto the nerve, consequently triggering the onset of scapula winging.

Anatomy

The scapula more commonly known as the shoulder blade articulates with the humerus at the glenohumeral joint. The scapula has three surfaces: the costal, lateral and posterior.

Costal Surface

The anterior surface of the scapula faces the ribcage. This is where the subscapularis originates (one of the rotator cuff muscles). The coracoid process also originates here which lies underneath the clavicle allowing the pectoralis minor, coracobrachialis and bicep brachii to attach at this region.

Lateral Surface

The lateral surface faces the humerus bone. This is where the glenohumeral joint is situated, the main bones around this area are the glenoid fossa, supraglenoid tubercle and infraglenoid tubercle.

Posterior Surface

The posterior surface of the scapula is the site of the majority of the rotator cuff muscles. These include the Infraspinous fossa and the Supraspinous fossa.

All 3 surfaces of the scapula are important to know to locate the site of pain/ discomfort and understand what is causing the winging.

Symptoms

Scapula winging symptoms may differ as it depends where the location of the muscle or nerve damage is situated. Scapula winging is commonly presented by the shoulder blade sticking out from the back uncharacteristically. This may affect a person from even doing everyday things such as sitting down on a chair that has a hard back or even carrying bags that have straps.

Common symptoms of scapula winging are shown as:

  • Shoulder blades sticking out
  • Pain into the neck, shoulders and arms
  • Weakened muscles surrounding the shoulder blade
  • Tiredness and exhaustion when performing simple tasks
  • Pain and discomfort around the area
  • Inability to lift arms over the head
  • Sagging of the scapula

Causes

Scapula winging Is triggered by an individual sustaining a severe injury to any muscles that control the scapula. The serratus anterior is one of the main muscles that enables a person to lift the arm above shoulder level, therefore when this is injured it can cause many problems within the shoulder region.

The main causes of scapula winging are:

    • Nerve damage to the long thoracic nerve
    • Serratus anterior weakness
    • Weakness in the rotator cuff muscles (supraspinatus, infraspinatus, teres minor and subscapularis)
    • Compression on the dorsal scapula nerve (controls the Rhomboid muscles)
    • Weakness in the trapezius

Diagnosis

Firstly, for the diagnosis of scapula winging your doctor will look at the shoulder blades for any clear obvious signs of winging. Some patient’s scapula bone may be more visible than others and have distinct scapula winging. The doctor may also ask you to perform arm/ shoulder movements to examine the range of movement and stability at the joint.

One of the main tests that are used to aid in the diagnosis of scapula winging is the serratus anterior test. This is where the patient is asked to face a wall, standing about two feet from the wall and then push against the wall with flat palms at waist level. This test is carried out to identify if any damage is done to the thoracic nerve causing the scapula to wing.

Treatment

Treatment for winging scapula is dependent on which muscles or nerve is causing the issue. There are two types of treatment surgical and non-surgical.

Non-surgical treatment (Scapula Winging)

Surgical treatment (Scapula Winging)

One surgical treatment for scapula winging is nerve and muscle transfers. This is a process which involves moving a part of the nerve and muscle to a different portion of the body, this mainly focuses on the neck, shoulder, back and chest areas.

Static stabilization is another form of treatment used to prevent scapula winging, however there is a risk with this treatment that it may return. This procedure uses a sling to attach the scapula to the ribs to add extra stability to the shoulder blade.

Exercises

When performing these exercises aim to do 3 rounds of 15 sets for each exercise. Make sure they are slow and controlled so that it is solely focusing on strengthening the weakened muscles:

  • Scapula retraction
  • External Rotation
  • Horizontal Row
  • Standard press ups
  • Press up on knees (easier version)
  • Angel wings exercise

Prevention

Prevention for scapula winging may not always be possible, however there are procedures you can complete to reduce the risk:

  • Perform exercises to help with posture
  • Try and maintain correct posture positioning
  • Don’t carry anything to heavy on the shoulders and back
  • Do not lift heavy weights at the gym that could cause more damage to the shoulder
  • Strengthen the muscles in the neck and shoulders
  • Perform rehabilitation exercises given by a physiotherapist or doctor
  • Avoid constant repetitive shoulder/ arm movements
  • Rest when needed

If you want to discuss this concern with our specialists then please contact us or make a booking.

Achilles Tendinitis

Achilles tendinitis may occur when overuse or to much strain is placed onto the tendon in the ankle region. The Achilles tendon is situated at the heel of the foot and connects the lower leg muscles of the calf to the heel bone of the ankle.

This pathology is mainly sustained by people who do a lot of running and high intensity exercises. Individuals who may have amplified the time and intensity of their runs, thus potentially leading to Achilles tendinitis. This injury could also occur with a lot of people who play sports such as tennis, netball or basketball, due to the fast pace and explosive movements, causing added pressure onto the ankle joint. If not treated correctly Achilles tendinitis could lead to further complications such as tendon tears or ruptures, which may require surgical repair.

Anatomy

The Achilles tendon, also known as the calcaneal tendon is situated at the back of the ankle. It is a hard band of fibrous tissue that attaches the calf muscles to the calcaneus (heel bone of the ankle). The Achilles tendon is also the largest and strongest in the body.

The two calf muscles; the gastrocnemius and soleus form into one band of tissue, which becomes the Achilles tendon at the lowest point of the calf. A bursa (small sac of fluid) covers the Achilles tendon to help support and protect the area.

When we flex the calf muscles the Achilles tendon pulls onto the heel. This enables us to perform day to day movements such as walking, running and standing on our tip toes. So, it is important to be safe when exercising ensuring the area is protected. The tendon has a limited amount of blood supply, so when we place the tendon under strain or tension it can be more susceptible to injury.

Causes

The main causes for Achilles tendinitis are from repetitive stress and tension placed onto the tendon, it is not usually related to one specific injury cause. Too much pressure on our bodies sometimes can be harmful and extra care should be taken whenever performing any sporting event or exercise activities. Here are some causes of Achilles tendinitis:

  • Tightness in calf muscles
  • Sudden increase in intensity of exercise
  • Longer duration of exercise
  • Unexpected bone growth

Symptoms

Common signs and symptoms of Achilles tendinitis are as follows:

  • Stiffness at the back of the ankle first thing when you wake up
  • Pain along the back of the tendon
  • Sharp pain along the back of the foot
  • Feels different e.g., thicker or tighter
  • Lack of range of movement
  • Severe pain after exercising
  • Swelling around the tendon

When exercising or walking and you feel or hear a loud popping noise, you should see your doctor immediately. As it is highly likely that you may have torn/ ruptured the tendon and will need medical attention.

Diagnosis

If you feel you are suffering with Achilles tendinitis, then it is best you go and see your doctor. The health care professional will palpate (feel) the area to determine the site of pain tenderness and swelling. The doctor will also complete a physical examination assessing flexibility, alignment, reflexes and range of movement around the effected area.

Special imaging test may also be used such as:

  • X-Rays
  • Magnetic Resonance imagining (MRI)
  • Ultrasound

Treatment

Now days there are many treatment theories available for Achilles tendinitis. These could be home treatments, anti-inflammatory medication or surgery.

  • Use the RICE acronym- Rest, Ice, Compress and Elevate the area of injury
  • Reduce physical activity until swelling and pain has reduced
  • Ice the area after exercising when pain has occurred
  • Anti- inflammatory drugs such as aspirin or ibuprofen (however this may just mask the pain)
  • See a sports therapist / physiotherapist for rehabilitation exercises and stretches
  • Wear protective equipment such as a brace to prevent heel movement
  • See a sports therapist and get a sports massage to ease the tension from the calves and plantar on the achilles tendon.

Exercises

Here are a few exercises which may aid in preventing Achilles tendinitis:

  • Calf raises on floor
  • Single leg calf raises
  • Calf raises on elevated bench
  • Lunge calf stretch
  • Resistance band calf stretch
  • Resisted plantarflexion
  • Walking on tip toes

Prevention

It may not be possible to full prevent Achilles tendinitis from occurring, however you can incorporate certain measures to reduce the risk factors:

  • Don’t over do exercise, make sure to have rest days and include full warm ups before exercising
  • Increase intensity levels of exercise progressively
  • Make sure you are wearing the correct footwear
  • Stretch daily, and even more importantly before and after exercising
  • Perform specific exercises to strengthen the calf muscles
  • Complete non weight bearing exercise such as swimming to reduce pressure onto the Achilles tendon.

If you think you may have achilles tendinitis or would like to find out if you have it, please contact a member of our team today or make a booking online.

Lateral Ankle Sprain

A lateral ligament sprain within the ankle complex is one of the most frequently injured area within the body, being encountered at 83% in sports such as football and many athletic events.

The main mechanism of this occurring is when an individual will be placed in excessive inversion and internal rotation of the foot whilst the leg is forced into external rotation. The anterior talo-fibula ligament is thought to be the most susceptible within this Injury.

As soon as athlete or personnel have sustained a lateral ankle injury, mechanical limitations and neuromuscular control of the joint becomes effected, for example; ligamentous tear, reduced strength and loss of balance. Due to these influences effecting the ankle joint, it leads to a 73% chance of recurrent damage and injury within one year, especially if correct and safe rehabilitation is not carried out.

Anatomy

The ankle complex consists of three key joints; these are the talocrural, subtalar and distal tibiofibular. The talocrural joint is known as a hinge joint, movements such as plantarflexion, dorsiflexion, inversion and eversion can be experienced. However due to the fibula being protracted superiorly towards the lateral malleolus compared to the tibia with medial malleolus, eversion movements become restricted. Therefore, implying why inversion injuries may be more frequent in the lateral ankle complex.

Symptoms

A few symptoms of a lateral ankle sprain are as follows:

  • Tenderness and swelling
  • Bruising around the ankle joint
  • Tenderness on palpation around the joint
  • Unable to place full body weight onto the joint
  • Restricted range of movement
  • General pain and discomfort

Causes

A lateral ankle sprain may occur when the ankle joint is forced out of its natural position, causing an overstretch within the ligaments around the joint, therefore resulting in a possible partial tear or complete tear. Some causes may consist of wrongly falling on the ankle causing it to twist. Awkwardly landing from a jump or pivoting. Walking or running on an uneven surface resulting in loss of balance, or another person unintentionally landing onto the ankle during a sporting event.

Diagnosis

An injury to the ankle complex is classified by grades I to III to distinguish the severity of ligamentous damage and indisposition of the sprain. Lateral ankle injuries consist of two types of dysfunction, one being mechanical instability and the other being functional instability.

Both of these elements influence the acute injury, implying that once an individual has sustained a lateral ankle injury, a development of chronic ankle instability may transpire in the near future. The incidence of CAI may be present due to mechanical instability from where ligaments have not healed properly in the ankle region and joint laxity becomes effected.

Specific Tests can also be used to help with the diagnosis of a lateral ankle sprain:

  • The Anterior Draw test: Tests the ATFL
  • Talar tilt test: Tests the CFL
  • Posterior Draw test: Tests the PTFL

Treatment

Treatment for a lateral ankle sprain can vary as it will be dependant on the severity of the injury.

  • The first step that should be taken 24-72 hours after the injury is sustained would be to reduce the amount of swelling around the joint. An individual should follow the RICE model. Rest, Ice Compress and Elevate. This would include using a cold compress on the ankle and making sure no weight is placed onto the joint.
  • Soft tissue massage therapy may also be used to assist with the removal of oedema and aid in mild stretching. However, this technique should only be performed once swelling and bruising has reduced around the joint.
  • Once the ankle can handle some weight being placed onto it, rehabilitation exercises given by a Physiotherapist or doctor should be performed. This will help decrease stiffness around the joint, increase ankle strength and prevent any further complications such as long-term chronic ankle instability issues. These exercises may consist of proprioceptive, strengthening and early motion specific training exercises.

Exercises

Here is a list of exercises specifically for lateral ankle sprain injuries:

  • Single leg squat (use chair to hold onto if needed)
  • Single leg squat (use chair to hold onto if needed)
  • Single leg hip abduction
  • Wobble board balance on one leg
  • Standing single leg balance
  • Star excursion balance test

Prevention

To assist in the prevention of a lateral ankle sprain from reoccurring you should:

  • Ensure a full warm up and cool down is performed before and after taking part in Sporting events or exercise activities.
  • Wear the correct footwear that is made for your activity e.g., suitable running trainers when going for a run.
  • If suffered with an ankle sprain before then use protective equipment such as a brace or tape to add extra support to the ankle.
  • Perform some form of stability training and balance exercises regularly.
  • Use strengthening exercises for the ankle joint.
  • Make sure any rehabilitation strategies are executed and performed daily.

If you believe you have a lateral ankle sprain or at least want to find out, please contact a member of our physiotherapy or sports therapy team or make a booking online for an appointment.


Carpal Tunnel Syndrome

Carpal Tunnel Syndrome (CTS) is a form of repetitive strain injury (RSI) which occurs as a result of damage to soft tissue structures (such as tendons) and in some cases bones of the wrist. Women are three times more likely to develop CTS than men, with approximately 3 to 6 percent of adults in the general population being affected. The condition is particularly common in people who use their hands repetitively, for example individuals working on computers or assembly lines. It is quite common to develop CTS in both hands, however symptoms tend to be worse in the side of the dominant hand.

Anatomy

The Carpal Tunnel is a narrow passage made up of ligaments and bones at the base of the hand. The Median Nerve and tendons responsible for bending your fingers passes through this passage. The median nerve is the receptor (provides feeling and feedback) for the palm side of your thumb, index, middle and part of your ring fingers.

CTS develops when swelling or damage to the structures of your wrist creates pressure on the median nerve. In addition to swelling due to soft tissue injury inflammation any swelling can develop as a result of medical conditions such as diabetes and arthritis. It can develop during pregnancy, in this case it will probably disappear after delivery.

Symptoms

Symptoms tend to develop gradually over time, beginning with slight discomfort and deteriorating progressively if left untreated. Initially symptoms usually appear in one or both hands during the night. As symptoms get worse, tingling may be felt during the day, especially with repetitive activities such as typing or using a mouse.

Common signs and symptoms of CTS include:

  • Pain, tingling and numbness in your hand, wrist and also your thumb and fingers.
  • Fingers may feel and/or appear swollen.
  • Hand weakness and difficulty gripping.
  • Partial loss of sensation in the affected thumb and fingers.
  • In severe cases, where left untreated, muscle wastage of the muscles at the base of the thumb can occur

Causes

CTS is often a combination of many factors which increase pressure on the median nerve rather than a problem with the nerve itself.

Recent studies indicate that CTS can be idiopathic (no identifiable direct cause) and that there may be a genetic component which increases the possibility that an individual develops CTS.

Activities considered high risk for CTS include any which involve repetitive and/or forceful use of one or both hands. In terms of sports this can include gymnastics, weightlifting (Olympic style in particular), racquet sports, cycling, rowing, baseball and golf. CTS also has a high incidence in individuals who regularly use vibrating hand tools (e.g. hammer drill).

Research has shown that certain conditions can increase the risk of developing CTS by causing fluid obstruction in the carpal tunnel. These include:

  • Pregnancy
  • Menopause
  • Obesity
  • Renal failure/haemodialysis
  • Hypothyroidism
  • Use of oral contraceptives
  • Congestive heart failure
  • Tumours
  • Autoimmune disease (eg, rheumatoid arthritis)
  • Wrist fracture/dislocation/deformity
  • Age – The majority of those affected are in range 40 to 60 years old, CTS usually only occurs in adults.

Diagnosis

To determine the cause of your CTS your doctor may conduct a physical examination of hands, arms, shoulders and neck. This can help them to decide if the condition is being caused by daily activities, an underlying disorder, or if it is a condition which presents similar symptoms to CTS. They will look for abnormalities in wrist tenderness, swelling, warmth and colour. Your doctor will probably conduct nerve testing to establish sensation in each thumb and finger any check for muscle atrophy (wasting).

You should inform your doctor of any history of fractures, arthritis or diabetes. It will also be helpful if you can provide them with an insight in to your daily activities and hobbies. They will discuss when your symptoms occur, improve or get worse.

They may ask you to have and X-Ray (to check for fractures or arthritis), an ultrasound (which can show if the median nerve is an abnormal size) or an MRI (to check the wrist anatomy).

Treatment

It is important not to ignore the symptoms of CTS. You can often treat it yourself, but it can take months to get better. Leaving the condition untreated can lengthen recovery time considerably.

REST – Where possible stop any activities which make your symptoms worse. Ask an occupational health advisor how you can modify your work station and/ or the activities that cause the pain.

ICE – Applying an ice pack for 5-10 minutes every 1-2 hours in the early stages of the pain/numbness may help reduce swelling and the pressure on the nerve.

SUPPORT – A wrist splint will help limit movement of your wrist which may help reduce the pain and risk of further swelling.

ELEVATION – Try and keep your wrist elevated to reduce the potential for swelling in your wrist. When you lie down this may mean resting your hand on pillows.

MASSAGE – A Sports Massage Therapist can help to relive the pressure in your carpal tunnel by encouraging the proper flow and drainage of fluids to and from your wrist. They may use Soft Tissue Release (STR) to lengthen and normalize the muscles from your wrist in some cases up to your neck. These muscles often become very tight when performing repetitive tasks, this tension can exacerbated the symptoms of CTS. If your therapist is trained in the use of Kinesiology taping they can also use this to create space in the carpal tunnel and support the soft tissue structures of your wrist. Because the problem may be caused, or made worse, by structures as far up as the neck, your therapist will be keen to address these problems as well as the ones at your wrist. Treating the cause of a problem is always more effective than treating the symptoms alone if the condition is to be resolved.

PHYSIOTHERAPY – Consider seeing a Physiotherapist if other treatment have not improved the symptoms.

CTS can be resolved without invasive procedures, following treatments such as those outlined above has been shown to reduce symptoms effectively if properly followed. It is important to be consistent with treatments for CTS as it may take a number of moths for the issue to resolve.

STEROID INJECTION – A medical professional may suggest a treatment involving a steroid injection to reduce inflammation.

SURGERY – In some cases surgery may be necessary but only after all non-surgical methods have been tried.

Exercises

The exercises shown in the video are designed to improve the flexibility and strength of your wrist and also stretch other muscles which may be putting pressure on the median nerve supplying your wrist. Make sure you are pain-free at all times and take care not to progress too quickly. Where possible stop any activities which make your symptoms worse. We have given suggested sets and repetitions, but everyone is different so your practitioner may give guidance that is more specific to you. It is important to perform the exercises correctly and at the frequency prescribed in order to reach a successful outcome.

Prevention

As CTS can be idiopathic it is not easy to prevent its occurrence. If possible avoid repetitive activities, when unavoidable take time to perform stretches and take regular breaks. Be aware of the first signs of symptoms developing, the earlier you start treatments the quicker it can be resolved.

The video above is not just to help rehabilitate the area it will also help in strengthening the area and again you should seek professional advice for this.

For more infomation or to make a booking with one of our team to help with your Carpal Tunnel Syndrome then please contact us today.

Golfers Elbow

Golfers elbow, clinically known as medial epicondylitis, is a condition that causes pain around the inside of the elbow joint. Often occurring after repetitive overuse of the forearm muscles and tendons used for moving the wrist and hand. Due to the constant strain of the wrist flexors on the insertion (attachment) point, inflammation or micro tears can occur.

Golfers elbow is a musculoskeletal condition usually seen in people aged 40 – 60, whose daily activities include repetitive wrist flexion. Despite generally being diagnosed in golfer’s, the injury can occur in several other professions or sporting activities.

The level of pain associated with the pathology can vary from a mild niggle to a severe ache. Fortunately there are many different treatments available to help, with more than 80% of people recovering with basic treatment.

Anatomy

Your elbow joint is a joint consisting of 3 bones. The first is in your upper arm and known as the Humerus. The other 2 bones are in your forearm and known as the Radius and Ulna bones. At the bottom of the humerus there are small bony prominences called epicondyles, where muscles within the forearm attach. The bony prominence located on the inside side of the elbow is called the medial epicondyle.

Muscles, ligaments, and tendons play a huge role in holding the elbow joint in position with strength but also flexibility to move.

Medial epicondylitis, or Golfer’s elbow, is a condition that affects the muscles and tendons of your forearm which attach onto the medial epicondyle. Research suggests that the flexor carpi radialis (FCR) and the pronator teres are the muscles most commonly affected.

Symptoms

The symptoms of golfer’s elbow usually develop over a long period of time. In the vast majority of cases the pain can be minor and more of a side note but can worsen over time. In most cases there is no specific mechanism of injury associated with the condition, it is usually due to repetitive overuse.

Common signs and symptoms of tennis elbow include:

  • Pain or burning on the inner part of your elbow
  • Weakness or pain when gripping, lifting or twisting objects
  • Pain when straightening the arm
  • Sometimes, pain at night

The symptoms are often worse when the forearm is being used in activities that can be as simple as pouring water into a cup, using a screw driver even shaking hands.

Causes

Overuse – As mentioned previously the underlying cause of Golfer’s elbow is overuse, causing the tendons of the muscles to become inflamed. Overtime this inflammation can lead to small tears within the tendon or muscle. Recent studies have shown that particular muscles when damaged can play a large part in the cause of Golfer’s Elbow. These muscles are located in the forearm, known as the flexor carpi radialis (FCR) and the pronator teres. When these muscles become injured or weak from overuse they can get very tight causing the muscles to shorten and pull on the tendons at the insertion point. This constant pull on the tendons is what then causes the inflammation and micro tears, resulting in pain.

Activities – Activities play a large part in the cause of Golfer’s Elbow (Medial epicondylitis). As you would expect Golf and other sports are a factor in the case of Golfer’s Elbow (hence the name) however, anyone can get it and it could even be down to work related overuse. Professionals such as Plumbers, Electricians, Carpenters, Factory Workers and Office Workers can get this condition, any work where grip and wrist strength is important.

Age – Anyone can get Golfer’s Elbow at any stage in their life depending on the activities they are doing and how they are using their arm. That said, the majority of cases we see can range between the ages of 40 and 60.

Diagnosis

When discussing this issue with your doctor, they will take into consideration a number if factors before making a diagnosis. These will include how your symptoms developed, your work and your hobbies etc.

The Doctor will discuss how and when the symptoms occur and are more severe and where on the arm the pain / symptoms are materialising. You will need to make sure you inform your doctor of any underlying health issues such as Arthritis (RA or Osteo), you you have injured your elbow in the past or any other medical issues that has a baring on your elbow.

There are a number of tests the doctors can and should perform during your examination such as asking you to try straighten your wrist and fingers with the doctor providing resistance with your arm straight.

Your doctor may recommend additional tests such as X-rays, Magnetic resonance imaging (MRI) scan or an Electromyography (EMG) – this will be to rule out nerve compression.

Golfers Elbow Treatment

Golfer’s elbow is a condition that will eventually get better over time, the length of time will be determined by how much you are using the arm in the way in which it was damaged in the first place. This may mean you will need to stay off certain activities indefinitely for a period of around 6-8 weeks. This could be shorter or longer depending on what state the injury is in.

However, there are treatments that can be used to speed up your recovery and ultimately help alleviate symptoms while you recover.

The first stage in any recover is

REST. It is important you rest your injured arm and stop doing the activity that’s caused the problem in the first instance.

ICE – Apply a cold compress to the injured arm, such as a bag of frozen peas or a sports ice pack / gel pack for a few minutes several times a day, this will reduce inflammation and ease the pain. Some people have great success with contrast bathing the area so for example, icing the joint itself (the bony / tendonous areas) and using heat on the muscular areas such as Forearm to relax the muscles and speed up recover.

PAINKILLERS – Taking Paracetamol to ease the pain and Non-Steroidal Anti-Inflammatory’s such as Ibuprofen to reduce the inflammation can help greatly whilst in recovery.

MASSAGE – Asking your personal Sports Massage Therapist / Massage Therapist to perform massage on the arm offering STR (Soft Tissue Release) as well as general massage to relax the area and stimulate blood flow can really help to speed up recovery and make you feel better.

PHYSIOTHERAPY – Physiotherapy should be considered with other conservative treatment options especially for more severe and persistent cases.

A good rehabilitation plan with those elements mentioned above has seen great results and improved recovery time as well as reduced inflammation, reduced pain and improvement to the range of movement in your arm.

SURGERY – may be an option if the issue persists and you have gone through a considered and tailored physiotherapy and massage program as a last resort to remove the damaged part of the tendon.

Exercises

There are a number of exercises you can perform to help in the Recovery of Golfers Elbow but also to help strengthen the area to help in the prevention moving forward. We have put together a video of some of the popular and most effective exercises / rehabilitation programs for this condition.

Prevention

It’s not easy to avoid getting golfers elbow as it can be very minor issues that cause it. However a dynamic and considered training program with a qualified strength and conditioning coach can really help. Further to this if your injury was caused through overuse then looking at reducing that particular activity until you have strengthen the area or looking at other ways to do the task in question will help.

The video above is not just to help rehabilitate the area it will also help in strengthening the area and again you should seek professional advice for this.

If you need any help with your rehabilitation of this particular issue our sports therapy specialits and physiotherapy specialists can help. Please contact us today.

Sciatica

Sciatica is a specific type of pain that radiates down the sciatic nerve. Which extends from your lower back, into the glutes and down the back of the legs, however sciatica generally takes place down one side of your body. The main cause of this happening is when a herniated disk, which is bone spur on the spine, compresses part of the nerve. This can cause numbness and pain in the legs and also inflammation. Generally this is not considered as anything serious and in most cases will goes away after a few weeks. On rare occasions a patient may need surgery but this is only a result if there is a significant weakness in the legs.

Anatomy

The sciatic nerve is the biggest and longest nerve in the human body, starting at the base of the spine, into the gluteal region and running down the back of the leg into the toes. The sciatic nerve is formed in the lower spine by the combination of motor and sensory fibers from spinal nerves L4 to S3. These spinal nerves belong to a larger group of nerves in the lower spine called the lumbosacral plexus.This long, thick, nerve then divides into the Peroneal and Tibial nerves which innervate different parts of the lower leg, foot and toes.

Symptoms

Pain that forms and travels through your legs up via your glute and into your back is the biggest and most common sign that you may have sciatica. Discomfort can be felt almost anywhere but this is more apparent through the nerve pathway through the areas stated above. Feelings such as burning pain can be felt through sciatica and this may be mild or severe. This can sometimes feel worse or be more painful when you sneeze or cough, additionally sitting for a long period of time can also aggravate this more. Another main symptom is numbness or tingling, this is commonly known as the phrase pins and needles. Muscles can also tighten and become weak in the leg and foot.

Causes

Sciatica occurs when an overgrown bone is on your vertebrae/ herniated disk in your spine and results in the sciatic nerve getting pinched. 

Some factors such as age can not prolong sciatica. There is sometimes nothing you can do to stop this. Obesity can also be a factor as this puts stress on your spine and the extra weight can cause spinal changes leading to sciatica. Your job can also play part as a factor, for example if you have a heavy lifting job or a job that requires you sitting down for long periods of times like driving long distances. Diabetes can also enhance sciatica because of the way your body uses blood sugar, and increases your risk of nerve damage. Finally not being active can also trigger sciatica.

Diagnosis

Sciatica is commonly diagnosed through the patients history taking and physical screening. By definition patients mentioning the radiating pain in the leg will spark the sciatica diagnosis. They may be asked to report the distribution of the pain and whether it radiates below the knee and drawings may be used to evaluate the distribution. Sciatica is characterised by radiating pain that follows a dermatomal pattern.Physical examination largely depends on neurological testing. The most applied investigation is the straight leg raising test.

Treatment

As stated before sciatica can go on its own so in most cases you won’t have to do an awful lot however some cases are worse than others and there are various things that you can do to help treat this. Easy things like making sure that you stretch regularly can help massively. This allows you to keep your muscles stretched out and start to stimulate the nervous system. 

A qualified soft tissue specialist providing Sports Massage can be really beneficial with techniques such as Soft Tissue Release and also Nueromuscular therapy. This also helps stretch the muscles and really stimulate the nervous system by increasing the blood flow especially in the legs.

It is also important if this persists to seek help from a qualified sports therapist or physiotherapist who can work with you on a rehabilitation plan that will involve exercises and stretches.

Exercises

Glute Max Stretch

Piriformis Stretch

Hamstring Stretch

Quadricep Stretch

Trigger Point the Piriformis Muscle

Please see some exercises and stretch examples in our video provided or alternatively contact one of our personal trainers who can talk you through these exercises.

Prevention

As Sciatic can be idiopathic it is not easy to prevent its occurrence. If possible avoid repetitive activities, when unavoidable take time to perform stretches and take regular breaks. Be aware of the first signs of symptoms developing, the earlier you start treatments the quicker it can be resolved.

If you are suffering with Sciatica

Hip flexor strengthening exercises

Hip Flexor Strengthening exercises

Stretching

Quadricep and hip flexor stretch (lying on side):

• Lie on one side, with your legs extended and stacked on top of each other
• Bend your top knee and bring your foot towards your glutes, keeping your bottom leg straight
• Hold this stretch for about 30 seconds and then switch sides

Hip flexors stretch (kneeling):

• Kneel on the floor with one foot in front of the other
• Shift your weight forward, keeping your back straight, until you feel a stretch in your hip flexors
• Hold this stretch for about 30 seconds and then switch sides

Hip flexors stretch (edge of table):

• Stand facing a table or similar surface
• Place one foot up on the table with your knee bent, while keeping the other foot on the floor
• Lean forward into the table until you feel a stretch in your hip flexors
• Hold this stretch for about 30 seconds and then switch sides

Seated butterfly:

• Sit on the floor with the soles of your feet touching each other
• Hold onto your feet and gently press your knees down towards the floor
• Hold this stretch for about 30 seconds

Bridge pose:

• Lie on your back with your knees bent and feet flat on the floor
• Lift your hips up towards the ceiling, keeping your feet and shoulders on the ground
• Hold this position for a few seconds and then slowly lower your hips back down to the floor.

Strengthening

Mountain climbers:

• Get into a push-up position with your hands placed under your shoulders
• Bring one knee up towards your chest while keeping your other leg extended behind you
• Switch legs quickly and repeat the motion, as if you are running in place
• Continue this motion for a specified number of repetitions or for a set amount of time

Lunges/Jump Lunges:

• Stand with your feet hip-width apart
• Step forward with one foot, lowering your body until both knees form a 90-degree angle
• Push back up to the starting position
• For jump lunges, add a jump as you switch legs and land with the opposite foot forward.

Straight leg raises:

• Lie on your back with your legs extended straight up towards the ceiling
• Keeping your legs straight, lower one leg down towards the floor until it is about 6 inches off the ground
• Raise your leg back up to the starting position and repeat with the other leg
• Continue this motion for a specified number of repetitions or for a set amount of time.

Hamstring bridge with banded hip flexion:

• Lie on your back with your knees bent and feet flat on the floor
• Place a resistance band around your thighs, just above your knees
• Push through your heels to lift your hips up towards the ceiling
• While holding this position, bring your knees towards your chest and then straighten them back out

Standing knee flexion with additional weight:

• Attach weight to one feet
• Focusing on holding your core strong, bend the knee to flexed position
• Continue this motion for a specified number of repetitions or for a set amount of time.