Hip Arthritis

Osteoarthritis / Arthritis is a degenerative disease where cartilage in the joints of the body get worn down eventually leaving the bone exposed causing endless amount of pain who anyone who suffers with it. Normal or “healthy” cartilage acts as support in the joint, which allows the bone to run smoothly, when damaged it becomes rough causing discomfort for many people.

Anatomy

The hip is a ball and socket joint and is one of the largest joints in the body.  The acetabulum is a part of the pelvis bone which allows the head of the femur to move freely in the socket.

Articular cartilage is a slippery substance which covers the joint, this helps protect and allows free unpainful movement in the ball and socket. Within the hip synovium can be found, this also helps lubricate the joint to allow the hip to function properly.

A person who is suffering with arthritis of the hip will have cartilage that is worn down and will not be producing enough fluid to allow the free movement.  This will lead to the bone rubbing against another bone creating discomfort and pain for an individual.

Hip Arthritis

Symptoms

  • Stiffness around the hip joint
  • Flare ups when walking, running or performing exercise
  • Pain when resting
  • Daily discomfort and ongoing pain in the joint
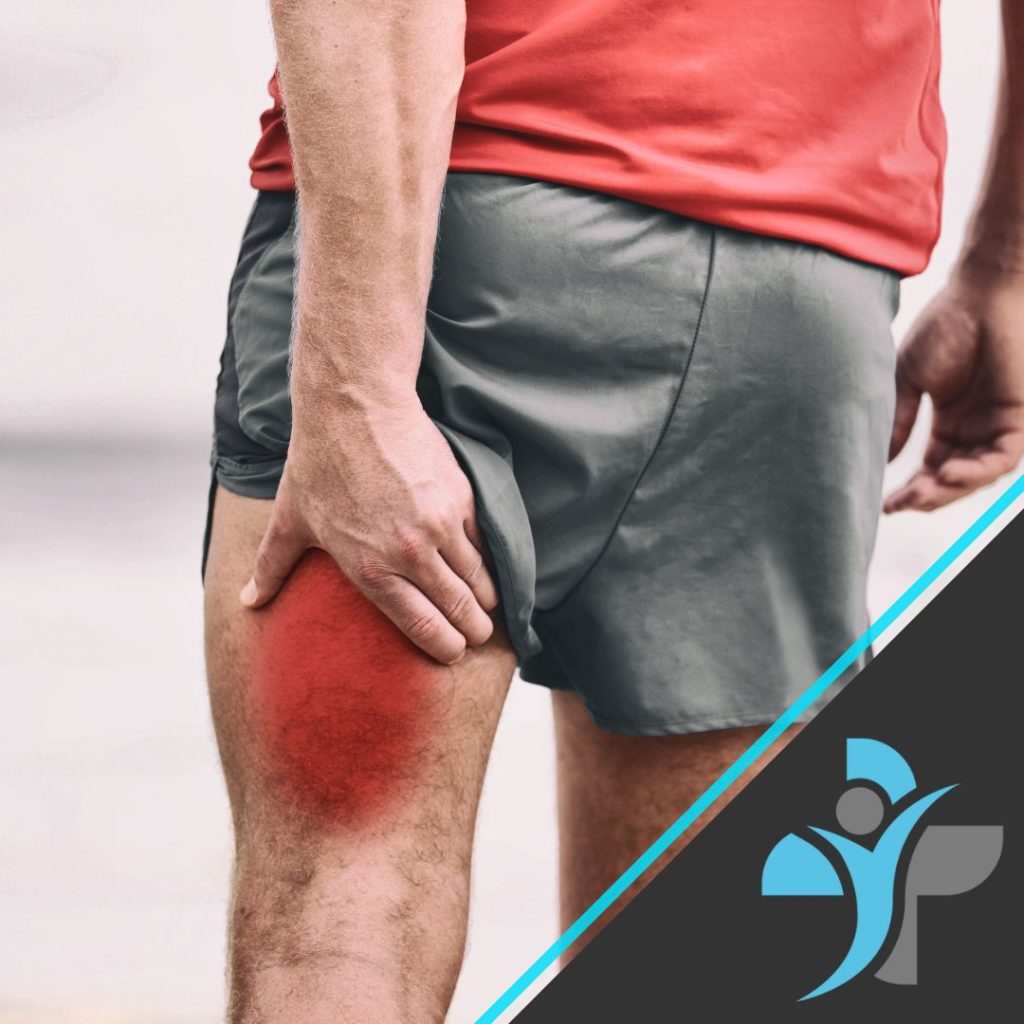
  • Stiffness in the groin, thigh and glutes when walking
  • Swelling around the hip
  • Grinding sensation in the joint when moving

Causes

  • Arthritis is more common as you get older
  • Family history is a common factor of hip arthritis
  • Individuals who are more overweight often show on going signs of arthritis
  • An injury to the hip and overuse may lead to the long-term effects of arthritis

Diagnosis

A full physical examination will be carried out by a doctor to determine the severity of your condition.

The doctor will carry out special tests specific for the hip to see what movements create the most pain and discomfort. The professional will need to know information such as when the pain first started to occur, how if effects your sleep and how it affects your day-to-day life and activities.

Special tests that are used for the diagnosis of hip arthritis are Trendelenburg test, supine (leg length test) and gait test.

Treatment

Non- surgical treatment that may be effective to help reduce the pain from arthritis are as follows:

  • One of the most successful forms of treatment is to have a deep tissue or sports massage. The reason for this is to lengthen the muscles, relax the muscles around the Hip such as the Glutes etc in order to alleviate some of the pressure in the joint.
  • Ensuring you rest enough when the hip joint is in any pain to reduce irritating the arthritis
  • Preform non-weight baring exercises such as swimming or a gentle cycle to reduce any added pressure onto the hip, this allows the hip to still have good range of motion and keeps the joint functioning
  • Make sure you are getting enough sleep and resting the hip
  • Try eating a healthier balanced diet, this will help with weight loss and reduce the amount of stress placed onto the joints
  • Use over the counter treatment such as deep freeze which may help reduce pain and swelling around the joint

If the pain is ongoing, it is worth speaking to your doctor who may suggest surgery as a last resort. This would mean you would undergo a hip replacement, where you would then follow an 8–12-week rehabilitation programme.

Exercises

These exercises should be performed in sets and reps, it is best to speak to a doctor or physiotherapist to find out the recommended amount suitable for you:

1. Seated Hip Flexion

  • Purpose: Improve hip flexor strength and maintain mobility in the hip joint, which can help alleviate stiffness and pain from arthritis.
  • How to Perform:
    • Sit on a chair with your feet flat on the floor.
    • Lift one knee toward your chest while keeping your back straight.
    • Lower your leg back down slowly and repeat with the other leg.

2. Sit to Stand

  • Purpose: Strengthen the muscles around the hip joint, particularly the quadriceps and glutes, to improve stability and reduce pain from hip arthritis.
  • How to Perform:
    • Sit on a chair with your feet hip-width apart and your hands on your thighs or crossed in front of you.
    • Lean slightly forward and push through your heels to stand up, using your leg muscles rather than your arms.
    • Slowly lower yourself back down to the chair and repeat.

3. Kneeling Hip Flexor Stretch

  • Purpose: Stretch the hip flexors, which can become tight and contribute to pain and reduced mobility in people with hip arthritis.
  • How to Perform:
    • Kneel on one knee with the other foot in front of you, forming a 90-degree angle at both knees.
    • Gently push your hips forward, stretching the front of your hip on the kneeling side.
    • Hold the stretch for 20-30 seconds, then switch legs and repeat.

4. Hip Abduction in Supine Position

  • Purpose: Strengthen the hip abductors, particularly the gluteus medius, which helps support and stabilise the hip joint.
  • How to Perform:
    • Lie on your back with your legs straight and slightly apart.
    • Keeping your leg straight, slowly slide one leg out to the side as far as comfortable, then return it to the starting position.
    • Repeat with the other leg.

5. Hip Extension

  • Purpose: Strengthen the glutes and hamstrings, improving hip stability and reducing pain from arthritis.
  • How to Perform:
    • Stand with your feet hip-width apart and hold onto a sturdy surface for balance.
    • Keeping your leg straight, slowly lift one leg backward, squeezing your glutes.
    • Lower the leg back down slowly and repeat with the other leg.

6. Glute Bridges

  • Purpose: Strengthen the glutes and lower back muscles, providing better support for the hip joint and reducing arthritis symptoms.
  • How to Perform:
    • Lie on your back with your knees bent and feet flat on the floor, hip-width apart.
    • Lift your hips toward the ceiling, squeezing your glutes and keeping your body in a straight line from shoulders to knees.
    • Hold for a few seconds at the top, then slowly lower your hips back down.

7. Body Weight Squat

    • Purpose: Strengthen the quadriceps, hamstrings, and glutes, which helps support and stabilise the hip joint.
    • How to Perform:
      • Stand with your feet shoulder-width apart.
      • Slowly lower your body by bending your knees and hips, keeping your back straight and your weight on your heels.
      • Lower as far as comfortable, then push through your heels to stand back up

Prevention

Prevention of hip arthritis involves making lifestyle changes and taking steps to reduce your risk of developing the condition. Here are some tips for preventing hip arthritis:

  • Maintain a healthy weight: Being overweight or obese puts additional stress on your hip joint, increasing your risk of developing arthritis.
  • Exercise regularly: Regular exercise can help improve your joint health, flexibility, and strength.
  • Avoid overuse injuries: Repeated stress on the hip joint can lead to arthritis over time.
  • Use proper technique: When performing physical activities or exercises, use proper technique
  • Wear appropriate footwear

Avoid sitting for long periods: Sitting for extended periods can increase the pressure on your hips.

Manage other health conditions: Certain health conditions, such as diabetes or rheumatoid arthritis, can increase your risk of developing hip arthritis. Work with your healthcare provider to manage these conditions and reduce your risk.

By making these lifestyle changes and taking steps to reduce your risk of developing hip arthritis, you can help protect your hip joints and maintain good overall health.

If you are suffering with Hip Arthritis and would like to Make a booking or speak with one of our Phsyiotherapists or Sports Therapists then please contact us today.

Hamstring Tear – Grade 1 and 2

Hamstring tear is an injury to a muscle at the back of the thigh, that is caused by a rapid extensive contraction or a violent stretch of the hamstring muscle group, causing high mechanical stress. They account for up to 29% of lower limb injuries in sport, due to the involvement of high speeds such as sprinting and football, however older age can increase the risk due to a loss of flexibility.

Some experiences of hamstring tears involve pain and tenderness, with limited range of motion, where others experience additional symptoms, such as swelling or a ‘popping’ or tearing sensation.

Grade 1 and 2 hamstring tears can heal within 3 to 8 weeks, however can take months to heal depending on the severity of symptoms.

Hamstring Tear – Grade 1 and 2

Anatomy

The hamstrings are a group of three muscles: semitendinosus, semimembranosus, and bicep femoris (long head), that predominantly acts to flex and extend the knee.

Most hamstring tears occur in the central part of the muscle, or where the muscle fibres and tendon fibres intersect (MTJ). Tendons can tear away from a small bone fragment (ischial tuberosity), that typically occur at the proximal origin (top) of the hamstring, however, can occur from the distal origin (bottom), although less common.

Hamstring Tear - Grade 1 and 2

Symptoms

  • Sudden and sharp pain
  • Tenderness
  • A “popping sensation” at the time of injury
  • Swelling and bruising (or discolouration) in the first few hours and days
  • Weakness and a loss of strength in the leg

Causes

Overload of the hamstrings typically the cause of hamstring tears, that occurs when the muscle is stretches beyond its limit or challenged with sudden load, typically during an eccentric contraction. Previous hamstring injuries can increase the risk of developing a tear, particularly if the body is compensating for another limb injury, or if there is muscle weakness and a lack of flexibility.

Diagnosis

Physical examinations are often performed, such as palpation to pinpoint the area of the hamstring tear, however precise location may be difficult to determine without medical imaging.

Other physical examinations involve performing various movement to evaluate strength and range of motion, to determine the severity or the classification (grade 1 to 3) according to the pain and physical limitations.

Neurological examination may be performed to assess the sciatic nerve, to check any entrapment or irritation in healing scar tissue. Imaging such X-rays and MRI may be advised in severe cases, to detect the location of the tear and the extent of the injury, however for grade 1 and 2 tears, only physical examination if typically required.

Treatment

There are 3 phases of treatment to aid recovery and function of the hamstring injury (grade 1 and 2):

Phase 1 (inflammation phase) -Exercises and excessive stretching should be avoided, to control pain and help scar tissue develop. At the phase, crutches may be required to reduce weight bearing and facilitate recovery. You may want to use cold and heat therapy (contrast bathe) as well as gentle massage.

Phase 2 (reparative phase) – Exercises are introduced to try and regain full range of motion. Progressions of more challenging exercises are included in this stage, however, should be performed tolerably and pain-free. Such exercises could include hamstring curls, hip extension (with added resistance band for progression), hamstring wall stretch, and single leg balance.

Phase 3 (remodelling phase) – specific to patients playing sport to allow return to sport, and their level of function. This phase is specific to the patient, where sport or activity-specific drills such as agility are advised to promote tissue remodelling, or drills involving quick movements such as plyometric exercises.

Exercises

  • Hamstring stretch: Sit on the floor with your legs straight out in front of you. Lean forward, reaching your hands towards your toes until you feel a stretch in your hamstrings. Hold for 30 seconds and repeat 3 times.
  • Hamstring curl: Stand facing a wall or chair, with your feet shoulder-width apart. Lift one foot towards your buttocks, keeping your knee bent. Lower your foot and repeat for 10-15 repetitions on each leg.
  • Deadlift: Stand with your feet shoulder-width apart, holding a barbell or dumbbells in front of your thighs. Hinge forward from your hips, keeping your back straight, and lower the weights towards the floor. Return to the starting position and repeat for 10-15 repetitions.
  • Romanian deadlift: Stand with your feet shoulder-width apart, holding a barbell or dumbbells in front of your thighs. Hinge forward from your hips, keeping your back straight, and lower the weights towards the floor. Keep your knees slightly bent and your hips back as you lower the weight. Return to the starting position and repeat for 10-15 repetitions.
  • Glute bridge: Lie on your back with your knees bent and your feet flat on the floor. Lift your hips towards the ceiling, squeezing your glutes at the top. Lower your hips and repeat for 10-15 repetitions. This exercise strengthens the glutes and hamstrings.

Prevention

  • Warm-up properly: Warming up properly before any physical activity is essential to prevent hamstring tears. It increases blood flow to the muscles, making them more pliable and less prone to injury.
  • Stretch regularly: Regular stretching, especially before and after exercise, can help prevent hamstring tears. Incorporate stretching exercises such as hamstring stretches, quadriceps stretches, and hip flexor stretches into your routine.
  • Build strength gradually: Gradually increasing the intensity and duration of your exercise routine can help prevent overloading the hamstrings. Focus on building strength in the hamstrings and surrounding muscles to improve overall stability and reduce your risk of injury.
  • Use proper technique: Using proper technique when performing exercises that involve the hamstrings, such as running and weightlifting, can help prevent hamstring tears. Avoid over-striding, sudden changes of direction, and landing heavily on your heels.
  • Wear appropriate footwear: Wearing appropriate footwear that provides adequate support can help prevent hamstring tears. Choose shoes that fit well and have good shock absorption.

If you are interested in finding out how livewell and our team of physiotherapists, sports therapists and massage therapists can help you in your recovery from your Hamstring tear, then please either book a consultation or contact us today.

Calf Tear

Calf Tear

Calf tears are a relatively common injury that occurs in people of all ages and activity levels. It is estimated that up to 18% of all sports injuries involve the calf muscles, making it one of the most injured areas in the lower leg.

Calf tears are more common in people who engage in sports or activities that involve repetitive or explosive movements of the lower legs, such as running, jumping, or dancing. These activities can put a significant amount of stress on the calf muscles, making them more susceptible to injury.

Calf tears are classified into three grades based on the severity of the injury. Grade 1 tears involve minor damage to the muscle fibers, while grade 2 tears involve a partial tear of the muscle. Grade 3 tears are the most severe and involve a complete tear of the muscle.

While calf tears can be painful and limit mobility, they generally heal well with proper treatment and rehabilitation. It is important to seek medical attention if you suspect a calf tear or if you experience persistent pain or swelling in the calf muscle. With proper care, most people are able to return to their normal activities within a few weeks to a few months.

Anatomy

The calf muscle is made up of two muscles: the gastrocnemius and the soleus. The gastrocnemius is the larger of the two muscles and is responsible for flexing the ankle and knee. The soleus is located underneath the gastrocnemius and is responsible for plantar flexion of the ankle.


Symptoms

The symptoms of a calf tear can vary depending on the severity of the injury. The following are some common symptoms of calf tears grade 1 and 2:

  • Mild to moderate pain in the calf muscle
  • Swelling and tenderness in the affected area
  • Difficulty in walking or standing on the affected leg
  • Stiffness and limited range of motion in the ankle and foot
  • A popping or snapping sensation at the time of injury

Causes

Calf tears can be caused by a sudden or forceful movement, such as pushing off or jumping, which puts excessive strain on the calf muscle. The following are some common causes of calf tears:

  • Overuse or repetitive strain on the calf muscle
  • Sudden movements or changes in direction
  • Inadequate warm-up before exercise or sports activities
  • Poor flexibility or strength in the calf muscles
  • Foot and ankle problems, such as flat feet or ankle instability

Diagnosis

A calf tear can be diagnosed through a physical examination by a healthcare professional. Imaging tests, such as an ultrasound or MRI, may be ordered to confirm the diagnosis and to determine the extent of the injury.

Treatment

The treatment for a calf tear grade 1 or 2 (related article) generally includes the following:

  • Rest: The affected leg should be rested to allow the muscle to heal.
  • Ice: Applying ice to the affected area can help reduce pain and swelling.
  • Compression: Compression with a bandage or brace can help reduce swelling and provide support to the affected area.
  • Elevation: Elevating the affected leg can help reduce swelling and promote healing.
  • Pain medication: Over-the-counter pain medications may be used to help manage pain.

Exercises

After the initial healing period, the following exercises may be prescribed to help improve range of motion and strength in the calf muscle:

  • Calf stretches: Stretching the calf muscle can help improve flexibility and reduce the risk of future injury. Stand facing a wall with your hands on the wall and your feet shoulder-width apart. Step back with your affected leg, keeping your heel on the ground. Lean forward into the wall until you feel a stretch in your calf. Hold for 30 seconds and repeat on the other leg.
  • Calf raises: This exercise helps strengthen the calf muscle. Stand with your feet shoulder-width apart and rise up on your toes, lifting your heels off the ground. Hold for a few seconds and then lower your heels back down. Repeat for 10-15 repetitions.
  • Single leg balance: This exercise helps improve balance and stability in the affected leg. Stand on your affected leg and lift your other leg off the ground. Hold for 30 seconds and repeat on the other leg.

Prevention

To prevent calf tears, it is important to take the following measures:

  • Warm-up: Always warm up before engaging in exercise or sports activities. A proper warm-up can help prepare your muscles for activity and reduce the risk of injury.
  • Stretching: Regular stretching of the calf muscles can help improve flexibility and reduce the risk of tears. Incorporate calf stretches into your warm-up routine and stretch after exercise.
  • Proper footwear: Choose appropriate footwear that provides adequate support and cushioning for your feet and ankles. Replace worn-out shoes regularly.
  • Gradual progression: If you are new to a sport or activity, start slowly and gradually increase the intensity and duration of your workouts. This can help prevent overuse injuries.
  • Strengthening exercises: Regularly performing exercises that strengthen the calf muscles can help prevent tears. Examples include calf raises and resistance band exercises.

By following these preventive measures, you can significantly reduce your risk of calf tears and other lower leg injuries. If you do experience pain or discomfort in your calf muscles, it is important to seek medical attention before continuing with exercise or sports activities.

Wrist Sprain

Wrist sprains occur most often in the athletic or occupational setting but can occur from overuse at work, home, or in any activity of daily living. Injury to the scapholunate ligament is the most common injury and most common form of carpal instability; hyperextension of the wrist is a common mechanism for this type of injury.

An acute wrist sprain is an injury to a ligament often due to an acute traumatic event or chronic repetitive movements. Wrist sprains occur when a ligament is pathologically stretched, twisted, lacerated, or torn.

The inciting event typically involves the sudden application of a force, excessive load-bearing, or twisting injury mechanisms. In most cases, this results from a fall on the outstretched hand with varying structures injured depending on the position of the hand and wrist at the time of injury. In severe cases, there can be a large tear in multiple wrist ligament(s), which can cause instability of the wrist and may require surgical interventions.

Anatomy

A wrist sprain occurs when the ligaments in the wrist are stretched or torn. The ligaments are the bands of tissue that connect the bones in the wrist and help to stabilize the joint.

There are several different ligaments in the wrist, including the radial collateral ligament, ulnar collateral ligament, and the intercarpal ligaments. A sprain can occur in any of these ligaments, but the most common type of wrist sprain is a sprained ligament on the thumb side of the wrist.

Symptoms

The symptoms of a wrist sprain can vary depending on the severity of the injury, but common signs include:

  • Pain: This is the most common symptom of a wrist sprain. The pain is typically located in the affected area and can be sharp, dull, or aching. Pain may be felt when gripping or moving the wrist.
  • Swelling: The wrist may become swollen due to inflammation of the ligaments and the accumulation of fluid in the joint.
  • Bruising: Bruising or discoloration of the skin can occur due to bleeding from the damaged blood vessels.
  • Stiffness: The wrist may feel stiff and difficult to move due to the injury. This is a common symptom of a more severe sprain.
  • Weakness: The affected wrist may feel weak and unstable due to the damage to the ligaments.
  • Instability: The joint may feel loose or unstable, and the wrist may move in an abnormal way.
  • Deformity: In severe cases, there may be a visible deformity of the joint, such as a bend or twist in the wrist.
  • Snapping or popping sensation: Some people may experience a snapping or popping sensation in the joint when they move their wrist.

Causes

There are several common causes of wrist sprains, including:

  • Trauma: A fall or impact to the wrist can cause a sprain. For example, landing on an outstretched hand during a fall can cause a sprain.
  • Overuse: Repetitive motions, such as those involved in sports like gymnastics or tennis, can cause small tears in the ligaments over time, leading to a sprain.
  • Osteoarthritis: This is a degenerative condition that can weaken the ligaments and make them more susceptible to injury.
  • Rheumatoid arthritis: this is an autoimmune disorder that causes inflammation in the joints, leading to damage in the ligaments.
  • Fractures: A fracture can also cause a sprain by damaging the ligaments.
  • Hypermobility: People with hypermobility or ligament laxity are more prone to sprains, as their ligaments are more flexible and can stretch more easily.

Diagnosis

Diagnosis of a wrist sprain typically begins with a physical examination by a healthcare provider. The provider will examine the affected joint for signs of pain, swelling, and tenderness.

They may also move the joint in different directions to assess for range of motion and stability. Imaging tests may also be used to diagnose a wrist sprain. X-rays can help to rule out any fractures and can also show if there is any damage to the bones in the joint. An MRI or CT scan can also be used to confirm a diagnosis and to determine the severity of the injury.

Once a diagnosis of a wrist sprain is made, treatment can begin.

Treatment

Treatment options for a wrist sprain may include:

  • Rest: The affected joint should be rested to allow the ligaments to heal.
  • Ice: Applying ice to the affected area can help to reduce inflammation and pain.
  • Compression: A compression bandage or brace may be used to help reduce swelling and support the joint.
  • Elevation: Keeping the affected joint elevated above the level of the heart can help to reduce swelling.
  • Over-the-counter pain medication: Non-steroidal anti-inflammatory drugs (NSAIDs) such as ibuprofen can help to reduce pain and inflammation.
  • Physical therapy: Physical therapy and rehabilitation exercises may be prescribed to restore range of motion and strength in the joint.
  • Surgery: In severe cases, surgery may be necessary to repair or reconstruct the damaged ligaments.

Recovery time for a wrist sprain can vary depending on the severity of the injury. Mild sprains may take several weeks to heal, while more severe sprains can take several months to heal. It is important to follow the treatment plan and any physical therapy or exercise recommendations provided by a healthcare provider to help ensure a full recovery.

It’s important to note that even after a wrist sprain has healed, it may be more susceptible to future injuries. Therefore, it is important to take steps to prevent future sprains, such as wearing a brace or splint during activities that put the wrist at risk, and doing exercises to strengthen the wrist.

Exercises

The best exercises for a wrist sprain include:

  • Wrist flexion and extension: Gently bend and straighten your wrist to improve range of motion.
  • Wrist pronation and supination: Rotate your wrist to improve strength and flexibility.
  • Wrist circles: Rotate your wrist in both clockwise and counter clockwise directions to improve flexibility.
  • Wrist stretches: Stretch your wrist in different directions to improve flexibility.
  • Grip strengthened exercises: Squeeze a ball or use a hand gripper to improve grip strength.

It is important to consult a doctor or physical therapist before starting any exercise program, particularly if you have a severe sprain. They can advise you on the appropriate exercises for your specific injury and guide you through the healing process.


Prevention

  • Warm up before any physical activity: Take the time to stretch your wrists and hands before participating in any physical activity that requires repetitive wrist motions, such as playing sports or typing.
  • Use proper technique: When participating in sports or other activities that require wrist movements, make sure to use proper technique to avoid putting excessive strain on your wrists.
  • Strengthen your wrists: Regularly performing exercises that strengthen the muscles and tendons in your wrists can help prevent injury. Simple exercises such as wrist curls with light weights or resistance bands can be effective.
  • Take breaks and alternate activities: If you perform repetitive motions with your wrists for extended periods, take frequent breaks to rest and stretch your wrists. Additionally, alternating activities that use different muscle groups can help prevent overuse injuries.
  • Wear appropriate gear: Wearing supportive wrist braces or splints during physical activity can help prevent wrist sprains by providing extra support and stability to the joint.
  • Maintain good posture: Poor posture can put extra strain on your wrists, so make sure to maintain good posture while performing any activity that requires wrist movements.

Flat Feet

Flat Feet

Flat Foot medically known as Pes planus, is a medical condition in which the medial longitudinal arch (MLA) which runs the length of the foot is flattened out or lowered. Flatfoot may affect one or both feet, and not only increases the load acting on the foot structure, but also interferes with the normal foot function. Therefore, individuals with flat feet experience discomfort while standing for long periods of time and exhibit a distinctive flat-footed gait.

Typical flatfoot symptoms include a tenderness of the plantar fascia, a laxity of the ligaments, a rapid tiring of the foot, pain under stress, and instability of the medial side foot structure. Over time, the mechanical overloading resulting from the flattened MLA is transferred to proximal areas such as the knees, hips and lower back, and thus flatfoot is recognized as a contributory factor in a wide variety of medical conditions, including lower limb musculoskeletal pathologies such as plantar fasciitis Achilles tendonitis, and patello-femoral joint pain.

Flatfoot deformities are commonly treated using some form of orthotic device. Such devices are designed to provide stability and to realign the foot arch, and have a demonstrable success in alleviating patients’ symptoms.

Anatomy

Flatfeet are an anatomical alteration which can occur in one foot or in both feet. The most common structural difference in flatfeet is found to be rear-foot varus which in turn causes excessive pronation of the foot.

In addition, deepened navicular cup, widened talus articular surface, proximally faced talus, and higher positioned navicular articular surface can be seen. These alterations cause the MLA to collapse resulting in a loss of arch height. When this loss of arch height is observable in both non-weight bearing and weight bearing positions, it is termed as rigid flatfeet.

Contrarily, when a normal MLA height is present in non-weight bearing condition and collapses with weight bearing is identified as flexible flatfeet.

Symptoms

The most identifiable symptoms and characteristics of flat feet are the decrease or lack of arches in the feet (especially when weight bearing) and pain / fatigue along the inner side of the feet and arches.

Some issues caused by flat feet include:

  • Inflammation of soft tissue
  • Foot, arch, and leg fatigue
  • Heel, foot, and ankle pain
  • Knee, hip, and lower back pain
  • Rolled-in ankles
  • Abnormal walking patterns
  • Shin splints
  • Bunions
  • Hammertoe
  • Arthritis
  • Plantar fasciitis
  • Posterior tibial tendon dysfunction (PTTD)

Causes

Flatfeet is not unusual in infants and toddlers, because the foot’s arch hasn’t yet developed. Most people’s arches develop throughout childhood, but some people never develop arches. People without arches may or may not have problems.

Some children have flexible flatfeet, often called flexible flatfoot, in which the arch is visible when the child is sitting or standing on tiptoes but disappears when the child stands. Most children outgrow flexible flatfeet without problems.

People without flatfeet can also develop the condition. Arches can collapse abruptly after an injury. Or the collapse can happen over years of wear and tear. Over time, the tendon that runs along the inside of the ankle and helps support the arch can get weakened or tear. As the severity increases, arthritis may develop in the foot.

Diagnosis

The observation of the feet mechanics from the front and back and also toes stand. The strength test in the ankles and locate the main area of pain. The wear pattern on the shoes also may reveal information about the feet.

Imaging tests that can be helpful in diagnosing the cause of foot pain may include:

  • X-rays. A simple X-ray uses a small amount of radiation to produce images of the bones and joints in the feet. It’s particularly useful in evaluating alignment and detecting arthritis.
  • CT scan. This test takes X-rays of the foot from different angles and provides much more detail than a standard X-ray.
  • Ultrasound may be used when a tendon injury is suspected. Ultrasound uses sound waves to produce detailed images of soft tissues within the body.
  • Using radio waves and a strong magnet, MRIs provide excellent detail of both bone and soft tissues.

Treatment

Many people with flat feet don’t have significant problems or need treatment. However, if foot pain, stiffness or other issues occur health provider might recommend nonsurgical treatments. Rarely, people need surgery to fix rigid flat feet or problems with bones or tendons.

Treatments include:

  • Nonsteroidal anti-inflammatory drugs (NSAIDs), rest and ice to ease inflammation and pain.
  • Physical therapies to stretch and strengthen tight tendons and muscles, improving flexibility and mobility.
  • Supportive devices like foot orthotics, foot or leg braces and custom-made shoes.

Exercises

  1. Toes elevations: Start by standing with your feet shoulder-width apart and flat on the ground. Slowly raise your toes off the ground as high as you can, while keeping your heels on the ground. Hold this position for a few seconds, then lower your toes back down to the ground. Repeat for several repetitions.
  2. Toes scrunches: Begin by sitting in a chair with your feet flat on the ground. Scrunch your toes together as tightly as you can, then relax them. Repeat for several repetitions.
  3. Double/Single leg raises: Start by lying on your back with your legs straight out in front of you. For double leg raises, raise both legs off the ground at the same time, keeping them straight. For single leg raises, raise one leg off the ground while keeping the other leg straight and on the ground. Hold the raised leg in the air for a few seconds, then lower it back down to the ground. Repeat for several repetitions on each leg.
  4. Standing single leg balance: Stand on one foot with your knee slightly bent. Hold this position for as long as you can, up to 30 seconds, then switch to the other foot. For a greater challenge, close your eyes or stand on a pillow or unstable surface.
  5. Toes walks: Start by standing with your feet flat on the ground. Slowly walk forward on your toes, keeping your heels off the ground. Walk for a few steps, then lower your heels back down to the ground. Repeat for several repetitions.
  6. Heel walks: Begin by standing with your feet flat on the ground. Slowly walk forward on your heels, keeping your toes off the ground. Walk for a few steps, then lower your toes back down to the ground. Repeat for several repetitions.
  7. Calf muscle stretch: Start by standing facing a wall with your hands on the wall at shoulder height. Take one step back with one foot, keeping your heel on the ground. Bend your front knee, keeping your back leg straight, until you feel a stretch in your calf muscle. Hold this position for 15-30 seconds, then switch legs and repeat.

Prevention

Flat feet can be hereditary and hereditary causes can’t be prevented. However, to prevent the condition from worsening and causing excessive pain by taking precautions such as wearing shoes that fit well and providing the necessary foot support.

How we can help

Massage therapy and sports therapy can be effective treatment options for individuals with flat feet. These therapies aim to address imbalances in the muscles and connective tissues of the feet and lower legs, which can contribute to the development of flat feet or exacerbate existing flat foot symptoms.

Massage therapy involves the manual manipulation of soft tissues, such as muscles and fascia, to promote relaxation, improve circulation, and reduce tension and pain. A massage therapist can work on the feet and lower legs to release tension in muscles and connective tissues that may be contributing to flat foot symptoms. They may also use techniques such as trigger point therapy or myofascial release to address specific areas of tension or pain.

Sports therapy, on the other hand, focuses on improving strength, flexibility, and function in the muscles and joints of the feet and lower legs. A sports therapist can develop a personalized exercise program to help strengthen weak muscles, improve flexibility, and correct imbalances in the feet and legs that may be contributing to flat feet. They may also use techniques such as kinesiology taping or orthotics to support the arch of the foot and promote proper alignment.

Together, massage therapy and sports therapy can help alleviate pain, improve function, and prevent further complications associated with flat feet. If you are experiencing flat foot symptoms or have been diagnosed with flat feet, consult with a qualified massage therapist or sports therapist to develop a personalized treatment plan that can help you achieve optimal foot health.

Rotator Cuff Injury

Rotator Cuff Injury

In the rotator cuff region there are four muscles, tendons and ligaments, surrounding the shoulder which provide added stability to the shoulder joint. This structure helps to keep the bone securely placed into the socket. Injury to the rotator cuffs can cause an ache like pain in the shoulder. This may lead to a feeling of muscle weakness and inability to lift the shoulder above the head.

Rotator cuff injuries are most commonly presented in people regularly exposed to overhead movements, such as painters, carpenters and builders. Individuals who suffer from this injury can usually manage their symptoms, through sports massage and specific exercises focusing on the rotator cuff muscle region. However, if not treated correctly, further injury to the area may occur such as a complete tear, which may result in surgery.

Anatomy

The rotator cuffs are made up by four muscles, these are the supraspinatus, infraspinatus, teres minor and subscapularis. These muscles aid in keeping the upper arm and shoulder into the socket with stability. They also each allow specific movements at the shoulder joint. The group of four muscles all originate within the shoulder blade, but all insert into different portions of the upper arm bone.

Supraspinatus: This muscle originates at the supraspinous fossa; the muscle belly passes laterally over the acromion process and inserts into the greater tubercle of the humerus bone. This muscle allows the first 15 degree’s movement of abduction, after this the deltoid and trapezius muscles will then allow further motion.

Infraspinatus: The origin of the infraspinatus is the infraspinatus fossa, and the insertion is also the greater tubercle of the humerus. The motion created by this muscle is lateral rotation of the shoulder, moving the arm away from the centreline of the body.

Teres Minor: A small narrow muscle on the back of the shoulder blade which sits underneath the infraspinatus. The origin is the lateral boarder of the scapula. This muscle contributes to external rotation of the arm of the body.

Subscapularis: This rotator cuff is the strongest and largest out of the three listed above. This muscle originates at the subscapularis fossa and inserts into the lesser tubercle of the humerus. The subscapularis allows greater motion at the shoulder and mainly aids in allowing medial rotation of the arm.

Symptoms

Common symptoms of possible rotator cuff injury:

  • Dull ache
  • Difficulty lifting arm over head
  • Weakness around the shoulder
  • Disturbed sleep
  • The constant need to use self-myofascial techniques

Causes

There are a few common risk factors of why rotator injury may occur:

  1. Family History: There may be family history of rotator cuff injuries which may make certain family members more prone to having the injury than others.
  2. The type of job you do: Individuals who work in construction or manual labour who have repetitive overhead movement of the shoulder could damage the rotator cuff overtime.
  3. Age: As you get older joints and muscles become weaker, meaning you may be more prone to injury overtime.

Diagnosis

To diagnose a rotator cuff injury a physical examination will be carried out by a doctor or a physiotherapist. Firstly, they may ask about your day-to-day activities which may determine the seriousness of the injury. The doctor will test the range of movement at the shoulder by getting you to perform movements such as flexion, extension, abduction, adduction and medial and lateral rotation. This will allow the doctor to determine if it is actually rotator cuff injury or whether it may be other conditions such as impingement or tendinitis.

Imaging scans such as X-Ray’s may also be used to see if there is any abnormal bone growth within the joint, which may be causing the pain.

Treatment

Treatments for rotator cuff injuries can be non-surgical or surgical. Tendinitis may occur over time from the repetitive strain placed around the joint, so it is important to treat the affected area.

  • Apply a cold compress/ ice to the effected area to reduce swelling
  • Heat packs can be used to reduce swelling
  • Resting the affected area
  • Inflammatory medication such as ibuprofen and naproxen
  • Reduce the amount of repetitive movement to the joint
  • Don’t lift the arm overhead

Exercises

  • Doorway Stretch: Stand facing an open doorway with your hands placed on the door frame at shoulder height. Step one foot forward and gently lean forward, feeling a stretch in your chest and shoulders. Hold the stretch for 20-30 seconds before releasing. Repeat the stretch with the other foot forward.
  • External rotation with weight: Hold a dumbbell or weight plate in one hand and stand with your elbow bent at 90 degrees and your upper arm against your side. Rotate your arm outwards, away from your body, while keeping your elbow tucked in. Slowly return to the starting position and repeat for 8-12 repetitions before switching arms.
  • High to low rows with resistance band: Attach a resistance band to a sturdy anchor point at chest height. Stand facing the anchor point with the band in both hands. Pull the band towards your chest, keeping your elbows tucked in and your shoulders down. Slowly release the band back to the starting position and repeat for 8-12 repetitions.
  • Reverse fly’s: Hold a dumbbell or weight plate in each hand and bend forward at the waist, keeping your back straight. Extend your arms out to the sides, keeping them parallel to the floor. Squeeze your shoulder blades together as you bring the weights up towards your body, then slowly release back to the starting position. Repeat for 8-12 repetitions.
  • Lawn mower pull with resistance band: Attach a resistance band to a low anchor point and stand with your side to the anchor point. Hold the band in one hand with your arm extended towards the anchor point. Pull the band towards your chest, keeping your elbow bent and your shoulder blade squeezed down and back. Slowly release back to the starting position and repeat for 8-12 repetitions before switching sides.
  • Isometric internal rotation: Stand with your elbow bent at 90 degrees and your upper arm against your side. Place a rolled up towel or small ball between your elbow and your side. Squeeze your elbow into your side, holding the contraction for 10-15 seconds before releasing. Repeat for 2-3 sets of 10-15 repetitions.
  • Isometric external rotation: Stand with your elbow bent at 90 degrees and your upper arm against your side. Hold a resistance band in both hands, with one end of the band anchored to a sturdy object. Rotate your arm outwards, away from your body, while keeping your elbow tucked in. Hold the contraction for 10-15 seconds before releasing. Repeat for 2-3 sets of 10-15 repetitions before switching arms.

Prevention

  1. Strengthen the rotator cuff muscles: Exercises that target the rotator cuff muscles can help to build strength and stability in the shoulder joint. Examples of such exercises include external rotation with a resistance band, internal rotation with a light weight, and scapular stabilization exercises.
  2. Warm up properly: Before engaging in any activities that involve overhead arm movements, it is important to warm up the shoulder joint with dynamic stretches and exercises. This can help to increase blood flow to the muscles and reduce the risk of injury.
  3. Practice good technique: When engaging in activities that involve overhead arm movements, it is important to use proper technique and form. This can help to reduce stress on the rotator cuff muscles and tendons and minimize the risk of injury.
  4. Use proper equipment: Using equipment that is properly fitted and designed for the activity can help to reduce the risk of rotator cuff injuries. For example, using a tennis racket with a larger grip or wearing properly fitting swim goggles can reduce the stress on the shoulder joint.
  5. Rest and recover: Resting and allowing the shoulder joint to recover after activity is important for preventing overuse injuries. Avoiding overuse and engaging in activities that strengthen and stretch the shoulder muscles can help to prevent rotator cuff injuries.

How We Can Help

We understand that dealing with a rotator cuff injury can be a challenging and painful experience. As healthcare professionals, we are dedicated to helping you manage your symptoms and regain full function of your shoulder joint.

We are pleased to offer you our services in massage therapy and sports therapy, both of which can be highly effective in treating rotator cuff injuries. Our trained and experienced therapists can work with you to reduce pain and inflammation, improve range of motion, correct muscle imbalances, and provide advice on injury prevention.

Our services are tailored to meet your individual needs and goals, and we will work with you to develop a treatment plan that is effective and manageable for you. We believe in a collaborative approach to healthcare, and we may work in conjunction with other healthcare professionals, such as physiotherapists or orthopedic specialists, to ensure that you receive the best possible care.

We take pride in providing our patients with high-quality, compassionate care, and we are committed to helping you achieve optimal health and well-being. If you are interested in learning more about our physiotherapy and sports therapy services, or if you would like to schedule an appointment, please do not hesitate to contact us.

Glenohumeral Joint Instability

Glenohumeral Joint Instability

The glenohumeral joint (GH) is a ball and socket joint that includes a complex, dynamic, articulation between the proximal humerus (“ball”) and the glenoid (“socket”) of the scapula. The static and dynamic stabilizing structures allow for extreme range of motion in multiple planes, that predisposes the joint to instability events. Shoulder instability often occurs when the capsule (lining of the shoulder joint), ligaments, or labrum becomes stretched, torn, or detached from the glenoid, commonly after shoulder trauma or repetitive motion. A genetic condition can also cause looseness and weakness in the joint. Exercise programs that aim to strengthen the rotator cuff and scapular muscles are often the primary treatment for instability, where full range of motion usually returns after 6-8 weeks.

Anatomy

Structurally a ball and socket joint, that involves the humeral head with the glenoid cavity of the scapula, and it represents the major articulation of the shoulder girdle. The joint capsule and ligaments provide a passive restraint to keep the humeral head compressed against the glenoid. As one of the most mobile joints, the GH joint has stabilising elements, that are divided into static (capsule-labro-ligamentous complex) and active (rotator cuffs and bicep tendons).

Symptoms

The symptoms of Glenohumeral Joint Instability include but may not be limited to:

  • Pain, tenderness, swelling, and/or bruising.
  • A loose feeling, or hearing a “pop” in the shoulder joint.
  • Repeated shoulder dislocation.
  • Tingling or burning sensation in the lower arm and hand.
  • Localised numbness of the skin overlying the deltoid muscle.
  • Decreased range of arm/shoulder motion.

Causes

Glenohumeral joint instability can occur following a traumatic accident such as a fall or collision. It can also occur without significant trauma or injury, which is often genetic from those with hypermobility or connective tissue problems, or from a development of laxity in tissues of the shoulder joint. Other causes can be from repetitive motions, particularly from throwing sports, causing the shoulder to stretch over time, where normal muscle control is lost.

Diagnosis

A physical examination can confirm the impression obtained from the history and help to determine if the shoulder is loose or unstable. Radiographs or imaging, such as X-rays, MRI, or a CT scan can help to provide confirmation of traumatic glenohumeral instability present from the damaged bones, cartilage, and rotator cuff. Mobility may be restricted for two weeks, followed by physical therapy to strengthen the muscles that stabilises the shoulder.

Classifications

Polar Type I (structural instability) – typically present with a positive apprehension (anterior direction) associated with rotator cuff weakness. Posture, single leg balance, and scapula control are often disturbed. Can begin to exhibit signs of poor scapula control, abnormal muscle activation, and altered trunk stability and balance, when moving towards type II and III poles.

Polar Type II – (atraumatic instability) – present with positive anterior apprehension test, with increased laxity and excessive external rotations, and muscular balance

Polar Type III – (neurological dysfunctional or muscle patterning) – shows abnormal activation of large muscles and suppression of the rotator cuff. Mostly occurs with a history of easy shoulder dislocation.

Treatment

Treatment usually begins with physical therapy, designed to strengthen the shoulder, and maintain the joint in position.

Restricting activity that includes overhead motion may be advised to reduce symptoms. Full range of motion usually returns after 6-8 weeks.

If less invasive treatments don’t work, and in severe instances, open surgery is often necessary, where an incision is made over the shoulder and the muscles are moved to access the joint capsule, ligaments, and labrum. After surgery, full recovery often takes 4-6 months, and in some cases up to 12 months. At this stage some deep tissue massage and scar tissue work may be necesary!

Exercises

1. Shoulder Flexion (Lying Down)

  • Purpose: Improve shoulder mobility and strengthen the muscles involved in flexion, which helps stabilise the shoulder joint.
  • How to Perform:
    • Lie on your back with your arm by your side.
    • Hold a light weight or no weight at all, and slowly raise your arm straight up toward the ceiling, keeping your elbow straight.
    • Lower your arm back down slowly, and repeat.

2. Shoulder Blade Squeeze

  • Purpose: Strengthen the scapular stabilisers, particularly the muscles that control the shoulder blades, to improve overall shoulder stability.
  • How to Perform:
    • Sit or stand with your arms at your sides.
    • Squeeze your shoulder blades together, as if trying to pinch something between them.
    • Hold the squeeze for a few seconds, then relax.
    • Repeat for the desired number of repetitions.

3. Resisted Rows

  • Purpose: Strengthen the upper back and shoulder muscles, particularly the rhomboids and middle trapezius, to enhance shoulder stability.
  • How to Perform:
    • Anchor a resistance band at chest height.
    • Hold the band with both hands, and step back to create tension.
    • Pull the band toward your chest, keeping your elbows close to your sides and squeezing your shoulder blades together.
    • Slowly return to the starting position and repeat.

4. Internal Rotator Strengthening Exercise

  • Purpose: Strengthen the internal rotators (subscapularis) of the shoulder, which are crucial for maintaining joint stability.
  • How to Perform:
    • Attach a resistance band to a sturdy object at waist height.
    • Stand with your affected side closest to the band, holding the other end with your elbow bent at 90 degrees.
    • Keep your elbow close to your body, and rotate your arm inward against the resistance.
    • Slowly return to the starting position and repeat.

5. External Rotator Strengthening Exercise (with Arm Abducted 90°)

  • Purpose: Target the external rotators (infraspinatus and teres minor) to improve the stability and control of the shoulder joint.
  • How to Perform:
    • Stand or sit with your arm raised to shoulder height and your elbow bent at 90 degrees, holding a resistance band or light weight.
    • Rotate your forearm upward, keeping your elbow in line with your shoulder.
    • Slowly lower your arm back down to the starting position and repeat.

6. Standing Row (with Resistance Band)

  • Purpose: Strengthen the muscles that stabilise the shoulder, particularly the upper back and shoulder blade muscles, to improve shoulder joint stability.
  • How to Perform:
    • Anchor a resistance band at chest height.
    • Stand facing the band, holding it with both hands.
    • Pull the band toward your chest, leading with your elbows and squeezing your shoulder blades together.
    • Slowly return to the starting position and repeat.


Prevention

Glenohumeral Joint Instability (GJI) is a condition that occurs when the ball and socket joint of the shoulder become dislocated or partially dislocated due to trauma or other underlying conditions. GJI can result in pain, weakness, and limited range of motion, making it difficult for people to perform their daily activities. In severe cases, surgery may be required to treat the condition. However, prevention is always better than cure, and there are several steps that individuals can take to prevent GJI.

Strengthen the Rotator Cuff Muscles:
The rotator cuff muscles are a group of muscles that attach the shoulder blade to the humerus bone and help stabilize the shoulder joint. Strengthening these muscles can help prevent GJI. Exercises that target the rotator cuff muscles include external and internal rotation exercises, scapular stabilization exercises, and shoulder blade squeezes.

Improve Shoulder Mobility:
Limited shoulder mobility can lead to increased stress on the shoulder joint, which can increase the risk of GJI. Stretching exercises that target the shoulder joint, such as shoulder circles and shoulder flexion stretches, can help improve shoulder mobility and prevent GJI.

Maintain Good Posture:
Poor posture can contribute to shoulder instability and increase the risk of GJI. Individuals should aim to maintain good posture by keeping their shoulders back and down and their chest open. Practicing good posture can help improve shoulder alignment and stability.

Avoid Overuse Injuries:
Overuse injuries can cause wear and tear on the shoulder joint, leading to increased instability and a higher risk of GJI. To avoid overuse injuries, individuals should practice proper form and technique when performing exercises and avoid repetitive overhead movements.

Wear Proper Protective Gear:
Individuals who participate in contact sports or activities that involve the risk of shoulder injuries should wear proper protective gear, such as shoulder pads or braces. Protective gear can help absorb the impact of a fall or collision, reducing the risk of GJI.

In conclusion, preventing GJI requires a combination of strengthening exercises, stretching, good posture, injury prevention strategies, and protective gear. By following these steps, individuals can help reduce the risk of GJI and maintain a healthy and stable shoulder joint. It is important to consult with a healthcare professional before starting any new exercise program or if experiencing any shoulder pain or discomfort. If you are unsure what to do, please contact us and one of our Personal Trainers, Physiotherapists or Sports Therapists can help.

Calf Tear Grade 1 and 2

Calf Tear Grade 1 and 2

Calf tears are a relatively common injury that occurs in people of all ages and activity levels. It is estimated that up to 18% of all sports injuries involve the calf muscles, making it one of the most injured areas in the lower leg.

Calf tears are more common in people who engage in sports or activities that involve repetitive or explosive movements of the lower legs, such as running, jumping, or dancing. These activities can put a significant amount of stress on the calf muscles, making them more susceptible to injury.

Calf tears are classified into three grades based on the severity of the injury. Grade 1 tears involve minor damage to the muscle fibers, while grade 2 tears involve a partial tear of the muscle. Grade 3 tears are the most severe and involve a complete tear of the muscle.

While calf tears can be painful and limit mobility, they generally heal well with proper treatment and rehabilitation. It is important to seek medical attention if you suspect a calf tear or if you experience persistent pain or swelling in the calf muscle. With proper care, most people are able to return to their normal activities within a few weeks to a few months.

Anatomy

The calf muscle, also known as the triceps surae, is located in the lower leg and is responsible for plantar flexion of the foot. It is composed of two muscles: the gastrocnemius and the soleus.

The gastrocnemius muscle is the larger of the two muscles and has two heads, the medial and lateral heads. The medial head originates from the medial condyle of the femur, while the lateral head originates from the lateral condyle of the femur. Both heads merge together to form the Achilles tendon, which inserts into the calcaneus bone. The gastrocnemius muscle is responsible for powerful contractions during activities such as running and jumping.

The soleus muscle is located beneath the gastrocnemius and is smaller in size. It originates from the tibia and fibula bones and also inserts into the Achilles tendon. The soleus muscle is responsible for maintaining posture and stability during standing and walking.

The calf muscle is supplied by the posterior tibial artery and is innervated by the tibial nerve. It is also surrounded by a layer of fascia known as the deep fascia of the leg.

In addition to the gastrocnemius and soleus muscles, the calf also contains other important structures such as the Achilles tendon, which connects the calf muscles to the heel bone, and the tibialis posterior tendon, which helps to stabilize the foot and ankle. The calf muscle plays an important role in lower limb movement and stability, making it crucial for activities of daily living and athletic performance.

Symptoms

The symptoms of a calf tear can vary depending on the severity of the injury. The following are some common symptoms of calf tears grade 1 and 2:

  • Mild to moderate pain in the calf muscle
  • Swelling and tenderness in the affected area
  • Difficulty in walking or standing on the affected leg
  • Stiffness and limited range of motion in the ankle and foot
  • A popping or snapping sensation at the time of injury

Causes

Calf tears can be caused by a sudden or forceful movement, such as pushing off or jumping, which puts excessive strain on the calf muscle. The following are some common causes of calf tears:

    • Overuse or repetitive strain on the calf muscle
    • Sudden movements or changes in direction
    • Inadequate warm-up before exercise or sports activities
    • Poor flexibility or strength in the calf muscles
    • Foot and ankle problems, such as flat feet or ankle instability

Diagnosis

To diagnose a calf tear, a healthcare provider will perform a physical examination of the calf muscle and take a detailed medical history. They may also order imaging tests such as an MRI or ultrasound to confirm the diagnosis and assess the severity of the tear.

During the physical exam, the healthcare provider will assess the calf muscle for tenderness, swelling, and discoloration. They may also check for a palpable gap in the muscle or a bulge in the muscle belly, which may indicate a partial or complete tear. The healthcare provider may also test the range of motion of the ankle and foot, as well as test for strength and flexibility of the calf muscle.

Imaging tests such as an MRI or ultrasound can provide more detailed information about the extent of the tear and help to rule out other possible injuries such as a blood clot or deep vein thrombosis.

Treatment

The treatment of a calf strain, also known as a calf muscle tear, depends on the severity of the injury. In mild cases, rest and home remedies may be enough to relieve the symptoms, while in more severe cases, medical intervention may be necessary. Massage can be a helpful complementary therapy for treating a calf strain, and it can help to promote healing and reduce pain and discomfort.

The initial treatment of a calf strain typically involves the RICE protocol, which stands for rest, ice, compression, and elevation. Resting the affected leg and avoiding activities that may aggravate the injury is important to allow the muscle to heal. Ice can be applied to the affected area to reduce swelling and inflammation. Compression bandages or wraps can help to reduce swelling and provide support to the injured muscle. Elevation of the affected leg can also help to reduce swelling and promote healing.

As the muscle heals, gentle stretching and physical therapy exercises can help to improve range of motion and prevent scar tissue from forming. Massage can also be a helpful complementary therapy for treating a calf strain. Massage can help to increase blood flow to the affected area, promote healing, and reduce pain and discomfort.

When performing massage therapy for a calf strain, it is important to use a light touch and avoid applying too much pressure to the affected area. Massaging the area around the calf muscle, as well as the foot and ankle, can help to improve circulation and reduce tension in the surrounding muscles. Deep tissue massage or trigger point therapy should be avoided, as these techniques can further damage the injured muscle.

Overall, a combination of rest, physical therapy, and massage therapy can be effective in treating a calf strain and promoting healing. It is important to work with a healthcare provider or licensed massage therapist to develop a treatment plan that is appropriate for the severity of the injury and individual needs.

Exercises

After the initial healing period, the following exercises may be prescribed to help improve range of motion and strength in the calf muscle:

  • Calf stretches: Stretching the calf muscle can help improve flexibility and reduce the risk of future injury. Stand facing a wall with your hands on the wall and your feet shoulder-width apart. Step back with your affected leg, keeping your heel on the ground. Lean forward into the wall until you feel a stretch in your calf. Hold for 30 seconds and repeat on the other leg.
  • Calf raises: This exercise helps strengthen the calf muscle. Stand with your feet shoulder-width apart and rise up on your toes, lifting your heels off the ground. Hold for a few seconds and then lower your heels back down. Repeat for 10-15 repetitions.
  • Single leg balance: This exercise helps improve balance and stability in the affected leg. Stand on your affected leg and lift your other leg off the ground. Hold for 30 seconds and repeat on the other leg.

Prevention

To prevent calf tears, it is important to take the following measures:

  • Warm-up: Always warm up before engaging in exercise or sports activities. A proper warm-up can help prepare your muscles for activity and reduce the risk of injury.
  • Stretching: Regular stretching of the calf muscles can help improve flexibility and reduce the risk of tears. Incorporate calf stretches into your warm-up routine and stretch after exercise.
  • Proper footwear: Choose appropriate footwear that provides adequate support and cushioning for your feet and ankles. Replace worn-out shoes regularly.
  • Gradual progression: If you are new to a sport or activity, start slowly and gradually increase the intensity and duration of your workouts. This can help prevent overuse injuries.
  • Strengthening exercises: Regularly performing exercises that strengthen the calf muscles can help prevent tears. Examples include calf raises and resistance band exercises.
  • Regular deep tissue massage or sports massage.

By following these preventive measures, you can significantly reduce your risk of calf tears and other lower leg injuries. If you do experience pain or discomfort in your calf muscles, it is important to seek medical attention before continuing with exercise or sports activities.

If you are keen to get a plan to strengthen and rehabilitate the calf then please contact us to speak to one of our qualified personal trainers, Physiotherapists or Sports Therapists. We can also provide advanced soft tissue therapy through massage to help with the healing process and to prevent future strains.

Bicep Tendonitis Elbow

Bicep Tendonitis (Elbow)

Bicep tendonitis at the elbow, is an inflammation of the tendons that connect the biceps muscle, to the elbow. The degeneration is often caused from a lifetime of normal activity but can worsen with repetitive elbow motion and rotation. In other instances, injury can occur when the elbow is forced straight against resistance, or a heavy load. Bicep tendonitis elbow typically heals between 6 weeks to 3 months, depending upon the severity, however resting the arm is required to avoid partial or full tear of the tendon, that could require surgery.

Anatomy

The biceps muscle has two tendons, one that attach the muscle to the shoulder, and the other tendon to the elbow (also called the distal biceps tendon). Bicep tendonitis elbow typically occurs at the insertion of the biceps tendon on the radial tuberosity, or forearm bone, limiting elbow flexion and rotation of the forearm with the palm upwards (supination).

Symptoms

  • Pain or discomfort, swelling, visible bruising at the front of the elbow and forearm
  • Exacerbated pain and weakness when bending the elbow and rotating the forearm (supination)
  • A bulge near the top of the biceps muscle
  • A gap in the front of the elbow

Causes

Inflammation and injury to the tendon at the elbow is uncommon, however when it occurs, it is typically a result of overuse and repetitive motions of the joint. Sports that involve repetitive overhead motion or overuse of the elbow joint, such as tennis and gymnastics, can cause bicep tendonitis elbow. In more severe cases, it can be caused when lifting heavy objects, increasing stress on the biceps, in which the tendon can tear away from the bone.

Diagnosis

Bicep tendonitis of the shoulder is diagnosed by assessing elbow pain in the antecubital fossa (front crease of elbow) and palpate for tenderness and a gap in the tendon. Pain and weakness with supination of the forearm may also be examined against resistance. Imaging techniques may also be recommended such as an X-ray or MRI, that can be helpful when there is partial tearing of the tendon and detect for any fluid around the site. In severe cases during a complete tear, a PRP injection or a repair may be advised.

Treatment

Simple treatments typically heal bicep tendonitis in the elbow, such as resting the affected arm or actively modifying and avoiding provocative exercises. Strengthening exercises of the bicep may be recommended, starting with a light weight, and progressively increasing, could help to relieve lower bicep pain, and restore normal function as pain subsides. Exercises could included bicep curls (gradually adding or increasing weight), bicep stretch, internal (+ external) rotation stretch, and forearm twists. In other instances where exercises do not improve bicep tendonitis elbow, injections such as cortisone, needle tenotomy, or platelet-rich plasma (PRP) can help to reduce tendon swelling and stimulate healing.

Exercises

  • Eccentric curls: Hold a dumbbell in one hand and curl the weight up with your bicep muscle. Then, slowly lower the weight down to the starting position, taking at least 3-4 seconds to do so. Repeat for several repetitions.
  •  Hammer curls: Hold a pair of dumbbells with your palms facing each other and curl the weights up to shoulder level, keeping your elbows close to your sides. Lower the weights back down and repeat.
  • Reverse curls: Hold a barbell with an overhand grip (palms facing down) and curl the weight up towards your shoulders. Lower the weight back down and repeat.
  •  Triceps extensions: Hold a dumbbell with both hands and extend your arms overhead, keeping your elbows close to your ears. Lower the weight back down and repeat.
  • Wrist curls: Hold a light dumbbell in one hand and rest your forearm on a table or bench with your palm facing up. Curl the weight up towards your wrist, then lower it back down and repeat.

Prevention

Preventing bicep tendonitis is always better than having to treat it later. Here are some tips to help prevent the condition:

  • Warm-up: Always perform a proper warm-up before any workout or physical activity. This can include light cardio, stretching, and dynamic movements that prepare your body for exercise.
  • Gradual progression: Gradually increase the intensity, duration, and frequency of your workouts. Avoid sudden changes in your exercise routine as this can put excess strain on your bicep tendon.
  • Proper technique: Use proper technique when performing exercises to prevent excessive stress on your bicep tendon. This includes maintaining proper form, avoiding jerky movements, and lifting weights that are appropriate for your strength and fitness level.
  • Rest and recovery: Allow your body adequate time to rest and recover between workouts. This means taking rest days, getting enough sleep, and eating a balanced diet to support muscle recovery.
  • Get a regular sports massage or deep tissue massage by a certified professional in sports rehabilitation or sports therapy.
  • Stretching and mobility: Incorporate stretching and mobility exercises into your routine to maintain flexibility and prevent tightness in your bicep muscles and tendons.
  • Avoid overuse: Avoid repetitive activities that can cause overuse of your bicep tendon, such as excessive typing or gripping activities.

For further information please don’t hestiate to get in contact with one of our qualified Physiotherapists or Sports Therapists.

Calf Rupture

Calf Rupture

Calf muscle injuries are relatively common, particularly among athletes and individuals who engage in physical activities that put a lot of stress on the lower legs. Runners, soccer players, basketball players, and jumpers are some examples of athletes who are at increased risk of calf muscle injuries.

The severity of calf muscle injuries can vary, with some being minor strains and others resulting in complete tears of the muscle. The extent of the injury can impact the length of time it takes to recover and return to physical activity.

In terms of the general population, calf muscle injuries can occur in people of all ages and fitness levels, not just athletes. Individuals who engage in physical activity after a period of inactivity or who have tight or weak calf muscles may be at increased risk of calf muscle injuries.

Anatomy

The “calf” is a term used to describe the group of muscles located on the back of the lower leg. This region is comprised of three specific muscles: the gastrocnemius, the soleus, and the plantaris.

The gastrocnemius is a key player in the movement of the ankle and knee, providing plantarflexion of the ankle joint and flexion at the knee joint. When the knee is bent, however, the gastrocnemius cannot exert its full power at the ankle joint and vice versa.

The soleus, located beneath the gastrocnemius, is responsible for plantarflexion of the ankle and stability of the tibia on the calcaneus. The plantaris, located in the posterosuperior compartment of the calf, acts as a flexor of the knee and a plantar flexor of the ankle, but is not considered a major contributor.

All three of these muscles converge at the achilles tendon, which inserts into the calcaneus. Together, they form the powerful calf region of the lower leg.

Symptoms

  • Pain and tenderness in the calf region
  • Swelling and bruising
  • Weakness or instability in the affected leg
  • A popping or tearing sensation at the time of injury
  • Difficulty walking or bearing weight on the affected leg

Causes

The cause of calf muscle injuries is typically due to overuse or excessive strain on the muscles. This can be the result of a sudden movement, such as jumping or sprinting, or due to gradually increasing the intensity of physical activity. Other factors that can increase the risk of calf muscle injury include tight or weak calf muscles, poor footwear, and a sudden increase in physical activity after a period of inactivity.

Diagnosis

Diagnosis of a calf muscle injury is typically based on a physical examination and medical history. Additional tests, such as MRI or ultrasound, may be necessary to confirm the diagnosis and assess the severity of the injury.

Treatment

Treatment for calf muscle injuries depends on the severity of the injury and the individual’s specific needs. Common treatment options include:

  • Rest and elevation of the affected leg to reduce swelling
  • Ice therapy to reduce pain and swelling
  • Physical therapy to improve strength and flexibility
  • Bracing or taping to support the calf muscle during healing
  • Pain medication to manage pain
  • In severe cases, surgery may be necessary to repair a complete tear of the calf muscle.

Recovery from a calf muscle injury can take several weeks to several months, depending on the severity of the injury and the individual’s overall health. Physical therapy and rehabilitation exercises can be instrumental in promoting proper healing and restoring strength and flexibility to the calf muscle

Exercises

If you have suffered a calf muscle injury, it is important to follow your doctor or physical therapist’s recommended treatment plan. However, there are several exercises that can be beneficial for promoting proper healing and strengthening the calf muscles following a calf muscle rupture. Here are a few exercises that are commonly recommended:

  • Calf raises: Stand on the edge of a step and slowly raise and lower your heels to strengthen your calf muscles
  •  Toe raises: Stand on the edge of a step and raise your toes as high as you can, then lower them slowly to target the soleus muscle in the calf
  •  Eccentric calf raises: Stand on the edge of a step and lower your heels slowly, taking 3-5 seconds to complete the motion. This exercise places a greater emphasis on the eccentric (lowering) portion of the calf raise, which can be particularly beneficial for strengthening the calf muscles after injury
  •  Stair stepping: Walk up and down stairs, focusing on pushing through your heels with each step to engage your calf muscles
  •  Heel walking: Walk on your heels for several minutes to target the gastrocnemius muscle in the calf

It is important to start slowly and gradually increase the intensity and duration of these exercises as recommended by your doctor or physical therapist. Incorporating these exercises into your rehabilitation program, along with rest and proper care for your injury, can help you regain strength and reduce the risk of further injury to your calf muscles.

Prevention

  • Stretch regularly: Regular stretching of the calf muscles can help improve flexibility and reduce the risk of injury.
  • Get a regular sports massage to help lengthen the muscles, stimulate repair and quality blood flow.
  • Strengthen the muscles: Incorporating calf strengthening exercises into your routine can help improve the overall strength and stability of the muscles. If you are unsure how to do this, contact a certified personal trainer.
  • Gradually increase physical activity: When starting a new exercise program or increasing the intensity of your current routine, do so gradually to allow your muscles time to adjust and reduce the risk of overuse injuries.
  • Wear proper footwear: Wearing shoes with adequate support and cushioning can help reduce the risk of calf muscle injuries.
  • Avoid sudden changes in terrain: Sudden changes in terrain, such as running on an uneven surface, can place added stress on the calf muscles and increase the risk of injury.
  • Warm up before physical activity: A proper warm-up can help increase blood flow to the muscles, reduce the risk of injury, and improve performance.

If you are unsure about any aspect of the above article and would like to speak to a professional sports therapist or physiotherapist, then please get in touch via our contact page.