Hamstring Tear – Grade 1 and 2

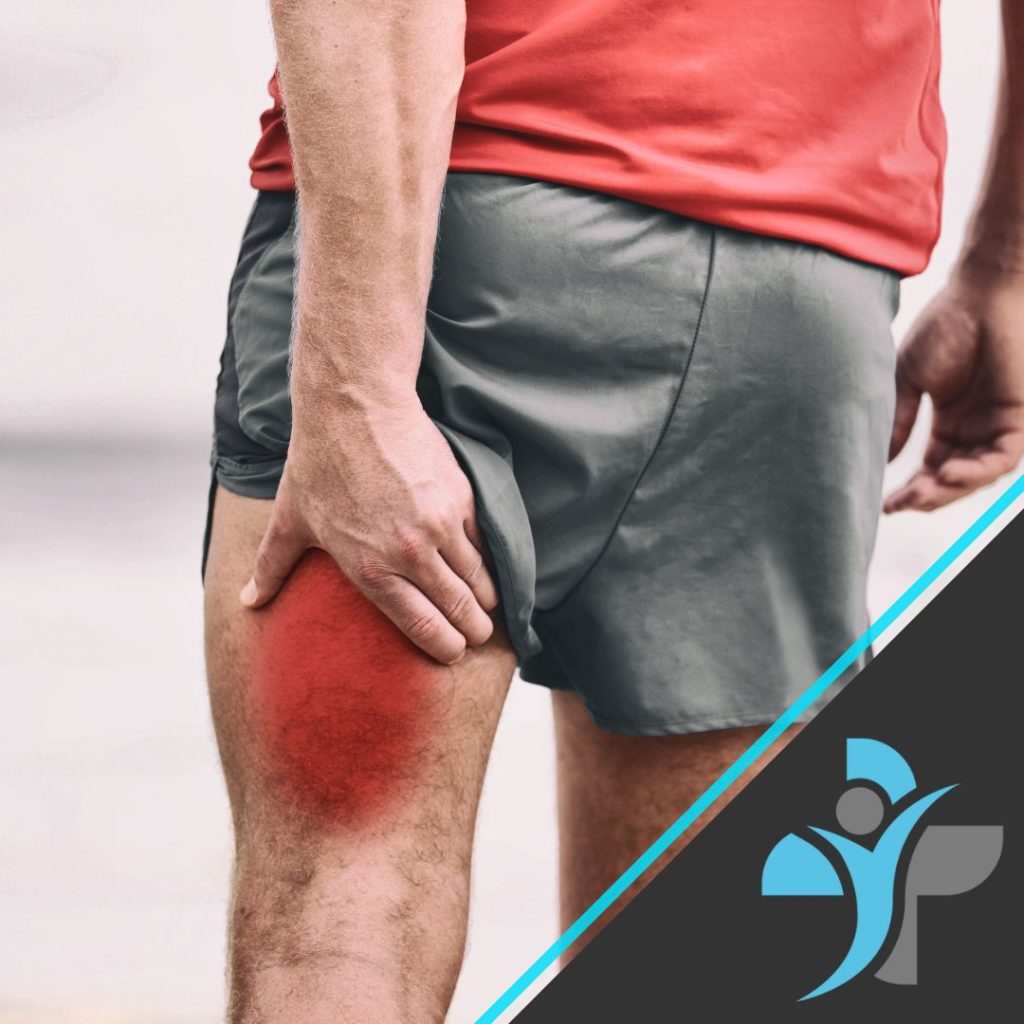
Hamstring tear is an injury to a muscle at the back of the thigh, that is caused by a rapid extensive contraction or a violent stretch of the hamstring muscle group, causing high mechanical stress. They account for up to 29% of lower limb injuries in sport, due to the involvement of high speeds such as sprinting and football, however older age can increase the risk due to a loss of flexibility.

Some experiences of hamstring tears involve pain and tenderness, with limited range of motion, where others experience additional symptoms, such as swelling or a ‘popping’ or tearing sensation.

Grade 1 and 2 hamstring tears can heal within 3 to 8 weeks, however can take months to heal depending on the severity of symptoms.

Hamstring Tear – Grade 1 and 2

Anatomy

The hamstrings are a group of three muscles: semitendinosus, semimembranosus, and bicep femoris (long head), that predominantly acts to flex and extend the knee.

Most hamstring tears occur in the central part of the muscle, or where the muscle fibres and tendon fibres intersect (MTJ). Tendons can tear away from a small bone fragment (ischial tuberosity), that typically occur at the proximal origin (top) of the hamstring, however, can occur from the distal origin (bottom), although less common.

Hamstring Tear - Grade 1 and 2

Symptoms

  • Sudden and sharp pain
  • Tenderness
  • A “popping sensation” at the time of injury
  • Swelling and bruising (or discolouration) in the first few hours and days
  • Weakness and a loss of strength in the leg

Causes

Overload of the hamstrings typically the cause of hamstring tears, that occurs when the muscle is stretches beyond its limit or challenged with sudden load, typically during an eccentric contraction. Previous hamstring injuries can increase the risk of developing a tear, particularly if the body is compensating for another limb injury, or if there is muscle weakness and a lack of flexibility.

Diagnosis

Physical examinations are often performed, such as palpation to pinpoint the area of the hamstring tear, however precise location may be difficult to determine without medical imaging.

Other physical examinations involve performing various movement to evaluate strength and range of motion, to determine the severity or the classification (grade 1 to 3) according to the pain and physical limitations.

Neurological examination may be performed to assess the sciatic nerve, to check any entrapment or irritation in healing scar tissue. Imaging such X-rays and MRI may be advised in severe cases, to detect the location of the tear and the extent of the injury, however for grade 1 and 2 tears, only physical examination if typically required.

Treatment

There are 3 phases of treatment to aid recovery and function of the hamstring injury (grade 1 and 2):

Phase 1 (inflammation phase) -Exercises and excessive stretching should be avoided, to control pain and help scar tissue develop. At the phase, crutches may be required to reduce weight bearing and facilitate recovery. You may want to use cold and heat therapy (contrast bathe) as well as gentle massage.

Phase 2 (reparative phase) – Exercises are introduced to try and regain full range of motion. Progressions of more challenging exercises are included in this stage, however, should be performed tolerably and pain-free. Such exercises could include hamstring curls, hip extension (with added resistance band for progression), hamstring wall stretch, and single leg balance.

Phase 3 (remodelling phase) – specific to patients playing sport to allow return to sport, and their level of function. This phase is specific to the patient, where sport or activity-specific drills such as agility are advised to promote tissue remodelling, or drills involving quick movements such as plyometric exercises.

Exercises

  • Hamstring stretch: Sit on the floor with your legs straight out in front of you. Lean forward, reaching your hands towards your toes until you feel a stretch in your hamstrings. Hold for 30 seconds and repeat 3 times.
  • Hamstring curl: Stand facing a wall or chair, with your feet shoulder-width apart. Lift one foot towards your buttocks, keeping your knee bent. Lower your foot and repeat for 10-15 repetitions on each leg.
  • Deadlift: Stand with your feet shoulder-width apart, holding a barbell or dumbbells in front of your thighs. Hinge forward from your hips, keeping your back straight, and lower the weights towards the floor. Return to the starting position and repeat for 10-15 repetitions.
  • Romanian deadlift: Stand with your feet shoulder-width apart, holding a barbell or dumbbells in front of your thighs. Hinge forward from your hips, keeping your back straight, and lower the weights towards the floor. Keep your knees slightly bent and your hips back as you lower the weight. Return to the starting position and repeat for 10-15 repetitions.
  • Glute bridge: Lie on your back with your knees bent and your feet flat on the floor. Lift your hips towards the ceiling, squeezing your glutes at the top. Lower your hips and repeat for 10-15 repetitions. This exercise strengthens the glutes and hamstrings.

Prevention

  • Warm-up properly: Warming up properly before any physical activity is essential to prevent hamstring tears. It increases blood flow to the muscles, making them more pliable and less prone to injury.
  • Stretch regularly: Regular stretching, especially before and after exercise, can help prevent hamstring tears. Incorporate stretching exercises such as hamstring stretches, quadriceps stretches, and hip flexor stretches into your routine.
  • Build strength gradually: Gradually increasing the intensity and duration of your exercise routine can help prevent overloading the hamstrings. Focus on building strength in the hamstrings and surrounding muscles to improve overall stability and reduce your risk of injury.
  • Use proper technique: Using proper technique when performing exercises that involve the hamstrings, such as running and weightlifting, can help prevent hamstring tears. Avoid over-striding, sudden changes of direction, and landing heavily on your heels.
  • Wear appropriate footwear: Wearing appropriate footwear that provides adequate support can help prevent hamstring tears. Choose shoes that fit well and have good shock absorption.

If you are interested in finding out how livewell and our team of physiotherapists, sports therapists and massage therapists can help you in your recovery from your Hamstring tear, then please either book a consultation or contact us today.

Calf Tear

Calf Tear

Calf tears are a relatively common injury that occurs in people of all ages and activity levels. It is estimated that up to 18% of all sports injuries involve the calf muscles, making it one of the most injured areas in the lower leg.

Calf tears are more common in people who engage in sports or activities that involve repetitive or explosive movements of the lower legs, such as running, jumping, or dancing. These activities can put a significant amount of stress on the calf muscles, making them more susceptible to injury.

Calf tears are classified into three grades based on the severity of the injury. Grade 1 tears involve minor damage to the muscle fibers, while grade 2 tears involve a partial tear of the muscle. Grade 3 tears are the most severe and involve a complete tear of the muscle.

While calf tears can be painful and limit mobility, they generally heal well with proper treatment and rehabilitation. It is important to seek medical attention if you suspect a calf tear or if you experience persistent pain or swelling in the calf muscle. With proper care, most people are able to return to their normal activities within a few weeks to a few months.

Anatomy

The calf muscle is made up of two muscles: the gastrocnemius and the soleus. The gastrocnemius is the larger of the two muscles and is responsible for flexing the ankle and knee. The soleus is located underneath the gastrocnemius and is responsible for plantar flexion of the ankle.


Symptoms

The symptoms of a calf tear can vary depending on the severity of the injury. The following are some common symptoms of calf tears grade 1 and 2:

  • Mild to moderate pain in the calf muscle
  • Swelling and tenderness in the affected area
  • Difficulty in walking or standing on the affected leg
  • Stiffness and limited range of motion in the ankle and foot
  • A popping or snapping sensation at the time of injury

Causes

Calf tears can be caused by a sudden or forceful movement, such as pushing off or jumping, which puts excessive strain on the calf muscle. The following are some common causes of calf tears:

  • Overuse or repetitive strain on the calf muscle
  • Sudden movements or changes in direction
  • Inadequate warm-up before exercise or sports activities
  • Poor flexibility or strength in the calf muscles
  • Foot and ankle problems, such as flat feet or ankle instability

Diagnosis

A calf tear can be diagnosed through a physical examination by a healthcare professional. Imaging tests, such as an ultrasound or MRI, may be ordered to confirm the diagnosis and to determine the extent of the injury.

Treatment

The treatment for a calf tear grade 1 or 2 (related article) generally includes the following:

  • Rest: The affected leg should be rested to allow the muscle to heal.
  • Ice: Applying ice to the affected area can help reduce pain and swelling.
  • Compression: Compression with a bandage or brace can help reduce swelling and provide support to the affected area.
  • Elevation: Elevating the affected leg can help reduce swelling and promote healing.
  • Pain medication: Over-the-counter pain medications may be used to help manage pain.

Exercises

After the initial healing period, the following exercises may be prescribed to help improve range of motion and strength in the calf muscle:

  • Calf stretches: Stretching the calf muscle can help improve flexibility and reduce the risk of future injury. Stand facing a wall with your hands on the wall and your feet shoulder-width apart. Step back with your affected leg, keeping your heel on the ground. Lean forward into the wall until you feel a stretch in your calf. Hold for 30 seconds and repeat on the other leg.
  • Calf raises: This exercise helps strengthen the calf muscle. Stand with your feet shoulder-width apart and rise up on your toes, lifting your heels off the ground. Hold for a few seconds and then lower your heels back down. Repeat for 10-15 repetitions.
  • Single leg balance: This exercise helps improve balance and stability in the affected leg. Stand on your affected leg and lift your other leg off the ground. Hold for 30 seconds and repeat on the other leg.

Prevention

To prevent calf tears, it is important to take the following measures:

  • Warm-up: Always warm up before engaging in exercise or sports activities. A proper warm-up can help prepare your muscles for activity and reduce the risk of injury.
  • Stretching: Regular stretching of the calf muscles can help improve flexibility and reduce the risk of tears. Incorporate calf stretches into your warm-up routine and stretch after exercise.
  • Proper footwear: Choose appropriate footwear that provides adequate support and cushioning for your feet and ankles. Replace worn-out shoes regularly.
  • Gradual progression: If you are new to a sport or activity, start slowly and gradually increase the intensity and duration of your workouts. This can help prevent overuse injuries.
  • Strengthening exercises: Regularly performing exercises that strengthen the calf muscles can help prevent tears. Examples include calf raises and resistance band exercises.

By following these preventive measures, you can significantly reduce your risk of calf tears and other lower leg injuries. If you do experience pain or discomfort in your calf muscles, it is important to seek medical attention before continuing with exercise or sports activities.

Rotator Cuff Injury

Rotator Cuff Injury

In the rotator cuff region there are four muscles, tendons and ligaments, surrounding the shoulder which provide added stability to the shoulder joint. This structure helps to keep the bone securely placed into the socket. Injury to the rotator cuffs can cause an ache like pain in the shoulder. This may lead to a feeling of muscle weakness and inability to lift the shoulder above the head.

Rotator cuff injuries are most commonly presented in people regularly exposed to overhead movements, such as painters, carpenters and builders. Individuals who suffer from this injury can usually manage their symptoms, through sports massage and specific exercises focusing on the rotator cuff muscle region. However, if not treated correctly, further injury to the area may occur such as a complete tear, which may result in surgery.

Anatomy

The rotator cuffs are made up by four muscles, these are the supraspinatus, infraspinatus, teres minor and subscapularis. These muscles aid in keeping the upper arm and shoulder into the socket with stability. They also each allow specific movements at the shoulder joint. The group of four muscles all originate within the shoulder blade, but all insert into different portions of the upper arm bone.

Supraspinatus: This muscle originates at the supraspinous fossa; the muscle belly passes laterally over the acromion process and inserts into the greater tubercle of the humerus bone. This muscle allows the first 15 degree’s movement of abduction, after this the deltoid and trapezius muscles will then allow further motion.

Infraspinatus: The origin of the infraspinatus is the infraspinatus fossa, and the insertion is also the greater tubercle of the humerus. The motion created by this muscle is lateral rotation of the shoulder, moving the arm away from the centreline of the body.

Teres Minor: A small narrow muscle on the back of the shoulder blade which sits underneath the infraspinatus. The origin is the lateral boarder of the scapula. This muscle contributes to external rotation of the arm of the body.

Subscapularis: This rotator cuff is the strongest and largest out of the three listed above. This muscle originates at the subscapularis fossa and inserts into the lesser tubercle of the humerus. The subscapularis allows greater motion at the shoulder and mainly aids in allowing medial rotation of the arm.

Symptoms

Common symptoms of possible rotator cuff injury:

  • Dull ache
  • Difficulty lifting arm over head
  • Weakness around the shoulder
  • Disturbed sleep
  • The constant need to use self-myofascial techniques

Causes

There are a few common risk factors of why rotator injury may occur:

  1. Family History: There may be family history of rotator cuff injuries which may make certain family members more prone to having the injury than others.
  2. The type of job you do: Individuals who work in construction or manual labour who have repetitive overhead movement of the shoulder could damage the rotator cuff overtime.
  3. Age: As you get older joints and muscles become weaker, meaning you may be more prone to injury overtime.

Diagnosis

To diagnose a rotator cuff injury a physical examination will be carried out by a doctor or a physiotherapist. Firstly, they may ask about your day-to-day activities which may determine the seriousness of the injury. The doctor will test the range of movement at the shoulder by getting you to perform movements such as flexion, extension, abduction, adduction and medial and lateral rotation. This will allow the doctor to determine if it is actually rotator cuff injury or whether it may be other conditions such as impingement or tendinitis.

Imaging scans such as X-Ray’s may also be used to see if there is any abnormal bone growth within the joint, which may be causing the pain.

Treatment

Treatments for rotator cuff injuries can be non-surgical or surgical. Tendinitis may occur over time from the repetitive strain placed around the joint, so it is important to treat the affected area.

  • Apply a cold compress/ ice to the effected area to reduce swelling
  • Heat packs can be used to reduce swelling
  • Resting the affected area
  • Inflammatory medication such as ibuprofen and naproxen
  • Reduce the amount of repetitive movement to the joint
  • Don’t lift the arm overhead

Exercises

  • Doorway Stretch: Stand facing an open doorway with your hands placed on the door frame at shoulder height. Step one foot forward and gently lean forward, feeling a stretch in your chest and shoulders. Hold the stretch for 20-30 seconds before releasing. Repeat the stretch with the other foot forward.
  • External rotation with weight: Hold a dumbbell or weight plate in one hand and stand with your elbow bent at 90 degrees and your upper arm against your side. Rotate your arm outwards, away from your body, while keeping your elbow tucked in. Slowly return to the starting position and repeat for 8-12 repetitions before switching arms.
  • High to low rows with resistance band: Attach a resistance band to a sturdy anchor point at chest height. Stand facing the anchor point with the band in both hands. Pull the band towards your chest, keeping your elbows tucked in and your shoulders down. Slowly release the band back to the starting position and repeat for 8-12 repetitions.
  • Reverse fly’s: Hold a dumbbell or weight plate in each hand and bend forward at the waist, keeping your back straight. Extend your arms out to the sides, keeping them parallel to the floor. Squeeze your shoulder blades together as you bring the weights up towards your body, then slowly release back to the starting position. Repeat for 8-12 repetitions.
  • Lawn mower pull with resistance band: Attach a resistance band to a low anchor point and stand with your side to the anchor point. Hold the band in one hand with your arm extended towards the anchor point. Pull the band towards your chest, keeping your elbow bent and your shoulder blade squeezed down and back. Slowly release back to the starting position and repeat for 8-12 repetitions before switching sides.
  • Isometric internal rotation: Stand with your elbow bent at 90 degrees and your upper arm against your side. Place a rolled up towel or small ball between your elbow and your side. Squeeze your elbow into your side, holding the contraction for 10-15 seconds before releasing. Repeat for 2-3 sets of 10-15 repetitions.
  • Isometric external rotation: Stand with your elbow bent at 90 degrees and your upper arm against your side. Hold a resistance band in both hands, with one end of the band anchored to a sturdy object. Rotate your arm outwards, away from your body, while keeping your elbow tucked in. Hold the contraction for 10-15 seconds before releasing. Repeat for 2-3 sets of 10-15 repetitions before switching arms.

Prevention

  1. Strengthen the rotator cuff muscles: Exercises that target the rotator cuff muscles can help to build strength and stability in the shoulder joint. Examples of such exercises include external rotation with a resistance band, internal rotation with a light weight, and scapular stabilization exercises.
  2. Warm up properly: Before engaging in any activities that involve overhead arm movements, it is important to warm up the shoulder joint with dynamic stretches and exercises. This can help to increase blood flow to the muscles and reduce the risk of injury.
  3. Practice good technique: When engaging in activities that involve overhead arm movements, it is important to use proper technique and form. This can help to reduce stress on the rotator cuff muscles and tendons and minimize the risk of injury.
  4. Use proper equipment: Using equipment that is properly fitted and designed for the activity can help to reduce the risk of rotator cuff injuries. For example, using a tennis racket with a larger grip or wearing properly fitting swim goggles can reduce the stress on the shoulder joint.
  5. Rest and recover: Resting and allowing the shoulder joint to recover after activity is important for preventing overuse injuries. Avoiding overuse and engaging in activities that strengthen and stretch the shoulder muscles can help to prevent rotator cuff injuries.

How We Can Help

We understand that dealing with a rotator cuff injury can be a challenging and painful experience. As healthcare professionals, we are dedicated to helping you manage your symptoms and regain full function of your shoulder joint.

We are pleased to offer you our services in massage therapy and sports therapy, both of which can be highly effective in treating rotator cuff injuries. Our trained and experienced therapists can work with you to reduce pain and inflammation, improve range of motion, correct muscle imbalances, and provide advice on injury prevention.

Our services are tailored to meet your individual needs and goals, and we will work with you to develop a treatment plan that is effective and manageable for you. We believe in a collaborative approach to healthcare, and we may work in conjunction with other healthcare professionals, such as physiotherapists or orthopedic specialists, to ensure that you receive the best possible care.

We take pride in providing our patients with high-quality, compassionate care, and we are committed to helping you achieve optimal health and well-being. If you are interested in learning more about our physiotherapy and sports therapy services, or if you would like to schedule an appointment, please do not hesitate to contact us.

Glenohumeral Joint Instability

Glenohumeral Joint Instability

The glenohumeral joint (GH) is a ball and socket joint that includes a complex, dynamic, articulation between the proximal humerus (“ball”) and the glenoid (“socket”) of the scapula. The static and dynamic stabilizing structures allow for extreme range of motion in multiple planes, that predisposes the joint to instability events. Shoulder instability often occurs when the capsule (lining of the shoulder joint), ligaments, or labrum becomes stretched, torn, or detached from the glenoid, commonly after shoulder trauma or repetitive motion. A genetic condition can also cause looseness and weakness in the joint. Exercise programs that aim to strengthen the rotator cuff and scapular muscles are often the primary treatment for instability, where full range of motion usually returns after 6-8 weeks.

Anatomy

Structurally a ball and socket joint, that involves the humeral head with the glenoid cavity of the scapula, and it represents the major articulation of the shoulder girdle. The joint capsule and ligaments provide a passive restraint to keep the humeral head compressed against the glenoid. As one of the most mobile joints, the GH joint has stabilising elements, that are divided into static (capsule-labro-ligamentous complex) and active (rotator cuffs and bicep tendons).

Symptoms

The symptoms of Glenohumeral Joint Instability include but may not be limited to:

  • Pain, tenderness, swelling, and/or bruising.
  • A loose feeling, or hearing a “pop” in the shoulder joint.
  • Repeated shoulder dislocation.
  • Tingling or burning sensation in the lower arm and hand.
  • Localised numbness of the skin overlying the deltoid muscle.
  • Decreased range of arm/shoulder motion.

Causes

Glenohumeral joint instability can occur following a traumatic accident such as a fall or collision. It can also occur without significant trauma or injury, which is often genetic from those with hypermobility or connective tissue problems, or from a development of laxity in tissues of the shoulder joint. Other causes can be from repetitive motions, particularly from throwing sports, causing the shoulder to stretch over time, where normal muscle control is lost.

Diagnosis

A physical examination can confirm the impression obtained from the history and help to determine if the shoulder is loose or unstable. Radiographs or imaging, such as X-rays, MRI, or a CT scan can help to provide confirmation of traumatic glenohumeral instability present from the damaged bones, cartilage, and rotator cuff. Mobility may be restricted for two weeks, followed by physical therapy to strengthen the muscles that stabilises the shoulder.

Classifications

Polar Type I (structural instability) – typically present with a positive apprehension (anterior direction) associated with rotator cuff weakness. Posture, single leg balance, and scapula control are often disturbed. Can begin to exhibit signs of poor scapula control, abnormal muscle activation, and altered trunk stability and balance, when moving towards type II and III poles.

Polar Type II – (atraumatic instability) – present with positive anterior apprehension test, with increased laxity and excessive external rotations, and muscular balance

Polar Type III – (neurological dysfunctional or muscle patterning) – shows abnormal activation of large muscles and suppression of the rotator cuff. Mostly occurs with a history of easy shoulder dislocation.

Treatment

Treatment usually begins with physical therapy, designed to strengthen the shoulder, and maintain the joint in position.

Restricting activity that includes overhead motion may be advised to reduce symptoms. Full range of motion usually returns after 6-8 weeks.

If less invasive treatments don’t work, and in severe instances, open surgery is often necessary, where an incision is made over the shoulder and the muscles are moved to access the joint capsule, ligaments, and labrum. After surgery, full recovery often takes 4-6 months, and in some cases up to 12 months. At this stage some deep tissue massage and scar tissue work may be necesary!

Exercises

1. Shoulder Flexion (Lying Down)

  • Purpose: Improve shoulder mobility and strengthen the muscles involved in flexion, which helps stabilise the shoulder joint.
  • How to Perform:
    • Lie on your back with your arm by your side.
    • Hold a light weight or no weight at all, and slowly raise your arm straight up toward the ceiling, keeping your elbow straight.
    • Lower your arm back down slowly, and repeat.

2. Shoulder Blade Squeeze

  • Purpose: Strengthen the scapular stabilisers, particularly the muscles that control the shoulder blades, to improve overall shoulder stability.
  • How to Perform:
    • Sit or stand with your arms at your sides.
    • Squeeze your shoulder blades together, as if trying to pinch something between them.
    • Hold the squeeze for a few seconds, then relax.
    • Repeat for the desired number of repetitions.

3. Resisted Rows

  • Purpose: Strengthen the upper back and shoulder muscles, particularly the rhomboids and middle trapezius, to enhance shoulder stability.
  • How to Perform:
    • Anchor a resistance band at chest height.
    • Hold the band with both hands, and step back to create tension.
    • Pull the band toward your chest, keeping your elbows close to your sides and squeezing your shoulder blades together.
    • Slowly return to the starting position and repeat.

4. Internal Rotator Strengthening Exercise

  • Purpose: Strengthen the internal rotators (subscapularis) of the shoulder, which are crucial for maintaining joint stability.
  • How to Perform:
    • Attach a resistance band to a sturdy object at waist height.
    • Stand with your affected side closest to the band, holding the other end with your elbow bent at 90 degrees.
    • Keep your elbow close to your body, and rotate your arm inward against the resistance.
    • Slowly return to the starting position and repeat.

5. External Rotator Strengthening Exercise (with Arm Abducted 90°)

  • Purpose: Target the external rotators (infraspinatus and teres minor) to improve the stability and control of the shoulder joint.
  • How to Perform:
    • Stand or sit with your arm raised to shoulder height and your elbow bent at 90 degrees, holding a resistance band or light weight.
    • Rotate your forearm upward, keeping your elbow in line with your shoulder.
    • Slowly lower your arm back down to the starting position and repeat.

6. Standing Row (with Resistance Band)

  • Purpose: Strengthen the muscles that stabilise the shoulder, particularly the upper back and shoulder blade muscles, to improve shoulder joint stability.
  • How to Perform:
    • Anchor a resistance band at chest height.
    • Stand facing the band, holding it with both hands.
    • Pull the band toward your chest, leading with your elbows and squeezing your shoulder blades together.
    • Slowly return to the starting position and repeat.


Prevention

Glenohumeral Joint Instability (GJI) is a condition that occurs when the ball and socket joint of the shoulder become dislocated or partially dislocated due to trauma or other underlying conditions. GJI can result in pain, weakness, and limited range of motion, making it difficult for people to perform their daily activities. In severe cases, surgery may be required to treat the condition. However, prevention is always better than cure, and there are several steps that individuals can take to prevent GJI.

Strengthen the Rotator Cuff Muscles:
The rotator cuff muscles are a group of muscles that attach the shoulder blade to the humerus bone and help stabilize the shoulder joint. Strengthening these muscles can help prevent GJI. Exercises that target the rotator cuff muscles include external and internal rotation exercises, scapular stabilization exercises, and shoulder blade squeezes.

Improve Shoulder Mobility:
Limited shoulder mobility can lead to increased stress on the shoulder joint, which can increase the risk of GJI. Stretching exercises that target the shoulder joint, such as shoulder circles and shoulder flexion stretches, can help improve shoulder mobility and prevent GJI.

Maintain Good Posture:
Poor posture can contribute to shoulder instability and increase the risk of GJI. Individuals should aim to maintain good posture by keeping their shoulders back and down and their chest open. Practicing good posture can help improve shoulder alignment and stability.

Avoid Overuse Injuries:
Overuse injuries can cause wear and tear on the shoulder joint, leading to increased instability and a higher risk of GJI. To avoid overuse injuries, individuals should practice proper form and technique when performing exercises and avoid repetitive overhead movements.

Wear Proper Protective Gear:
Individuals who participate in contact sports or activities that involve the risk of shoulder injuries should wear proper protective gear, such as shoulder pads or braces. Protective gear can help absorb the impact of a fall or collision, reducing the risk of GJI.

In conclusion, preventing GJI requires a combination of strengthening exercises, stretching, good posture, injury prevention strategies, and protective gear. By following these steps, individuals can help reduce the risk of GJI and maintain a healthy and stable shoulder joint. It is important to consult with a healthcare professional before starting any new exercise program or if experiencing any shoulder pain or discomfort. If you are unsure what to do, please contact us and one of our Personal Trainers, Physiotherapists or Sports Therapists can help.

Calf Tear Grade 1 and 2

Calf Tear Grade 1 and 2

Calf tears are a relatively common injury that occurs in people of all ages and activity levels. It is estimated that up to 18% of all sports injuries involve the calf muscles, making it one of the most injured areas in the lower leg.

Calf tears are more common in people who engage in sports or activities that involve repetitive or explosive movements of the lower legs, such as running, jumping, or dancing. These activities can put a significant amount of stress on the calf muscles, making them more susceptible to injury.

Calf tears are classified into three grades based on the severity of the injury. Grade 1 tears involve minor damage to the muscle fibers, while grade 2 tears involve a partial tear of the muscle. Grade 3 tears are the most severe and involve a complete tear of the muscle.

While calf tears can be painful and limit mobility, they generally heal well with proper treatment and rehabilitation. It is important to seek medical attention if you suspect a calf tear or if you experience persistent pain or swelling in the calf muscle. With proper care, most people are able to return to their normal activities within a few weeks to a few months.

Anatomy

The calf muscle, also known as the triceps surae, is located in the lower leg and is responsible for plantar flexion of the foot. It is composed of two muscles: the gastrocnemius and the soleus.

The gastrocnemius muscle is the larger of the two muscles and has two heads, the medial and lateral heads. The medial head originates from the medial condyle of the femur, while the lateral head originates from the lateral condyle of the femur. Both heads merge together to form the Achilles tendon, which inserts into the calcaneus bone. The gastrocnemius muscle is responsible for powerful contractions during activities such as running and jumping.

The soleus muscle is located beneath the gastrocnemius and is smaller in size. It originates from the tibia and fibula bones and also inserts into the Achilles tendon. The soleus muscle is responsible for maintaining posture and stability during standing and walking.

The calf muscle is supplied by the posterior tibial artery and is innervated by the tibial nerve. It is also surrounded by a layer of fascia known as the deep fascia of the leg.

In addition to the gastrocnemius and soleus muscles, the calf also contains other important structures such as the Achilles tendon, which connects the calf muscles to the heel bone, and the tibialis posterior tendon, which helps to stabilize the foot and ankle. The calf muscle plays an important role in lower limb movement and stability, making it crucial for activities of daily living and athletic performance.

Symptoms

The symptoms of a calf tear can vary depending on the severity of the injury. The following are some common symptoms of calf tears grade 1 and 2:

  • Mild to moderate pain in the calf muscle
  • Swelling and tenderness in the affected area
  • Difficulty in walking or standing on the affected leg
  • Stiffness and limited range of motion in the ankle and foot
  • A popping or snapping sensation at the time of injury

Causes

Calf tears can be caused by a sudden or forceful movement, such as pushing off or jumping, which puts excessive strain on the calf muscle. The following are some common causes of calf tears:

    • Overuse or repetitive strain on the calf muscle
    • Sudden movements or changes in direction
    • Inadequate warm-up before exercise or sports activities
    • Poor flexibility or strength in the calf muscles
    • Foot and ankle problems, such as flat feet or ankle instability

Diagnosis

To diagnose a calf tear, a healthcare provider will perform a physical examination of the calf muscle and take a detailed medical history. They may also order imaging tests such as an MRI or ultrasound to confirm the diagnosis and assess the severity of the tear.

During the physical exam, the healthcare provider will assess the calf muscle for tenderness, swelling, and discoloration. They may also check for a palpable gap in the muscle or a bulge in the muscle belly, which may indicate a partial or complete tear. The healthcare provider may also test the range of motion of the ankle and foot, as well as test for strength and flexibility of the calf muscle.

Imaging tests such as an MRI or ultrasound can provide more detailed information about the extent of the tear and help to rule out other possible injuries such as a blood clot or deep vein thrombosis.

Treatment

The treatment of a calf strain, also known as a calf muscle tear, depends on the severity of the injury. In mild cases, rest and home remedies may be enough to relieve the symptoms, while in more severe cases, medical intervention may be necessary. Massage can be a helpful complementary therapy for treating a calf strain, and it can help to promote healing and reduce pain and discomfort.

The initial treatment of a calf strain typically involves the RICE protocol, which stands for rest, ice, compression, and elevation. Resting the affected leg and avoiding activities that may aggravate the injury is important to allow the muscle to heal. Ice can be applied to the affected area to reduce swelling and inflammation. Compression bandages or wraps can help to reduce swelling and provide support to the injured muscle. Elevation of the affected leg can also help to reduce swelling and promote healing.

As the muscle heals, gentle stretching and physical therapy exercises can help to improve range of motion and prevent scar tissue from forming. Massage can also be a helpful complementary therapy for treating a calf strain. Massage can help to increase blood flow to the affected area, promote healing, and reduce pain and discomfort.

When performing massage therapy for a calf strain, it is important to use a light touch and avoid applying too much pressure to the affected area. Massaging the area around the calf muscle, as well as the foot and ankle, can help to improve circulation and reduce tension in the surrounding muscles. Deep tissue massage or trigger point therapy should be avoided, as these techniques can further damage the injured muscle.

Overall, a combination of rest, physical therapy, and massage therapy can be effective in treating a calf strain and promoting healing. It is important to work with a healthcare provider or licensed massage therapist to develop a treatment plan that is appropriate for the severity of the injury and individual needs.

Exercises

After the initial healing period, the following exercises may be prescribed to help improve range of motion and strength in the calf muscle:

  • Calf stretches: Stretching the calf muscle can help improve flexibility and reduce the risk of future injury. Stand facing a wall with your hands on the wall and your feet shoulder-width apart. Step back with your affected leg, keeping your heel on the ground. Lean forward into the wall until you feel a stretch in your calf. Hold for 30 seconds and repeat on the other leg.
  • Calf raises: This exercise helps strengthen the calf muscle. Stand with your feet shoulder-width apart and rise up on your toes, lifting your heels off the ground. Hold for a few seconds and then lower your heels back down. Repeat for 10-15 repetitions.
  • Single leg balance: This exercise helps improve balance and stability in the affected leg. Stand on your affected leg and lift your other leg off the ground. Hold for 30 seconds and repeat on the other leg.

Prevention

To prevent calf tears, it is important to take the following measures:

  • Warm-up: Always warm up before engaging in exercise or sports activities. A proper warm-up can help prepare your muscles for activity and reduce the risk of injury.
  • Stretching: Regular stretching of the calf muscles can help improve flexibility and reduce the risk of tears. Incorporate calf stretches into your warm-up routine and stretch after exercise.
  • Proper footwear: Choose appropriate footwear that provides adequate support and cushioning for your feet and ankles. Replace worn-out shoes regularly.
  • Gradual progression: If you are new to a sport or activity, start slowly and gradually increase the intensity and duration of your workouts. This can help prevent overuse injuries.
  • Strengthening exercises: Regularly performing exercises that strengthen the calf muscles can help prevent tears. Examples include calf raises and resistance band exercises.
  • Regular deep tissue massage or sports massage.

By following these preventive measures, you can significantly reduce your risk of calf tears and other lower leg injuries. If you do experience pain or discomfort in your calf muscles, it is important to seek medical attention before continuing with exercise or sports activities.

If you are keen to get a plan to strengthen and rehabilitate the calf then please contact us to speak to one of our qualified personal trainers, Physiotherapists or Sports Therapists. We can also provide advanced soft tissue therapy through massage to help with the healing process and to prevent future strains.

Bicep Tendonitis Elbow

Bicep Tendonitis (Elbow)

Bicep tendonitis at the elbow, is an inflammation of the tendons that connect the biceps muscle, to the elbow. The degeneration is often caused from a lifetime of normal activity but can worsen with repetitive elbow motion and rotation. In other instances, injury can occur when the elbow is forced straight against resistance, or a heavy load. Bicep tendonitis elbow typically heals between 6 weeks to 3 months, depending upon the severity, however resting the arm is required to avoid partial or full tear of the tendon, that could require surgery.

Anatomy

The biceps muscle has two tendons, one that attach the muscle to the shoulder, and the other tendon to the elbow (also called the distal biceps tendon). Bicep tendonitis elbow typically occurs at the insertion of the biceps tendon on the radial tuberosity, or forearm bone, limiting elbow flexion and rotation of the forearm with the palm upwards (supination).

Symptoms

  • Pain or discomfort, swelling, visible bruising at the front of the elbow and forearm
  • Exacerbated pain and weakness when bending the elbow and rotating the forearm (supination)
  • A bulge near the top of the biceps muscle
  • A gap in the front of the elbow

Causes

Inflammation and injury to the tendon at the elbow is uncommon, however when it occurs, it is typically a result of overuse and repetitive motions of the joint. Sports that involve repetitive overhead motion or overuse of the elbow joint, such as tennis and gymnastics, can cause bicep tendonitis elbow. In more severe cases, it can be caused when lifting heavy objects, increasing stress on the biceps, in which the tendon can tear away from the bone.

Diagnosis

Bicep tendonitis of the shoulder is diagnosed by assessing elbow pain in the antecubital fossa (front crease of elbow) and palpate for tenderness and a gap in the tendon. Pain and weakness with supination of the forearm may also be examined against resistance. Imaging techniques may also be recommended such as an X-ray or MRI, that can be helpful when there is partial tearing of the tendon and detect for any fluid around the site. In severe cases during a complete tear, a PRP injection or a repair may be advised.

Treatment

Simple treatments typically heal bicep tendonitis in the elbow, such as resting the affected arm or actively modifying and avoiding provocative exercises. Strengthening exercises of the bicep may be recommended, starting with a light weight, and progressively increasing, could help to relieve lower bicep pain, and restore normal function as pain subsides. Exercises could included bicep curls (gradually adding or increasing weight), bicep stretch, internal (+ external) rotation stretch, and forearm twists. In other instances where exercises do not improve bicep tendonitis elbow, injections such as cortisone, needle tenotomy, or platelet-rich plasma (PRP) can help to reduce tendon swelling and stimulate healing.

Exercises

  • Eccentric curls: Hold a dumbbell in one hand and curl the weight up with your bicep muscle. Then, slowly lower the weight down to the starting position, taking at least 3-4 seconds to do so. Repeat for several repetitions.
  •  Hammer curls: Hold a pair of dumbbells with your palms facing each other and curl the weights up to shoulder level, keeping your elbows close to your sides. Lower the weights back down and repeat.
  • Reverse curls: Hold a barbell with an overhand grip (palms facing down) and curl the weight up towards your shoulders. Lower the weight back down and repeat.
  •  Triceps extensions: Hold a dumbbell with both hands and extend your arms overhead, keeping your elbows close to your ears. Lower the weight back down and repeat.
  • Wrist curls: Hold a light dumbbell in one hand and rest your forearm on a table or bench with your palm facing up. Curl the weight up towards your wrist, then lower it back down and repeat.

Prevention

Preventing bicep tendonitis is always better than having to treat it later. Here are some tips to help prevent the condition:

  • Warm-up: Always perform a proper warm-up before any workout or physical activity. This can include light cardio, stretching, and dynamic movements that prepare your body for exercise.
  • Gradual progression: Gradually increase the intensity, duration, and frequency of your workouts. Avoid sudden changes in your exercise routine as this can put excess strain on your bicep tendon.
  • Proper technique: Use proper technique when performing exercises to prevent excessive stress on your bicep tendon. This includes maintaining proper form, avoiding jerky movements, and lifting weights that are appropriate for your strength and fitness level.
  • Rest and recovery: Allow your body adequate time to rest and recover between workouts. This means taking rest days, getting enough sleep, and eating a balanced diet to support muscle recovery.
  • Get a regular sports massage or deep tissue massage by a certified professional in sports rehabilitation or sports therapy.
  • Stretching and mobility: Incorporate stretching and mobility exercises into your routine to maintain flexibility and prevent tightness in your bicep muscles and tendons.
  • Avoid overuse: Avoid repetitive activities that can cause overuse of your bicep tendon, such as excessive typing or gripping activities.

For further information please don’t hestiate to get in contact with one of our qualified Physiotherapists or Sports Therapists.

Calf Rupture

Calf Rupture

Calf muscle injuries are relatively common, particularly among athletes and individuals who engage in physical activities that put a lot of stress on the lower legs. Runners, soccer players, basketball players, and jumpers are some examples of athletes who are at increased risk of calf muscle injuries.

The severity of calf muscle injuries can vary, with some being minor strains and others resulting in complete tears of the muscle. The extent of the injury can impact the length of time it takes to recover and return to physical activity.

In terms of the general population, calf muscle injuries can occur in people of all ages and fitness levels, not just athletes. Individuals who engage in physical activity after a period of inactivity or who have tight or weak calf muscles may be at increased risk of calf muscle injuries.

Anatomy

The “calf” is a term used to describe the group of muscles located on the back of the lower leg. This region is comprised of three specific muscles: the gastrocnemius, the soleus, and the plantaris.

The gastrocnemius is a key player in the movement of the ankle and knee, providing plantarflexion of the ankle joint and flexion at the knee joint. When the knee is bent, however, the gastrocnemius cannot exert its full power at the ankle joint and vice versa.

The soleus, located beneath the gastrocnemius, is responsible for plantarflexion of the ankle and stability of the tibia on the calcaneus. The plantaris, located in the posterosuperior compartment of the calf, acts as a flexor of the knee and a plantar flexor of the ankle, but is not considered a major contributor.

All three of these muscles converge at the achilles tendon, which inserts into the calcaneus. Together, they form the powerful calf region of the lower leg.

Symptoms

  • Pain and tenderness in the calf region
  • Swelling and bruising
  • Weakness or instability in the affected leg
  • A popping or tearing sensation at the time of injury
  • Difficulty walking or bearing weight on the affected leg

Causes

The cause of calf muscle injuries is typically due to overuse or excessive strain on the muscles. This can be the result of a sudden movement, such as jumping or sprinting, or due to gradually increasing the intensity of physical activity. Other factors that can increase the risk of calf muscle injury include tight or weak calf muscles, poor footwear, and a sudden increase in physical activity after a period of inactivity.

Diagnosis

Diagnosis of a calf muscle injury is typically based on a physical examination and medical history. Additional tests, such as MRI or ultrasound, may be necessary to confirm the diagnosis and assess the severity of the injury.

Treatment

Treatment for calf muscle injuries depends on the severity of the injury and the individual’s specific needs. Common treatment options include:

  • Rest and elevation of the affected leg to reduce swelling
  • Ice therapy to reduce pain and swelling
  • Physical therapy to improve strength and flexibility
  • Bracing or taping to support the calf muscle during healing
  • Pain medication to manage pain
  • In severe cases, surgery may be necessary to repair a complete tear of the calf muscle.

Recovery from a calf muscle injury can take several weeks to several months, depending on the severity of the injury and the individual’s overall health. Physical therapy and rehabilitation exercises can be instrumental in promoting proper healing and restoring strength and flexibility to the calf muscle

Exercises

If you have suffered a calf muscle injury, it is important to follow your doctor or physical therapist’s recommended treatment plan. However, there are several exercises that can be beneficial for promoting proper healing and strengthening the calf muscles following a calf muscle rupture. Here are a few exercises that are commonly recommended:

  • Calf raises: Stand on the edge of a step and slowly raise and lower your heels to strengthen your calf muscles
  •  Toe raises: Stand on the edge of a step and raise your toes as high as you can, then lower them slowly to target the soleus muscle in the calf
  •  Eccentric calf raises: Stand on the edge of a step and lower your heels slowly, taking 3-5 seconds to complete the motion. This exercise places a greater emphasis on the eccentric (lowering) portion of the calf raise, which can be particularly beneficial for strengthening the calf muscles after injury
  •  Stair stepping: Walk up and down stairs, focusing on pushing through your heels with each step to engage your calf muscles
  •  Heel walking: Walk on your heels for several minutes to target the gastrocnemius muscle in the calf

It is important to start slowly and gradually increase the intensity and duration of these exercises as recommended by your doctor or physical therapist. Incorporating these exercises into your rehabilitation program, along with rest and proper care for your injury, can help you regain strength and reduce the risk of further injury to your calf muscles.

Prevention

  • Stretch regularly: Regular stretching of the calf muscles can help improve flexibility and reduce the risk of injury.
  • Get a regular sports massage to help lengthen the muscles, stimulate repair and quality blood flow.
  • Strengthen the muscles: Incorporating calf strengthening exercises into your routine can help improve the overall strength and stability of the muscles. If you are unsure how to do this, contact a certified personal trainer.
  • Gradually increase physical activity: When starting a new exercise program or increasing the intensity of your current routine, do so gradually to allow your muscles time to adjust and reduce the risk of overuse injuries.
  • Wear proper footwear: Wearing shoes with adequate support and cushioning can help reduce the risk of calf muscle injuries.
  • Avoid sudden changes in terrain: Sudden changes in terrain, such as running on an uneven surface, can place added stress on the calf muscles and increase the risk of injury.
  • Warm up before physical activity: A proper warm-up can help increase blood flow to the muscles, reduce the risk of injury, and improve performance.

If you are unsure about any aspect of the above article and would like to speak to a professional sports therapist or physiotherapist, then please get in touch via our contact page.

Fix your forward head posture

How to fix your forward head posture

Forward head posture (FHP) is a common condition where your head is positioned with your ears in front of your body’s vertical midline. In normal or neutral head posture, your ears line up with your shoulders and midline. FHP can cause neck pain, stiffness, an unbalanced gait, and other side effects. It’s also often associated with rounded shoulders, called kyphosis. FHP is also called “text neck” or “nerd neck,” because it results from prolonged bending toward a computer screen or hunching over a laptop or cell phone. It’s also associated with the loss of muscle strength in the aging process.

The good news is that you can usually fix it: Stretching and strengthening exercises along with paying attention to good posture relieves side effects and restores better posture.

Anatomy

Forward head posture (FHP) is a poor habitual neck posture. It often co-exists with Upper Crossed Syndrome defined by hyperextension of the upper cervical vertebrae and forward translation of the cervical vertebrae.

Thoracic Kyphosis is a complication of the combination of slouched-forward shoulders and rounded upper back. This can lead to a painful shortening of the muscles of the back of the neck, as well as compression of the cervical vertebrae—the uppermost portion of the spine that supports the head and protects the spinal cord.

Symptoms

Due to the increased compressive forces through the neck joints and increased muscle tension, pain is the common outcome. Some of the types of problems associated with FHP are:

  • Headaches
  • Neck discomfort
  • Muscle tension in the neck and shoulders
  • Discomfort in the mid back
  • Chest pain
  • Pain, pins & needles and numbness in the arms and hands

Causes

People may associate FHP with using electronic devices for a long time, such as cell phones or computers.

However, any activity that causes a person to lean their head forward for a prolonged period of time can lead to chronic FHP.

    • slouching
    • sleeping with the head raised
    • carrying a heavy backpack or purse
    • driving with a hunched back
    • sewing
    • reading in bed
    • whiplash or other injuries to the spine
    • weakness in the muscles of the upper back
    • arthritis and bone degeneration

Diagnosis

Forward Head Posture (FHP) is a common postural imbalance that occurs when the head moves forward from its normal alignment with the spine. It can cause a range of problems, including neck and shoulder pain, headaches, and even reduced lung function. Diagnosing FHP involves a combination of physical examination and observation of the patient’s posture.

Here are the steps that may be taken to diagnose FHP:

  1. Patient history: The healthcare professional will ask the patient about their symptoms and any history of neck or shoulder pain. They may also ask about their occupation, lifestyle, and any recent injuries or surgeries.
  2. Physical examination: The healthcare professional will assess the patient’s posture, looking for any signs of FHP. They may ask the patient to stand upright against a wall, and then observe the alignment of the head, neck, and spine. They may also examine the patient’s range of motion, muscle strength, and any tenderness or pain.
  3. Imaging tests: In some cases, imaging tests may be ordered to get a more detailed look at the patient’s neck and spine. This can include X-rays, MRI scans, or CT scans.
  4. Assessment of muscle imbalance: FHP is often caused by muscle imbalances in the neck and upper back. The healthcare professional may assess the patient’s muscle strength and flexibility, looking for any areas of weakness or tightness.
  5. Other potential causes: It’s important to rule out other potential causes of neck and shoulder pain, such as spinal conditions or nerve impingements.

Overall, diagnosing FHP involves a thorough examination of the patient’s posture, range of motion, muscle strength and flexibility, and any potential underlying conditions. Once a diagnosis is made, treatment can involve a combination of exercises, manual therapy, and lifestyle modifications to correct the posture and address any underlying issues.

Treatment

The treatment of Forward Head Posture (FHP) typically involves a combination of exercises, manual therapy, and lifestyle modifications to address the underlying causes of the condition. Here are some general steps that may be taken to treat FHP:

  1. Corrective exercises: Exercises that strengthen the neck and upper back muscles can help to improve posture and reduce the strain on the neck and shoulder muscles. These may include chin tucks, shoulder blade squeezes, and neck stretches.
  2. Manual therapy: This may involve hands-on techniques such as massage or chiropractic adjustments to help correct spinal alignment and improve range of motion in the neck and upper back.
  3. Postural changes: Making changes to your work environment or daily habits can help to reduce the strain on your neck and upper back muscles. This may include adjusting your computer monitor height, using a supportive chair, or taking breaks to stretch and move throughout the day.
  4. Lifestyle modifications: Factors such as stress, lack of sleep, and poor diet can contribute to muscle tension and postural imbalances. Taking steps to manage stress, improve sleep quality, and eat a balanced diet can support overall physical and mental health and reduce the risk of FHP.
  5. Bracing: In severe cases of FHP, a brace or collar may be recommended to help support the neck and reduce strain on the muscles. However, this is typically a short-term solution and should be used under the guidance of a healthcare professional.

It’s important to work with a healthcare professional who can provide a personalized treatment plan based on your individual needs and underlying causes of FHP. With the right approach, it is possible to correct FHP and improve overall posture and health.

Exercises

Here are some exercises that can help to strengthen the neck and upper back muscles and improve posture in individuals with Forward Head Posture (FHP):

Chin tucks: Sit or stand with your back straight and your shoulders relaxed. Keeping your eyes facing forward, gently tuck your chin in towards your chest, as if making a double chin. Hold for 5-10 seconds and then release. Repeat 10-15 times.

Shoulder blade squeezes: Sit or stand with your back straight and your shoulders relaxed. Squeeze your shoulder blades together, as if trying to hold a pencil between them. Hold for 5-10 seconds and then release. Repeat 10-15 times.

Wall angels: Stand with your back against a wall, with your feet about 6 inches away from the wall. Raise your arms up to a 90-degree angle, with your elbows and wrists touching the wall. Slowly slide your arms up and down the wall, maintaining contact with your elbows, wrists, and fingers at all times. Repeat 10-15 times.

Neck stretches: Sit or stand with your back straight and your shoulders relaxed. Gently tilt your head to one side, bringing your ear towards your shoulder. Hold for 10-15 seconds and then release. Repeat on the other side. Repeat 3-5 times on each side.

Upper back stretch: Sit or stand with your back straight and your shoulders relaxed. Clasp your hands in front of you and round your upper back, bringing your chin towards your chest. Hold for 10-15 seconds and then release. Repeat 3-5 times.

Remember to start with a few repetitions of each exercise and gradually increase the number of repetitions and the level of difficulty as your muscles become stronger. It’s also important to maintain good posture throughout the day and take frequent breaks to stretch and move.


Prevention

Forward Head Posture (FHP), also known as “text neck,” is a common condition that affects people of all ages. It occurs when the head is positioned forward in relation to the shoulders, which places strain on the neck and upper back muscles. Over time, FHP can lead to chronic pain, headaches, and even spinal damage. However, there are several steps that you can take to prevent FHP.

  1. Be mindful of your posture: The first step to preventing FHP is to be mindful of your posture. Avoid slouching or leaning forward when sitting or standing. Instead, sit up straight with your shoulders back and your head aligned with your spine.
  2. Adjust your workspace: If you spend a lot of time sitting at a desk, it’s important to make sure that your workspace is set up correctly. Your computer screen should be at eye level, and your keyboard and mouse should be positioned so that your arms are at a comfortable angle. Use a supportive chair with good back support to prevent slouching.
  3. Take regular breaks: It’s important to take regular breaks when working or using electronic devices. Every 30 minutes, take a few minutes to stretch and move around. This will help prevent muscle tension and fatigue, which can lead to FHP.
  4. Strengthen your neck and back muscles: Strengthening your neck and upper back muscles can help prevent FHP. Incorporate exercises such as neck retractions, chin tucks, and shoulder blade squeezes into your daily routine. These exercises will help strengthen the muscles that support your head and neck.
  5. Stretch regularly: Stretching regularly can also help prevent FHP. Incorporate neck stretches and upper back stretches into your daily routine. These stretches will help increase your range of motion and prevent muscle tension.

In conclusion, FHP is a common condition that can lead to chronic pain and spinal damage. However, by being mindful of your posture, adjusting your workspace, taking regular breaks, strengthening your neck and back muscles, and stretching regularly, you can prevent FHP and maintain good spinal health. If you are experiencing pain or discomfort due to FHP, it’s important to seek medical attention to prevent further damage.

For further information please contact a member of our Physiotherapy or Sports Therapy team.

Ankle Stability Exercises

Ankle Stability Exercises

The ankle joint is a complex hinge joint that connects the lower leg bones (the tibia and fibula) to the foot bone (the talus). It plays a critical role in weight-bearing activities such as walking, running, and jumping. This joint is stabilized by a network of ligaments, tendons, and muscles, which work together to maintain its position and resist movements that could lead to injury.

Anatomy

The ankle joint, or talocrural joint, is a hinge joint connecting the lower leg bones (tibia and fibula) to the foot bone (talus). This joint plays a critical role in weight-bearing and movement, enabling actions like walking, running, and jumping. The tibia and fibula form a stable structure around the talus, providing both flexibility and stability. The joint is lined with a synovial membrane that produces fluid to reduce friction, while articular cartilage cushions the bones during movement.

Stability in the ankle is maintained by ligaments and tendons. Key ligaments include the deltoid ligament on the inner side, which prevents over-eversion, and the lateral ligaments (anterior and posterior talofibular and calcaneofibular ligaments), which prevent excessive inversion. Tendons like the Achilles tendon, connecting the calf muscles to the heel, and the peroneal tendons, which stabilize the outer ankle, ensure controlled motion and protection from injury.

Surrounding muscles, such as the calf muscles (gastrocnemius and soleus), tibialis anterior, and peroneal muscles, work to move and stabilize the ankle. Together with the ligaments and tendons, they allow the ankle to function as a strong, flexible foundation for everyday activities and high-impact movements, while reducing the risk of injury.

Symptoms

Issues with ankle stability often manifest as frequent sprains, a sensation of wobbliness, pain, swelling, and difficulty bearing weight on the affected ankle. Chronic ankle instability can also cause recurring discomfort and impact an individual’s ability to engage in physical activities.

Causes

Ankle instability can result from various factors, including:

  • Weak muscles supporting the joint.
  • Poor neuromuscular control.
  • Previous ankle injuries, such as sprains or fractures.
  • External factors like inappropriate footwear or uneven surfaces during physical activity.

Recurrent injuries can lead to chronic ankle instability, further increasing the risk of complications.

Diagnosis

Diagnosing ankle instability typically involves a physical examination by a healthcare professional. The process may include:

  • Assessing the range of motion and strength of the ankle.
  • Reviewing the patient’s history of injuries.
  • Imaging studies such as X-rays or MRIs to evaluate the condition of the ligaments, tendons, and bones.

Treatment

Treatment for ankle instability aims to strengthen the joint, improve neuromuscular control, and prevent further injuries. Interventions include:

  • Deep Tissue Massage and Sports Massage: These therapies help alleviate muscle tension, improve circulation, and promote healing.
  • Reflexology: Targeted pressure on specific points of the foot to support ankle function.
  • Heat and Ice Therapy: Heat helps relax muscles, while ice reduces inflammation and pain.
  • Medical Acupuncture: Stimulates the body’s natural healing processes and reduces pain.
  • Cupping Therapy: Promotes blood flow and aids in recovery.

Exercises

Strengthening exercises are essential for improving ankle stability. Here are some effective options:

  1. Ankle Dorsiflexion
    Use a resistance band to lift your foot toward your shin, strengthening the muscles at the front of the ankle.
  2. Ankle Plantar Flexion
    Press your foot away from your body using a resistance band, targeting the calf and ankle.
  3. Eversion and Inversion
    With a resistance band, move your foot outward (eversion) and inward (inversion) to strengthen the ankle’s stabilizing muscles.
  4. Calf Raises
    Stand on your toes and lift your heels off the ground to build strength in the calf and ankle.
  5. Balance Exercises
    Stand on one foot to enhance proprioception and improve stability.

Conclusion

Ankle stability is essential for maintaining proper joint function and preventing injuries. Through targeted exercises and strength and conditioning regime’s designed by our Physiotherapists or Sports Therapists combined with other modalities such as deep tissue massage, reflexology, and medical acupuncture, combined with specific strengthening exercises, individuals can significantly improve their ankle health.

If you experience recurring ankle issues such as sprains or weakness, or if you have sport-specific needs, contact our team of specialists. We can develop a personalized exercise plan and provide professional treatments to support your recovery and performance.

Adductor Strain

Adductor strain or injury to the adductor muscle group is a common cause of medial leg (inside leg) and groin pain, especially among athletes. A groin strain is an acute injury to the muscles on the inside of the thigh, known as the adductor muscles. These muscles help to stabilize the trunk and move the legs inward. A strain typically occurs because of an athletic injury or awkward movement of the hip joint, which leads to stretching or tearing of the inner thigh muscles.
A strain injury is graded I-III based upon its severity. Mild strains involve overstretching of the muscle, whereas more severe strains can involve complete muscle tears. Most injuries to the adductor muscles are Grades I or II.

Adductor Strain

GRADE 1 GROIN STRAIN

Grade I is a mild strain (tear) with some pain, bruising, and tenderness, but no significant fiber disruption.

GRADE 2 GROIN STRAIN

A Grade II injury involves injury to the muscle-tendon fibers, this is usually a more serious tear which will severely limit movement. However, the overall integrity of the muscle-tendon unit is preserved.

GRADE 3 GROIN STRAIN

A Grade III injury (or complete rupture) is one that results in a loss of overall muscle/tendon integrity. This serious injury will result in severe pain, swelling, joint instability, and pain associated with movement. It may in some cases mean the muscle detatching from it’s attachment point.

Anatomy

The adductor complex includes the three adductor muscles (longus, magnus, and brevis) of which the adductor longus is the most injured. All three muscles primarily provide adduction of the thigh. Adductor longus provides some medial rotation. The adductor magnus also has an attachment on the ischial tuberosity, giving it the ability to extend the hip. In open chain activation, the primary function is hip adduction. In closed chain activation, they help stabilize the pelvis and lower extremity during the stance phase of gait. They also have secondary roles including hip flexion and rotation.

Symptoms

Depending on the underlying cause, pain can be mild or severe, come on gradually or suddenly, and vary in quality (dull, sharp, throbbing, or even burning). Common symptoms include:

  • Pain and tenderness in the groin and the inside of the thigh
  • Sudden onset of pain sometimes accompanied by the sensation of a pop in the inner thigh
  • Failure to continue activity after initial onset of pain
  • Pain when you bring your legs together or when you raise your knee
  • Bruising may develop, and limping may also be a symptom

Causes

Most injuries can be managed conservatively by their primary care provider with rest, ice, physical therapy, and a graded return to play.

  • previous hip or groin injury
  • age
  • weak adductors
  • muscle fatigue
  • decreased range of motion
  • inadequate stretching of the adductor muscle complex

Diagnosis

Radiographic evaluation is the initial modality of choice for suspected adductor strain. Anteroposterior views of the pelvis and frog-leg view of the affected hip are recommended as initial imaging studies. In most patients, these images will be normal in appearance; however, occasionally one may observe an avulsion injury. These images can also help evaluate for other causes of groin pain such as osteitis pubis, apophyseal avulsion fractures, and pelvic or hip stress fractures.

If further imaging is needed, magnetic resonance imaging (MRI) is recommended. This is likely to show muscle oedema and haemorrhage at the site of injury. If there is a bony injury, this will be better elucidated on the MRI.

Musculoskeletal ultrasound can further visualize the tendon and bony attachment sites, muscles, ligaments, and nerves. Ultrasound can be used to identify the area and extent of the injury and used to evaluate periodically during the recovery phase.

Treatment

Fortunately, there are several effective treatment options for adductor strains, including rehabilitation and massage. In this article, we will discuss the various treatment options for adductor strains, with a particular focus on the benefits of rehabilitation and massage therapy.

Rest and Ice / Heat Therapy

The first step in treating an adductor strain is to rest the affected muscle. This means avoiding any activities that put stress on the muscle, such as running, jumping, or kicking. In addition, applying ice and heat to the affected area through contrast bathing can help reduce swelling and pain and then through the heat stimulate repair. To contrast bathe we recommend 5 minutes ice, 10 minutes heat, 3 times round 3 times a day. This will equate to 45 minutes at a time.

Compression and Elevation

Compression and elevation are also important in the early stages of adductor strain treatment. Compression can help reduce swelling and provide support to the injured muscle, while elevation can help improve blood flow and reduce inflammation. A compression bandage should be applied snugly but not too tightly, and the affected leg should be elevated above the level of the heart as much as possible.

Physical Therapy / Physiotherapy

Once the initial swelling and pain have subsided, physical therapy can help restore strength and flexibility to the injured muscle. Physical therapy may include exercises to improve range of motion, strengthen the muscles, and improve balance and coordination. Your physical therapist may also use stretching, to help relieve muscle tension and improve circulation to the affected area.

Massage Therapy

Massage therapy is a type of manual therapy that involves manipulating the soft tissues of the body, including muscles, tendons, and ligaments. Massage can help reduce muscle tension and improve circulation, which can help promote healing and reduce pain and stiffness. Massage therapists may use a variety of techniques, including sports massage, deep tissue massage, myofascial release, and trigger point therapy, depending on the specific needs of the patient.

Massage therapy can be especially beneficial for adductor strains because it can help relieve muscle tension and improve circulation to the affected area. Massage can also help reduce pain and stiffness, which can make it easier to perform physical therapy exercises and other activities of daily living.

In conclusion, adductor strains can be a painful and debilitating injury, but there are many effective treatment options available. If you are experiencing symptoms of an adductor strain, it is important to seek advice for a specialist, livewell and our team of highly qualified soft tissue specialists can help. If you want to find out more information or to book an appointment, please contact us.

Exercises

An adductor strain can be a painful and frustrating injury, but with the right exercises and a progressive plan, you can get back to your normal activities in no time. It’s important to start with gentle exercises and progress gradually to more challenging ones as your injury heals. Here are some exercises you can do on a weekly basis to help recover from an adductor strain:

1. Initial Phase: Gentle Stretching

Focus on restoring range of motion without straining the injured muscle.

  • Butterfly Stretch
    • Sit on the floor, bend your knees, and bring the soles of your feet together.
    • Gently press your knees toward the floor while keeping your back straight.
    • Hold for 15–30 seconds and repeat 2–3 times.
  • Standing Adductor Stretch
    • Stand with feet wider than shoulder-width apart.
    • Shift your weight to one side, bending that knee and keeping the other leg straight.
    • You should feel a stretch in the inner thigh of the straight leg.
    • Hold for 15–30 seconds on each side and repeat 2–3 times.

2. Intermediate Phase: Isometric Strengthening

Begin strengthening the adductor muscles without full range of motion.

  • Ball Squeeze (Isometric Adduction)
    • Sit in a chair with your knees bent at 90 degrees.
    • Place a soft ball or pillow between your knees.
    • Squeeze the ball gently and hold for 5–10 seconds.
    • Repeat 10–12 times.
  • Side-Lying Hip Adduction
    • Lie on your side with the injured leg on the bottom.
    • Keep the bottom leg straight and cross the top leg over for support.
    • Lift the bottom leg a few inches off the floor and slowly lower it back down.
    • Perform 2–3 sets of 10–12 repetitions.

3. Advanced Phase: Dynamic Strengthening

Introduce dynamic and functional movements to restore full strength and prepare for activity.

  • Side-Lunge with Adductor Focus
    • Stand with feet wide apart.
    • Shift your weight to one side, bending that knee while keeping the other leg straight.
    • Push back to the center and alternate sides.
    • Perform 2–3 sets of 8–10 repetitions per side.
  • Adductor Plank
    • Place your top leg on an elevated surface like a bench or step.
    • Keep the lower leg straight and lift it off the ground.
    • Support your body with your forearm and hold for 10–20 seconds.
    • Repeat 2–3 times on each side.
  • Cable or Resistance Band Adduction
    • Attach a resistance band or cable to your ankle.
    • Stand sideways to the anchor point and pull your leg inward across your body.
    • Slowly return to the starting position.
    • Perform 2–3 sets of 10–12 repetitions on each side.

4. Functional Phase: Return to Activity

Incorporate sport-specific drills and movements that mimic real-life activities to ensure the adductor is ready for higher demands. Examples include lateral shuffles, agility drills, and progressive plyometrics. Progress gradually through these exercises and adjust intensity based on pain and recovery. Stop any exercise that causes sharp pain or discomfort.

In conclusion, a progressive exercise plan is essential for recovering from an adductor strain. Starting with gentle isometric exercises and gradually progressing to more challenging resistance and functional exercises can help improve strength, flexibility, and overall function in the injured muscle. Be sure to consult with your healthcare provider before starting any exercise program to ensure it is safe and appropriate for your specific injury.

Prevention

  • Work on core stability. Having good core and pelvic stability provides a solid base for sport-specific movements and reducing the chance of adductor strains.
  • Dynamic warm-up! This is easily overlooked, but important. Prior to training and competing, ensure you perform a complete warm-up, including slow to fast movements, dynamic stretches (movement stretches) and sports-specific drills.
  • Strengthen the lateral hip muscles, mainly the gluteal muscles. This will help with pelvic stability
  • Stretch the inner thigh and outer thigh muscles on a daily basis.
  • Regularly get manual therapy and massages from certified physiotherapists, athletic therapists or massage therapists. This will help to get the muscles flexible and break down any trigger points or scar tissue that can lead to injury.
  • Practice sport-specific drills, change of direction and cutting manoeuvres which commonly cause groin strains. This will help the muscles to adapt and become stronger at performing this kind of movement.
  • Strengthen the inner thigh muscles using weight machines and resistance bands. It is especially important to strengthen the muscles in the movement which caused the injury, to prevent a reoccurrence.
  • Improve your proprioception. This is our sense of where each body part is in space and is similar to balance. Proprioception affects the way we move, especially when our balance is compromised and is therefore important in avoiding all injuries.
  • Get plenty of rest and avoid over-training! If you train too much or for too long fatigue sets in, which increases the risk of injury.

If you feel like you have an adductor strain then please contact a member of our team or make a booking online. For something like this you will need one of our Physiotherapists or Sports Therapists.